- Content
- How to cut drywall at home?
- Mounting knife
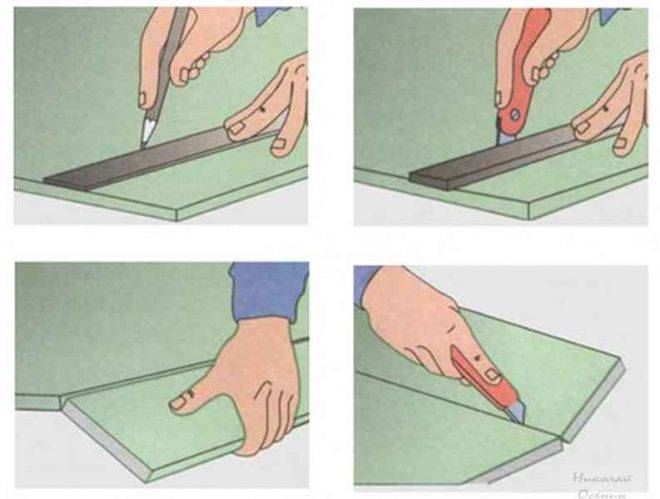
- Hacksaw
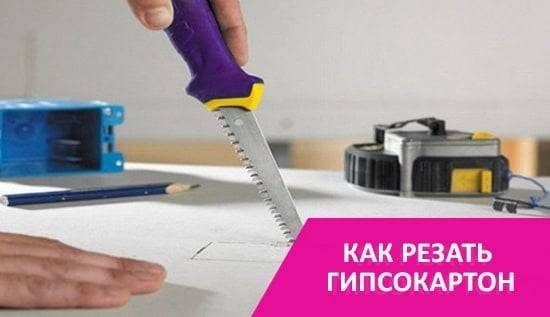
- Electric jigsaw
- We cut drywall with an electric jigsaw - an option for the lazy
- Process details
- Cutting features: dependence on the type of GKL
- General rules for cutting drywall
- Round holes, uneven cut
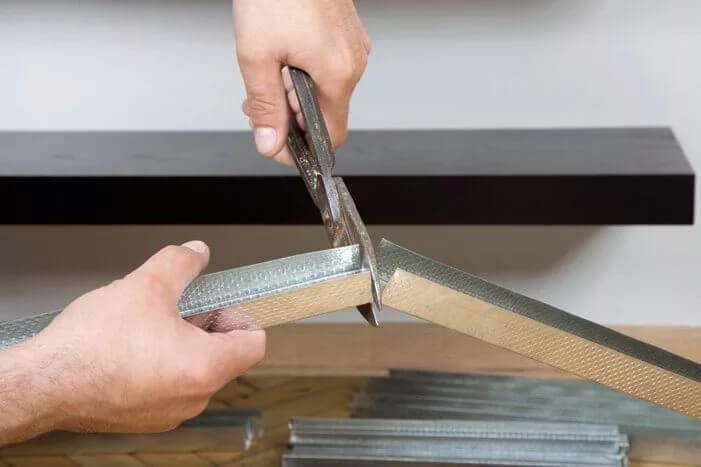
- Features of installing profiles for drywall around the perimeter of the room
- How to cut a hole
- Square or rectangular
- Round
- Is it necessary to cut the edge of drywall and how to do it right?
- The process of cutting drywall at home with your own hands
- How to cut gypsum decorative tiles
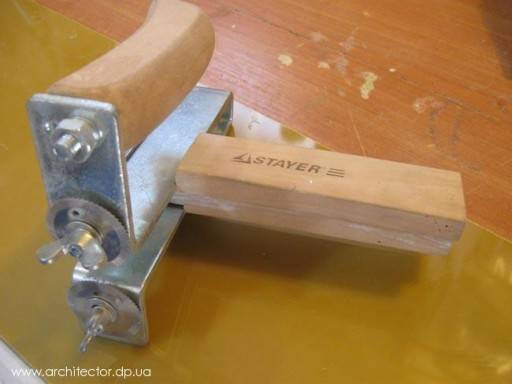
- 1. Hacksaw for wood
- 2. Tool for metal
- 3. File for drywall
- 4. Bulgarian
- 5. Trimming machine
- blade runner
Content
A tool for marking and cutting drywall will help you get the right and even cuts
Even if you haven't worked with drywall yet, you probably know that this material is made in the form of large rectangular slabs. Therefore, no matter what design you do, you cannot do without cutting drywall. Large slabs are convenient only for embedding a large area.
The cutting tool is useful both for creating complex structures and for giving the drywall sheet the desired dimensions.
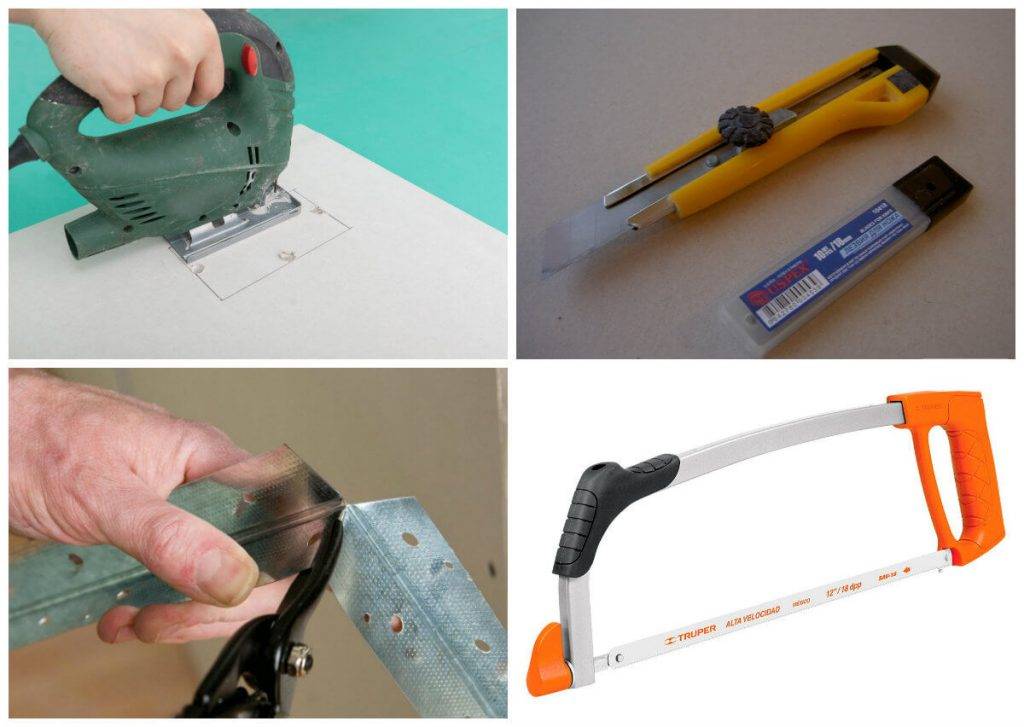
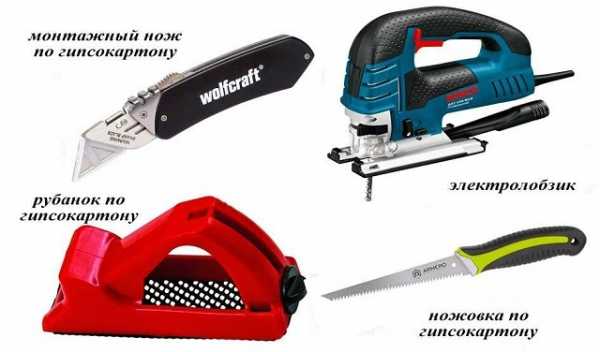
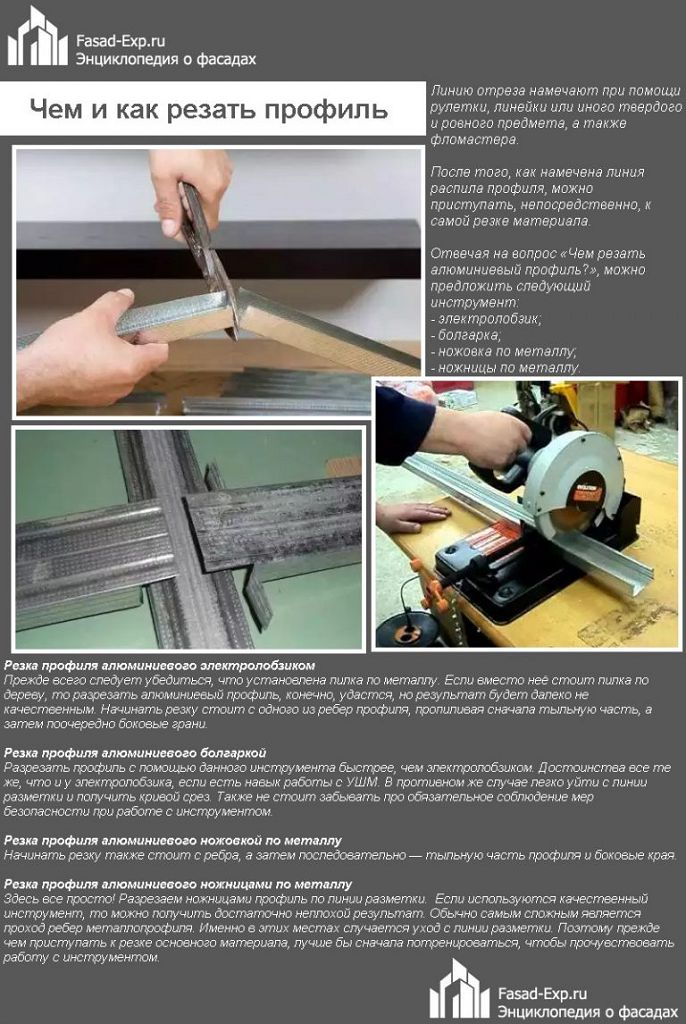
For cutting drywall, craftsmen most often use a mounting knife, a hacksaw and an electric jigsaw. But if these tools are not at hand, you can cut drywall with a cutting machine and a drill in the grinder mode.
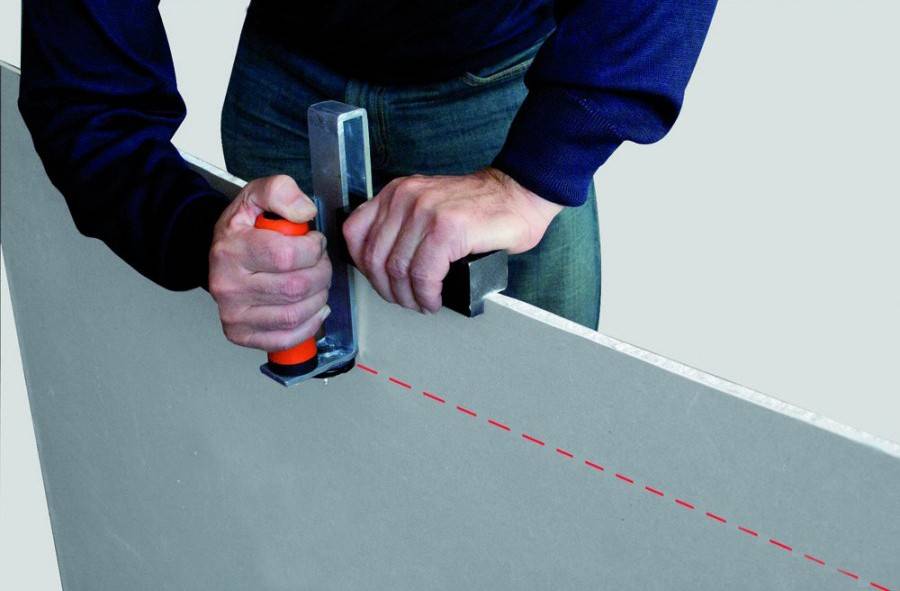
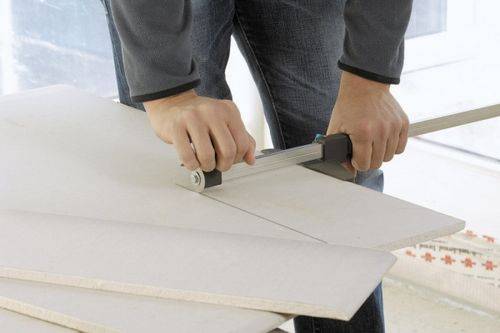
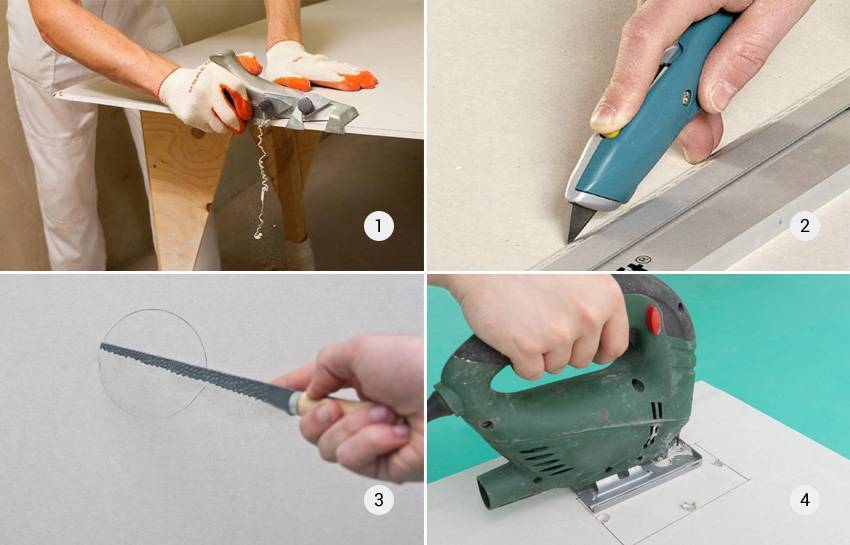
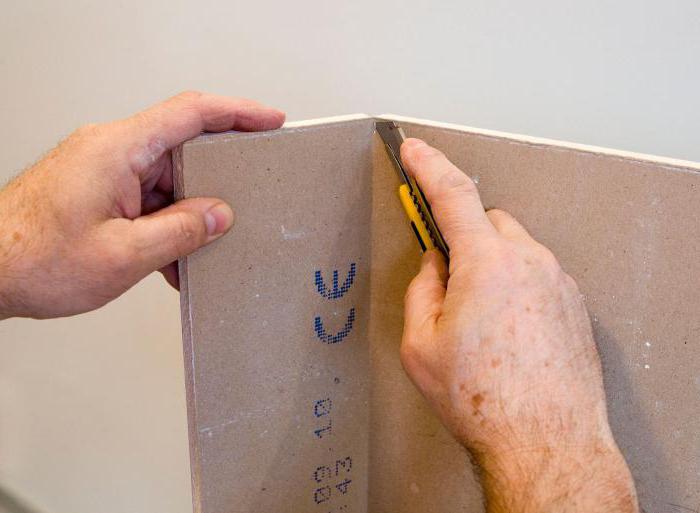
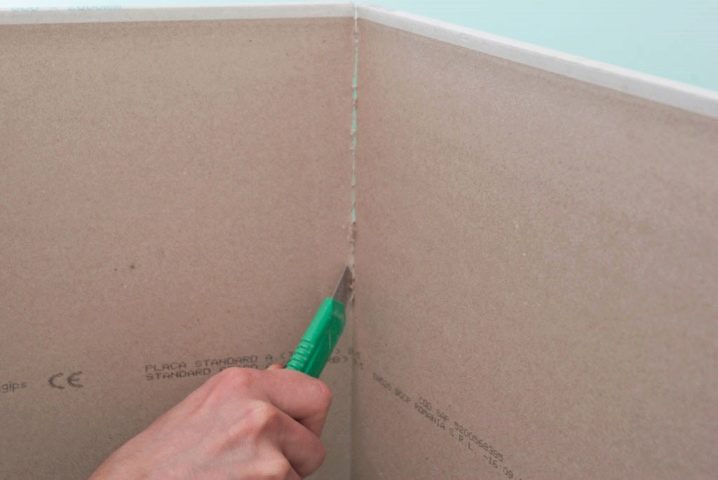
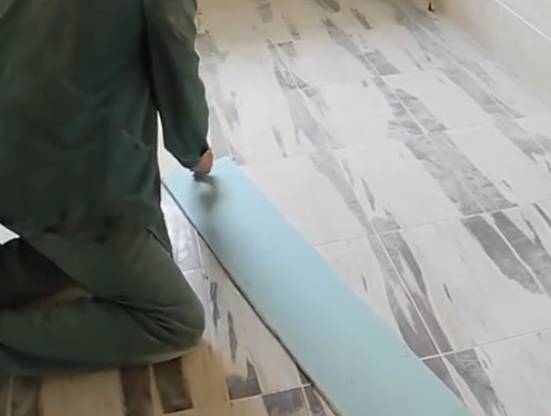
The mounting knife is suitable for cutting large lengthwise pieces of drywall. Having made the necessary measurements and drawn a line along which you will cut, attach a metal ruler to this line, and, firmly holding it with your free hand from the mounting knife, place the knife edge on the line. It is not necessary to use a metal ruler, any substitute with a sharp edge will do. Being careful, cut the cardboard exactly along the line.
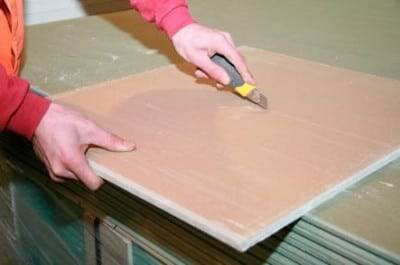
A regular mounting knife is suitable for cutting long longitudinal strips
The incised sheet is bent and finally cut at the fracture site.
If you are cutting material on a tabletop, move the board so that the notch protrudes 1-2 cm beyond the edge of the tabletop. Break the core with light taps, then turn the board over and cut the drywall at the break. If you're cutting on the floor, you can place a piece of wood under the drywall slab to crack it. When the core is broken, the beam is removed from under the sheet, the sheet is turned over and an incision is made. To make the resulting edge even, you can process it with a planer.
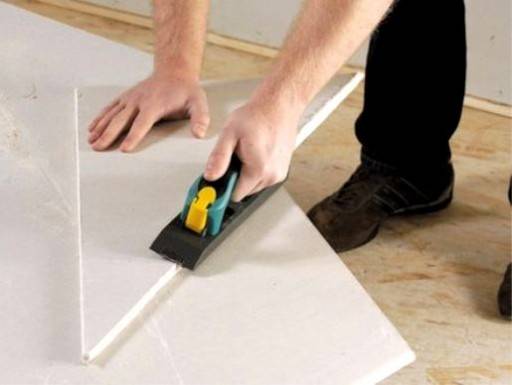
To make the edge even, you can additionally process it with a planer
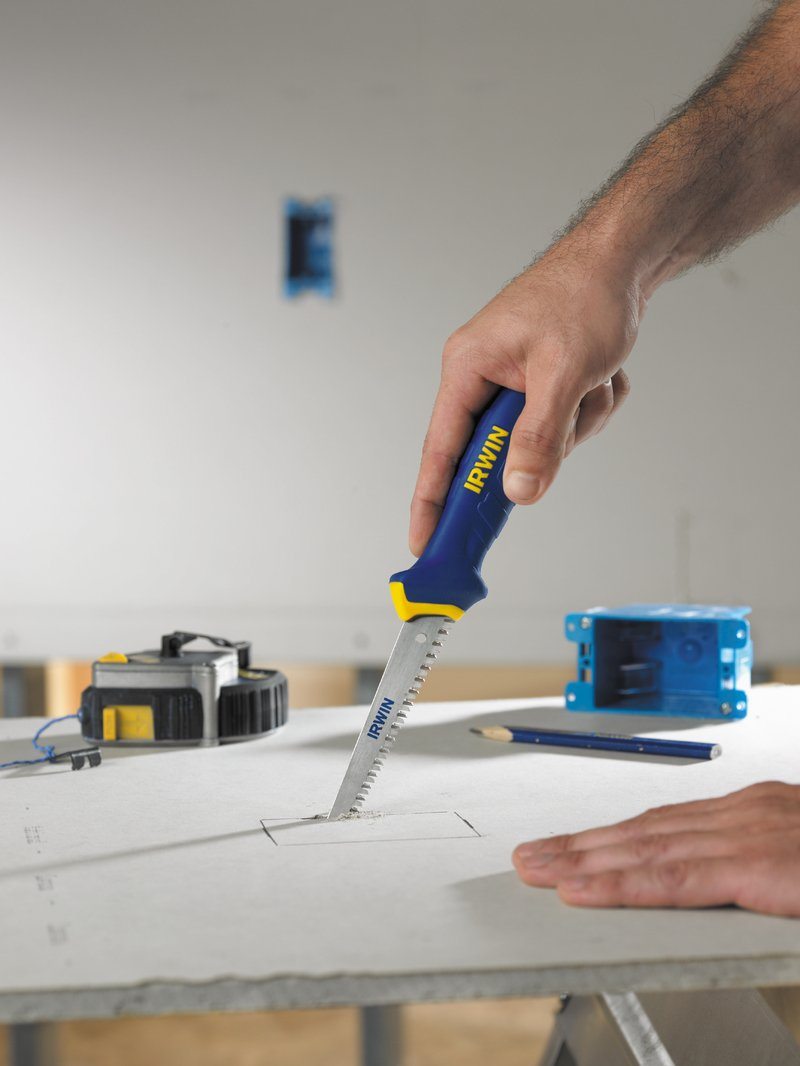
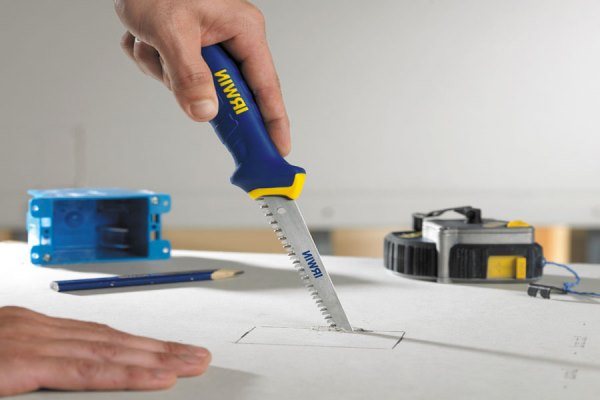
A hacksaw is needed for cutting square and rectangular openings in drywall. The thinner the blade of the hacksaw used, the better. To cut the opening, drywall is first drawn from the back. Then, in one of the corners of the future opening, a hole of such a diameter is made with a drill so that the hacksaw blade can freely pass into it.It is more convenient to cut if you drill holes on all the drawn sides. When the opening in the drywall is cut out, align the edge with a planer, and if dimensions do not allow, use a file. When cutting drywall with a hacksaw, remember: the tool blade must be perpendicular to the plane of the sheet. Then the edges are as smooth as possible.
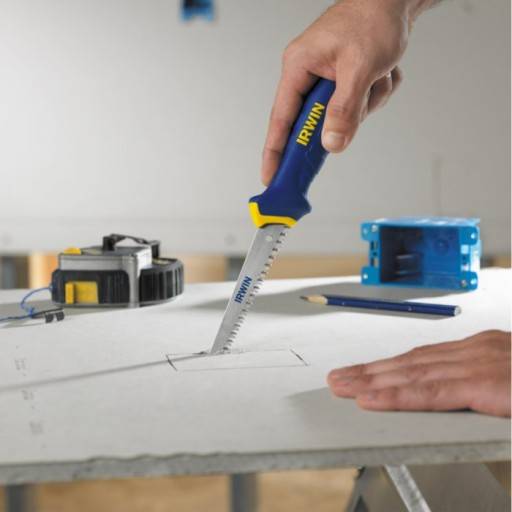
A hacksaw expands the possibilities when cutting a sheet of drywall - it can be used to cut small holes
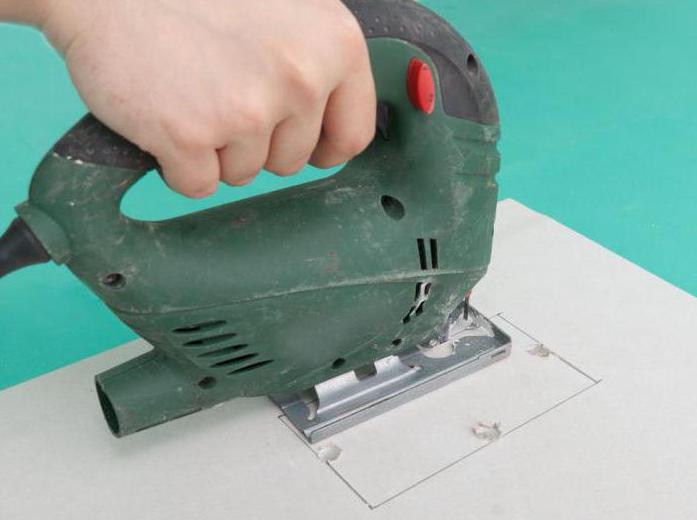
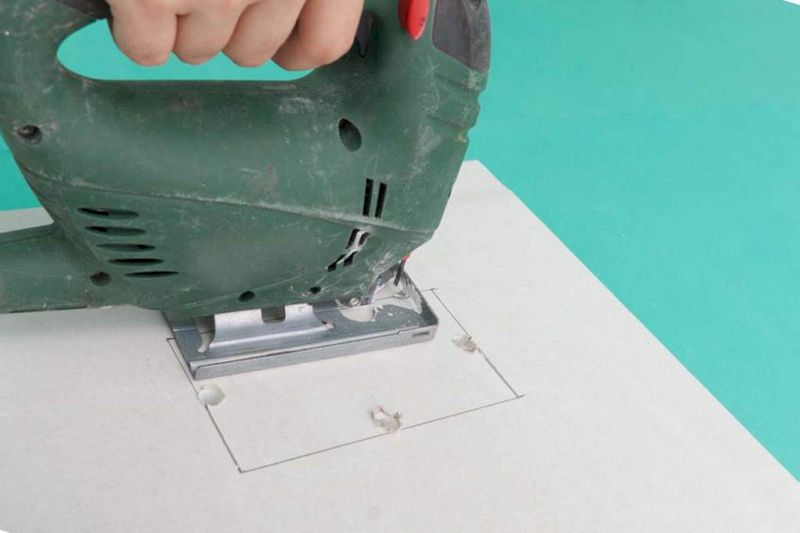
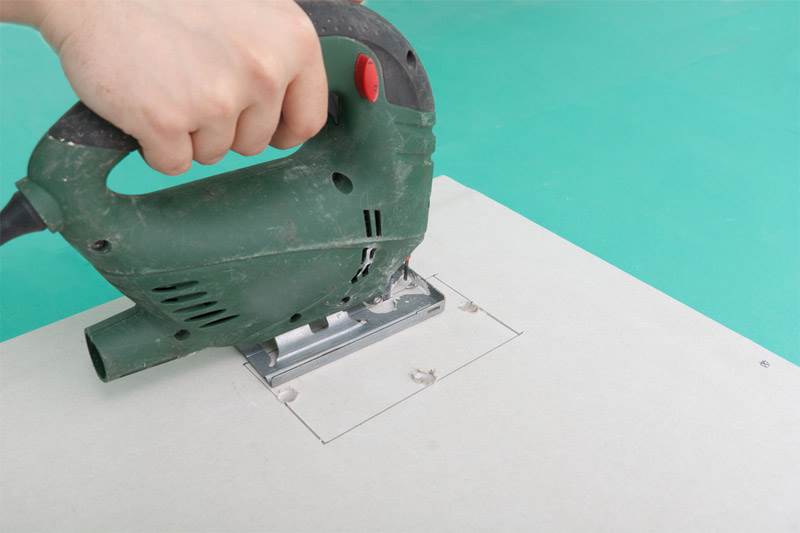
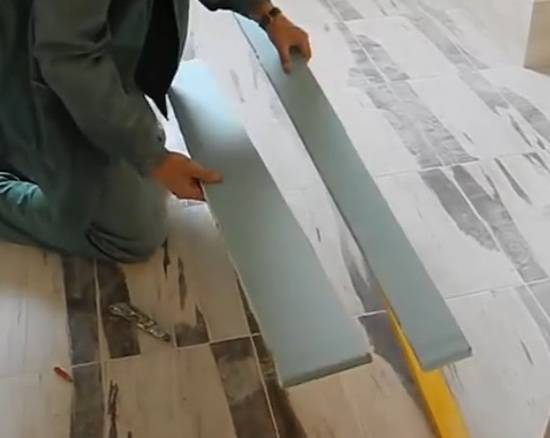
The fastest way to cut drywall is with an electric jigsaw. Of course, you will have to spend money on buying this tool (if you do not already have one), but the jigsaw is worth the money. After all, with its help you can cut not only openings of a strict shape, but also make curved lines. Just draw the slab the way you want, and then lay the sheet on two stools, leaving a distance between them so that the cut line runs in this space.
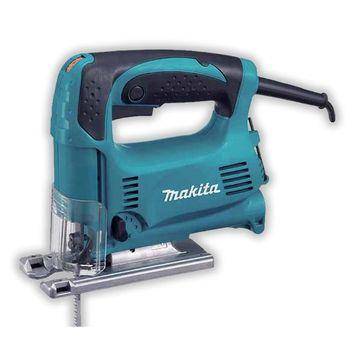
The electric jigsaw cuts drywall perfectly, coping with complex lines and saving time and effort.
Having set the jigsaw blade at the beginning of this line, begin to smoothly cut out the details from the drywall of the required shape. Round holes should be lined with a compass. To cut drywall inside the circle, drill a hole and pass a jigsaw blade through it. Cut out the desired circle along the drawn line.
Cutting drywall with a jigsaw requires little physical effort, takes less time and produces less waste.
If you are cutting drywall with an electric jigsaw, the resulting edges will need minimal work because of all the drywall cutting tools, only the electric jigsaw can be held perfectly perpendicular to the surface of the sheet. For this, a special sole is provided in its design.
Sometimes you need to cut drywall in the form of the letter L (for example, for a doorway). Then you need to use several types of drywall tools. The short part is cut with a hacksaw, and the long part is cut with a mounting knife. The plate is broken and cut from the reverse side. This work can be done on an already installed sheet.
How to cut drywall at home?
As mentioned above, drywall cutting is carried out with a standard tool that every home craftsman has. In this paragraph, we will consider in detail the existing tools for cutting GKL and the technology of work using its main types.
The following video discusses the main devices that simplify the cutting of drywall sheets:


Many novice craftsmen are wondering how to cut moisture-resistant drywall. There is no fundamental difference in the technology of cutting GKL of different types, therefore, the same devices are used for work.
Mounting knife
The main tool for cutting are knives, which are available in different types and will be discussed in more detail.
Table 1. Types of knives used for cutting drywall sheets
| Instrument appearance and name | Description |
| Photo 3. Universal mounting knife | The most simple and inexpensive option for home use.Assumes the possibility of installing blades of different thicknesses, simple and easy to use. |
| Photo 4. Knife with a trapezoidal blade | Designed specifically for drywall work. Features an ergonomic handle for optimum transfer of hand force to the material being cut. The trapezoidal blade is characterized by good rigidity, therefore, when pressed, it does not bend and cuts the material perfectly. |
| Photo 5. Folding knife with a trapezoidal blade | The characteristics do not differ from the previous one. The only difference is the possibility of folding, due to which it has a smaller size. |
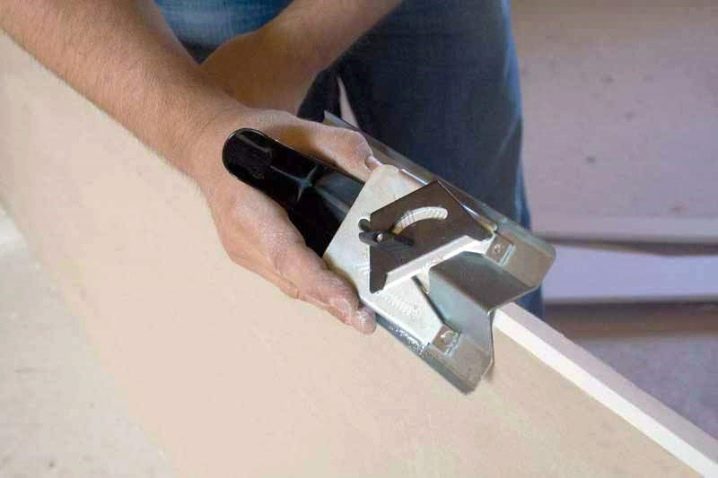
| Photo 6. Knife with a circular blade | Usually used by professionals. Allows you to perform not only straight, but also curvilinear cuts. The blade withstands even strong pressure. A knife of this type provides a perfectly even cut with the same depth of penetration into the gypsum core. |
| Photo 7 | Structurally, it consists of 2 disks located on both sides of the sheet when cutting GKL. Thanks to this, the tool cuts two layers of cardboard in one pass. The maximum cutting width usually does not exceed 120 mm, therefore it is optimal for harvesting straight, narrow strips that are needed when installing multi-level ceilings and other interior design elements. |
| Photo 8. Magnetic cutter "Bleydraner" | Also used mainly by professionals for straight and curved cutting. Allows you to speed up the process almost 2 times. It consists of two structural elements equipped with blades in special blocks and held together when cutting the sheet with magnetic clamps. Cutting is carried out according to pre-applied markings. Cuts the cardboard layer simultaneously on both sides. |
Hacksaw
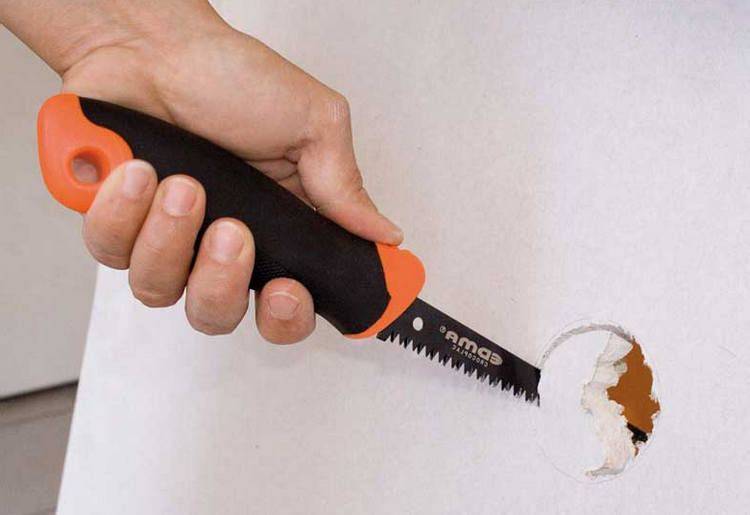
A hacksaw usually cuts curly parts and holes of various configurations. For cutting, a tool with a thin blade is best suited.

Photo 9. Special saw for plasterboard
Electric jigsaw
Just like a hacksaw, it is mainly used for cutting along a curved path and cutting various holes.
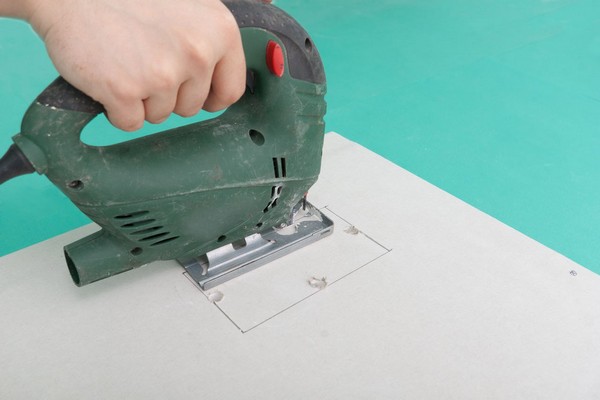
Photo 10. Cutting drywall with a jigsaw
We cut drywall with an electric jigsaw - an option for the lazy
If you do not know how to cut drywall at home and are afraid to experiment, then it is better to entrust the processing of the material to an electric tool. A jigsaw is the best tool for cutting drywall, as it allows you to make a canvas of any shape and can make holes inside a sheet of drywall. Curved lines will be as accurate as possible, and the edge will be much easier to handle with a drywall planer.


Consider step-by-step instructions on how to properly cut drywall with a jigsaw:
1. We draw a line along which it will be necessary to cut the material. It is better to use a black marker so that it is clearly visible.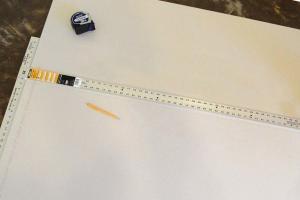
2. We install a drywall sheet on several bricks or stools so that there are no objects under the cut line (they can be hooked by a saw). The sheet should lie balanced, be not tense at the cutting points - the quality of the cut will improve significantly.
3. We install the jigsaw at the beginning of the line, turn on the laser sight (if there is one on the tool) and lead exactly along the desired path. Or we bring drywall to a tripod with a jigsaw.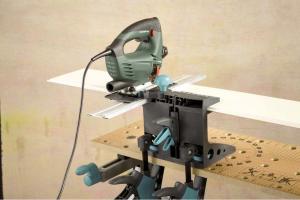
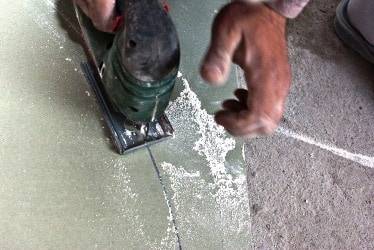
4. We demolish the edges at 45 degrees, for plastering the surface.You can even do it with sandpaper, if the processing area is not too large.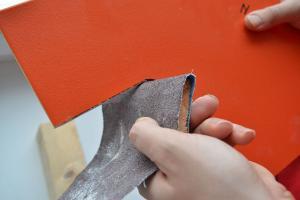
5. If you don’t have a planer or corners are bad, then a drywall cutter will become an actual tool. It can be put on a screwdriver or drill, set the cone between the sheets and draw along the joint. Cutting knives will remove the edges of each sheet at the same angle - very convenient for large volumes of work, where you need to quickly and efficiently process many sheets.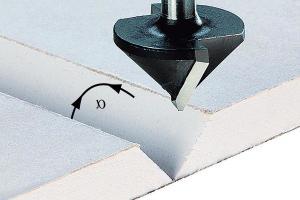
Perhaps you wanted to ask how to cut L-shaped drywall under a door or window opening? You cannot find a universal tool here, you must use both a hacksaw and a jigsaw, since with only a jigsaw or a hacksaw you cannot get an internal angle of 90 degrees.
A jigsaw will be the perfect tool for you if you don't have anything to cut drywall profiles, as it will work for metal as well. You need to buy several files "for all occasions" and it will be possible to cut not only drywall, but also metal, wood, stone and other materials. Now let's see a video of cutting drywall with a paint knife without noise and dust:
Successful repair and pleasant work with your own hands!
Process details
When cutting drywall, it is customary to follow some rules, such as:
- placing the sheet on a flat and stable surface;
- the surface must be dry and without excess debris;
- use personal protective equipment for the eyes and respiratory organs, as cutting leaves a large amount of small debris and dust.
A large sheet is recommended to be cut in stages.
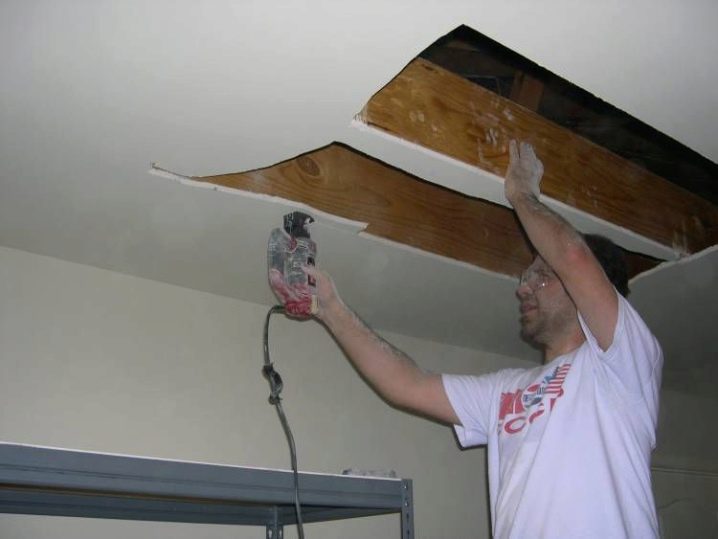
Also in our life there are moments when it is necessary to make a cut on an already installed drywall sheet for a lamp, paintings or any other things.There is also a way for this case.
First you need to make sure that the drywall is secure, after which the small holes we need are carefully cut out with a jigsaw, a drill with a nozzle, or an electric drill. Large holes are recommended to be cut with a knife according to the markings. When getting uneven edges, they can be removed with sandpaper or a hacksaw.
When cutting circles, there are a number of nuances. The simplest way to cut a circle in drywall is to apply the desired size to a sheet, then carefully cut it in a circle with a blade, and knock out the core with a hammer (with little effort with any similar object).
There is also the easiest way that saves time and effort - using a drill with a special cylindrical nozzle. This type of nozzle is usually used when cutting into the door of the lock mechanism with a latch.
There is also a so-called two-sided cut, which is carried out when various obstacles appear on the way of the sheet, be it a door, an opening, a beam, or any other.
When such a situation arises, you have to make a cut (or cut) from the right side and the desired shape. This manipulation is quite simple, but requires concentration, accuracy and care. One side of the sheet must be cut with a hacksaw, and the other side should be carefully cut with a knife. After completing the work, making a break and processing the edge with a planer.
When cutting drywall, it folds. It is advisable to do this carefully, without damaging the sheet. There are three possible ways to bend drywall. The easiest way is to attach the desired workpiece to the profile and fix it in the desired position with self-tapping screws.This method is used for small sheets of 20-30 centimeters in size and a small arc size.
A more complicated and second way (for dry drywall) is to make transverse cuts in drywall. They are made on the outside of the arc. The depth of the notch should not normally exceed four to five millimeters of the panel thickness.
We will also talk about the fold of the sheet for the door arch. The method has the unspoken name "wet". First of all, the required dimensions of the arch are measured and applied to the sheet. Next, the sheet is cut off, and non-through punctures are made on it using a needle roller. In the absence of a needle roller, a conventional awl is allowed.
Using a roller, sponge, rag or any other cloth, the pierced side is moistened with water so that the other side remains dry. After 15-20 minutes, a sheet of drywall is placed on the template with the wet side.
Next, carefully give our panel the shape of an arc. The edges are fixed with self-tapping screws or clamps. We leave for a day. After that, the sheet can be used during installation.

Cutting features: dependence on the type of GKL
Ordinary drywall sheets do not require any special handling. In waterproof GKL, cardboard is impregnated with polymers that close the pores in it, but the edges of this type remain unprotected. Therefore, work in wet conditions, even for GKLV, is prohibited. It can cause swelling of the ends, and the result will be a broken geometry of the products.
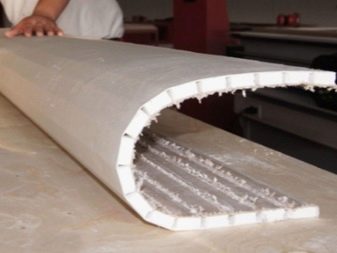
The most demanding is the thinnest arched variety of GKL. It seems illogical, but the fiberglass inside the sheet is to blame.It provides the reinforcement and flexibility necessary for the material to deform yet remain intact. In this case, a mounting knife or a hand saw will be poor helpers, a power tool is the only suitable solution.
General rules for cutting drywall
Gypsum microparticles inside the cardboard cover are light and volatile. Breaking out from under the paper during cutting, the mineral suspension rushes into the air, getting into the eyes, settling in the respiratory tract. Therefore, it is advisable to wear a protective mask.
It is recommended to lay a plastic film on the floor under the cut canvas, lightly spraying it with water from a spray bottle. Moisture will help the gypsum particles flying from above to swell, get heavier and sink onto the polyethylene. At the end of the work, it remains to roll up and throw it away. Particularly frugal wash the film in the bathroom, dry and reuse.
If gypsum dust settles directly on the floor, washing the powder will be problematic. Divorces will remain. If there is a porous coating on the floor such as matte porcelain stoneware, gypsum particles will clog into it.
A solution of warm water with sunflower oil becomes salutary at the rate of half a glass of product per 10 liters. After the floors are wiped with vinegar solution.
The method is not suitable for glossy surfaces. There it is better to do with a solution of potassium permanganate. It is added to warm water until it turns light pink.
Round holes, uneven cut
Often, when installing drywall sheets, you have to make a variety of holes, for example, for a battery, plumbing equipment, for installing electrical fittings (sockets, switches, when installing lamps). For this, conventional cutting methods are of little use.So how to cut drywall in this case? It is especially difficult to determine the correct dimensions of the future hole, to choose a tool, a place for fasteners. Let's consider in more detail the procedure.


First you need to draw up a drawing, and then measure all the dimensions. When it is necessary to make a semicircular cutout or a bend on straight surfaces, you can also use an ordinary hacksaw, having first marked the sheet with a simple pencil. For pipes and electrical fittings, special nozzles are used for drills, which allow you to perform an accurate and correct cut.
But you can make such round holes with a regular knife, and then clean all the edges with sandpaper. Usually such an easy method is used when installing fixtures. First, a marking is applied with a simple pencil, after which a hole is carefully cut out with a sharp knife.
The cut material is carefully knocked out with a hammer, the edges are cleaned. This method can be used when the cut points will be decorated with something additional
Do not forget that the sheets still need to be fixed to the previously prepared profile.
Drywall is a material that is often used for finishing walls and ceilings, in the construction of a wide variety of niches, partitions. With such material, you can embody a lot of ideas. And cutting the GKL, as you have seen, is not so difficult. So it's time to act and implement your ideas.
Features of installing profiles for drywall around the perimeter of the room
First you need to mark the plane along which the frame will be installed.
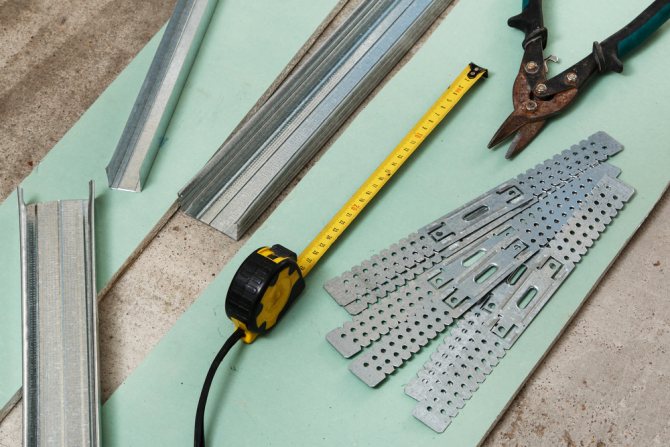
Next, prepare the tools in the form:
- two plumb lines;
- fishing line;
- rulers;
- hammer with nails;
- chalk.
To fix the plumb line on the wall, nails are used, it must be fixed to the ceiling, but hang down to the floor. The second plumb line is attached in the same way. Please note that the plumb lines should not touch anything, as the evenness of the vertical will be disturbed.
A fishing line is stretched along the wall in three places: top, bottom and center. The highest point on the wall will serve as the installation site for the metal frame. Retreating from her place, check the accuracy of the breakdown. Parallel to the previously stretched fishing line, pull another part of it against the side wall. Connect the sections of the woods located on the two walls with a ruler, thus making marks according to the location of the plane.
Repeat this procedure for all other walls and ceiling. Using the rule and chalk, draw the perimeter of the structure.
How to cut a hole
The greatest problems arise when it is necessary to form a section inside the slab. For this, there are several methods.
Square or rectangular
Scheme of work:
Markup in progress
It is important to correctly determine the placement of the hole. This will require several reference points.
If the reference is the edge, then it should be extremely even.
The boundaries of the created figure are well marked. Inside each side, without going beyond the lines, holes are drilled with a drill or screwdriver. This allows you to create an extremely even shape.
A jigsaw file is inserted into the holes and fragments are cut to each corner. The process is performed sequentially for all sections.
 To insert a jigsaw into the blade, a hole with a diameter of 10 - 12 mm is made next to each marking line (on the inside)
When deciding what is better to make holes, take into account that a manual hacksaw for drywall can also be used for this.
Round
To get a cutout for a socket or lamp, three main methods are used:
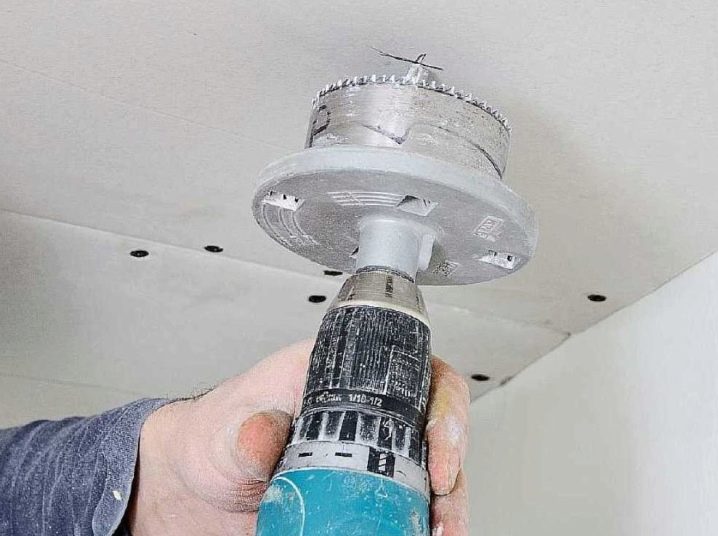
- The easiest and most affordable way is drilling. For this purpose, different nozzles can be used, but the most suitable ones are a set of crowns and a “ballerina” with a plastic catcher.
- You can form a round hole in the same way as a square one, but for this there is no need to drill many immersion points of the file, just one is enough.
- In the absence of a suitable tool, a knife is used: a shape is drawn, which cuts in sections, the figure is divided into a semicircle and smaller segments. The edges are uneven, so they are finalized with a file.
 If you need a perfectly even round hole, then it is better to give preference to a jagged crown, it is a little more difficult to work with a “Ballerina”, and manually cutting a circle requires skill
Responsibly, it is required to approach work on already fixed GKL sheets. To get a curve or a simple shape without problems, you need to make sure that the section does not fall on the profile.
Do you have any questions? We recommend watching this video:
Is it necessary to cut the edge of drywall and how to do it right?
Do I need to cut the edge of drywall when laying it.
Very rarely it turns out to cover the entire required surface with one sheet of drywall, and then there are joints that need to be sealed.
If you take a whole sheet of drywall, then it already has ready-made chamfers and you don’t need to do anything else. During the installation process, it becomes necessary to cut sheets and then it becomes necessary to chamfer them.
What is a bevel and why is it needed.
Many home craftsmen neglect such a stage of work as cutting the ends on the GKL, as they consider it unnecessary and unimportant. Experts recommend that you definitely cut the edge, and why you need to do this, let's try to figure it out in this article.
First, let's figure out what a bevel is. If you look it up in the dictionary, a bevel is an edge of drywall or any other material that is cut at an angle of 45-60 degrees.


The appearance of the bevel.
If a chamfer is made on a sheet of drywall, then the seam is wider, and this allows you to fill it well with putty, this will prevent cracks from appearing later.
If you do not chamfer, then a small gap will remain between the straight ends of the drywall sheets, it will be difficult for the primer to get there, and in the process of sealing it, little putty will get into the gap, which will lead to the fact that after a while a crack may appear in this place.
It becomes clear that it is necessary to cut the edge on drywall. If there is no chamfer on the edge of the drywall, even the presence of a sickle tape on the seam does not guarantee that a crack will not appear in this place.
In order to avoid the appearance of cracks in the future, it is enough that the chamfer is 8-10 mm, so it will be well filled with primer and putty, and the joint will turn out to be strong and reliable.
How to make a bevel.
To perform these works, you will need the following list of tools.
Drywall must be placed on a flat surface, it must be securely fixed so that it does not move during the work.
At the next stage, using a pencil and a ruler on drywall, approximately 8-10 mm from its edge, mark a line.
Now, with the help of a knife, which is located at an angle to the sheet, with a smooth movement we begin to cut off the edge of the sheet.
This should be done no more than 2/3 of the thickness of the sheet, the work is done with a sharp knife and a smooth movement. You can not make jerks or sawtooth movements, as in this case the edge will turn out to be uneven.
If you do everything smoothly, then during operation the chips will curl and you will get a flat inclined surface.
Cut off the edge of the sheet with a knife.
After you make the edge, it needs to be trimmed, this can be done with fine sandpaper or with a special drywall planer.
The same sequence of work will be with the remaining faces of the GKL, on which it is necessary to make an edge.
After you have made the edges and carried out the installation of drywall sheets, it is necessary to repair all joints with high quality. Before starting work, it is necessary to thoroughly clean the walls, seams from dust and debris, check the tightness of the sheets.
To seal the seams, you will need spatulas 80 and 250 mm wide, a container for putty, a grater or fine sandpaper and a brush for applying a primer.
To seal the seams, it is imperative to use a special reinforcing tape called sickle.
To remove dust, experts recommend wiping the seam with a damp cloth before starting work, so the putty will hold on better.
First, the seam is filled with the finished mixture, for which a spatula is used, the seam is completely filled and allowed to dry a little.
At the next stage, a reinforcing tape is applied and again, with a spatula, it is pressed into the putty.Now it remains to apply another layer on top of the tape, align it and wait until everything dries.
In order for the putty to hold tighter at the joint, it is recommended to soak it with a primer before this, after which it is necessary to let it dry completely and only then it will be possible to continue to carry out further work.
If you don’t have a sickle, you can use ordinary fiberglass, but before starting work, cut off a strip of the right size and knead it well with your hands so that it becomes soft.
You can not immediately stick the tape on the joint, and then fill it with putty. First you need to fill the joint with putty, which takes about 60%, then the tape is laid and the rest of the putty is applied.
Below is a table of the cost of tools and materials needed to work with drywall.
The process of cutting drywall at home with your own hands
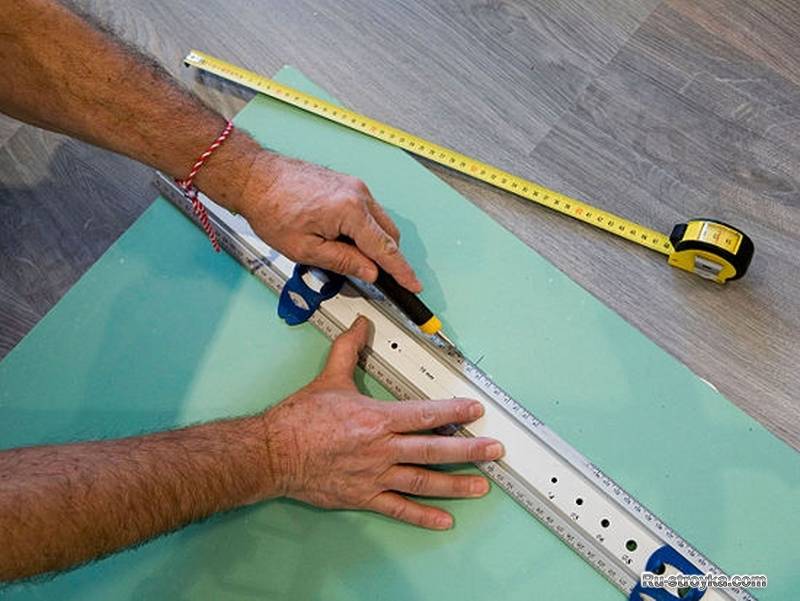
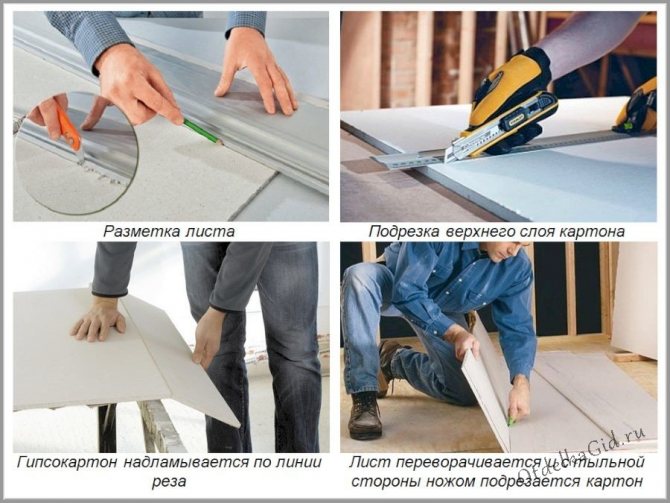
First of all, decide on a place convenient for you. Professionals can already easily cut drywall and canopy sheets, but if you are new to this business, then we would recommend that you cut the sheets on the floor, on a flat surface. So, lay the sheet on a flat, smooth surface and draw lines along which you will cut the sheet. You can do this with a tape measure and a pencil. Sometimes a sheet is cut immediately without marking, but it’s better to check seven times and cut one off than to make people laugh later!
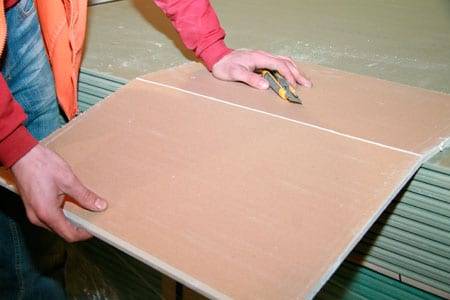
After we take the rule, level or profile, the main thing is that one of the surfaces is even and long. We apply close to the sheet and with the help of a clerical knife we cut the sheet along the entire length of the marking.


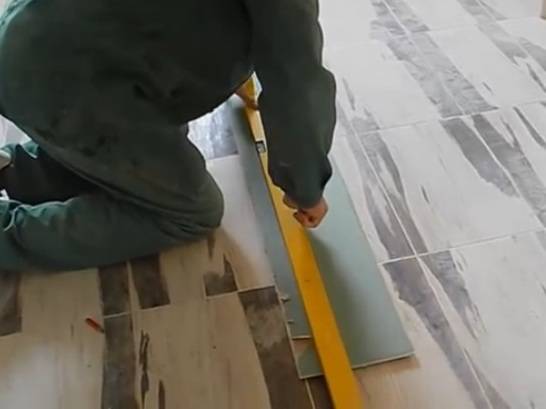
The force should be about 3-5 kg.The blade must be set perpendicular to the sheet so as not to break, and to ensure the correct direction for further breaking. We make a cut from one edge to the other. After, we take the sheet and bend it in the opposite direction to our cut. To do this, sometimes it is better to turn the sheet over to the other side.
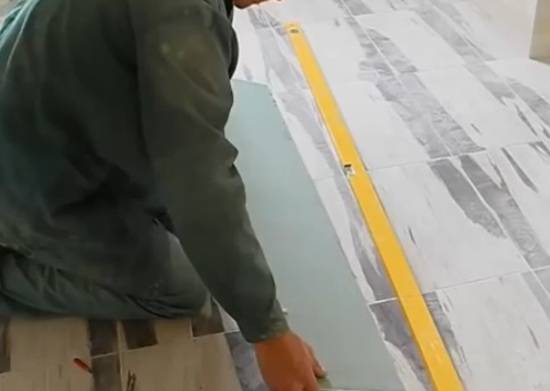
And you will probably have to do this if the sheet is on the floor. Now we bend the sheet at the place of the cut, but in the opposite direction. As we already said.
As a result, the sheet will crack and break, but still remain attached to the surface layer of the paper.
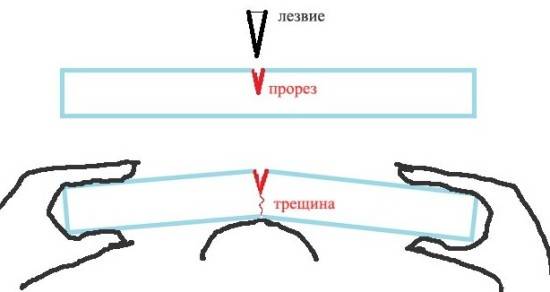
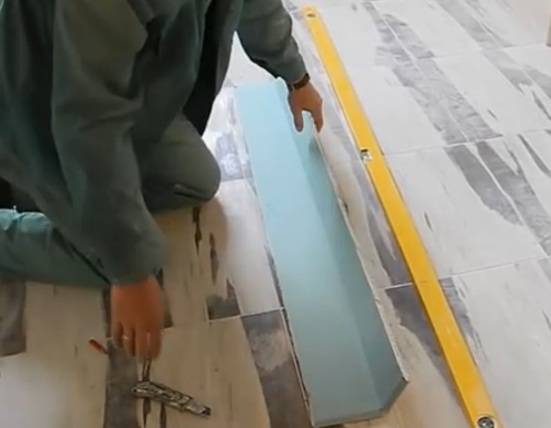
Next, we take the same clerical knife and cut it at the place of the cut, but on the other side, cutting through the paper.

After we cut the paper along the entire length, we separate the two halves of the sheet.
That's all, the process of cutting a sheet of their drywall at home with your own hands can be considered complete. As you can see, everything is simple and easy, and with our instructions and photos, anyone can complete the drywall cutting process.
How to cut gypsum decorative tiles
During installation, you have to cut the plates to the desired size and cut holes of various shapes in them. For this, different tools are used. Let's analyze all the options in detail.
1. Hacksaw for wood
A fine-toothed saw is one option for sawing gypsum tiles. It is a cutting tool with a solid metal frame and a serrated blade. The angle of sharpening and the shape of the tooth allow you to work for a long time without dulling the cutting blade. This is an advantage of the method, but you must be prepared for the fact that the edge will turn out to be uneven. The teeth "tear" the base, leaving an ugly end. It must be processed afterwards.
2. Tool for metal
The hacksaw differs from the one described above in the shape and size of the teeth.Small wedge-shaped teeth cut the material almost exactly, but the saw quickly becomes dull. When craftsmen choose how to cut gypsum tiles, they take into account that they will have to work longer and put more effort with a hacksaw. True, the result will be an almost even cut. Additional processing is usually not needed.
3. File for drywall
The shape of the teeth of such a file is also different from that used by a wood tool. This results in a smoother cut. Another difference is the shape of the saw. Cutting blades are located on both sides. Such a file is called round. With its help, you can perform not only straight cuts, but also curly ones. It is convenient to use when trimming in hard-to-reach places.
There are universal models for plasterboard and wood. They cut plaster less accurately.
If a hand tool is used for sawing, a miter box will help to make an even cut. It is a tool for cutting at an angle and along a straight line. It is a small tray, on the walls of which there are holes at different angles. The saw is placed in two holes and washed down exactly at the chosen angle. The miter box facilitates the work of cutting parts at a right angle and is indispensable for the design of joints.
4. Bulgarian
The angle grinder cuts plaster quickly and accurately. For cutting, choose a diamond-coated disc. It will cut the cladding quite evenly, without “torn” edges. The use of power tools has a significant disadvantage. During operation, a lot of fine dust is generated. It then has to be carefully cleaned from everywhere. There is one more thing. It is desirable to have experience with the grinder. The cladding is quite fragile, the wrong movement can split it.
5. Trimming machine
If the workshop has a miter machine, this will be the solution to how to cut gypsum tiles under a brick. The equipment is designed for trimming, that is, the transverse division of workpieces. With it, you can quickly and accurately cut the plates in a straight line. This creates a lot of dust. As with the grinder, the skill of using the machine is desirable. Otherwise, it is very easy to spoil the part.
Sometimes a manual tile cutter is used to cut decorative cladding. It is intended for ceramics, which must be taken into account when working. There is a risk of damaging the lining. In some cases, the gypsum plate is broken off. To do this, on the reverse side with a sharp object, a line is deeply scratched along which the cut passes. After that, the part is broken with a sharp movement.
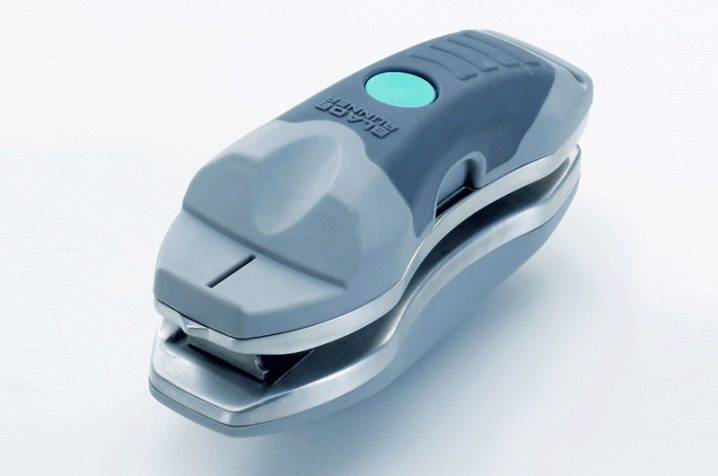
blade runner
Blade runner appeared in the ranks of building materials a few years ago, it is still little known, but in the circle of specialists it is preferred. Translated from English, it means "running blade". By looking at the design, you can confirm this. This professional knife consists of two main parts, which are located on both sides of the sheet during operation and are securely fixed with strong magnets. Each block has its own blade, which is quite simple to replace, you just need to open the case and remove the old one.
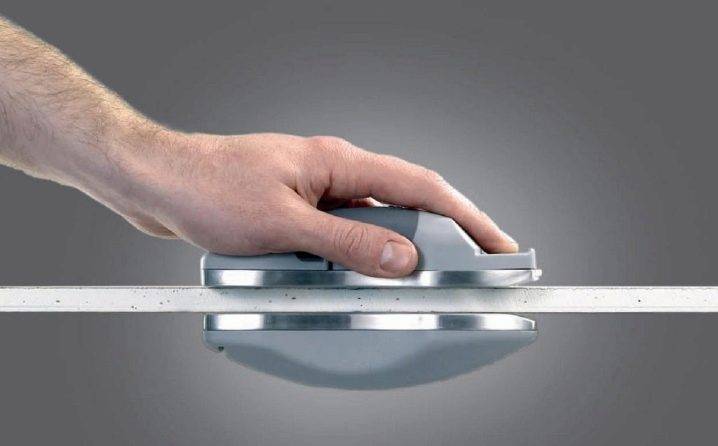
With the help of Blade runner it is convenient to cut vertical sheets, cut out elements of any complexity. To turn the blade, just press the button and turn the knife in the desired direction. It is not traumatic - the blades are hidden inside the case. Blade runner handles thick sheets perfectly, saves time and guarantees durability.