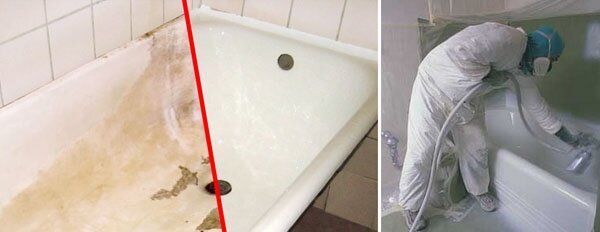
- What are the stages and methods of painting the font? The main nuances and features of this process
- Tools and accessories for painting
- What kind of paint can be used to paint a bathtub? Choosing a material
- Features of the preparation of epoxy enamel
- Coloring technology
- What color to paint a cast iron radiator
- White.
- The black.
- In the color of the wall.
- Contrasting color.
- Ombre.
- "Bath to bath" or acrylic liner
- With the help of a balloon
- Painting a cast iron bath at home
- The main advantages of self-painting the bathroom:
- Minuses
- Choosing a paint
- How to paint a cast-iron bathtub outside?
- Required inventory
- Stage 1. Preparatory work
- Stage 2. The staining process
- Stage 3. Drying
- Briefly about enamels
- Kinds
- Advantages and disadvantages of enamel coatings
- Minuses
- Ways to restore the coating of the bath
What are the stages and methods of painting the font? The main nuances and features of this process
Firstly, you need to take into account that the bath is located in a high humidity room, it “contacts” with water almost every day, which means that the colorants should be selected according to these characteristics, and not just because you liked the color. The mixture must be resistant to moisture, have increased adhesion. Reliably "stick" to the surface, so that after a certain time the paint does not peel off.
Experts advise you to purchase three-component formulations, mainly from manufacturers such as Dulux, Tikkurila, Jobi. They contain a priming composition of pale colors, semi-matte.
Before you paint the bath with your own hands, you need to prepare protective equipment.
- Respirator with absorber cartridge, civilian or military gas masks can be used.
- Oilcloth apron and rubber gloves. Latex two-layer ones are suitable, but then you need to prepare at least 2-3 pairs.
Tools and accessories for painting
- Brush made of natural material, 90 mm.
- Sanding head and rubber backed Durex wheel.
- Paint knife, for removing fluff from the brush.
- 0.5 l. acetone or thinner No. 646.
- Microfiber or sulfite clean towel to wipe respirator goggles.
What kind of paint can be used to paint a bathtub? Choosing a material
The most common paint is epoxy enamel, which has been used in construction for over 20 years. It serves for a very long time, but it also requires technically accurate performance of all stages of its application.
Acrylic for restoration is used relatively recently, but in terms of durability it is practically not inferior to epoxy. It is applied easily, but here it is an order of magnitude higher than the previous material.
For a beginner and far from a non-professional in the implementation of painting work, it is better to use acrylic. The first step in painting a bathroom with your own hands is preparation.
Consists of four elements:
- cleansing;
- grinding;
- degreasing;
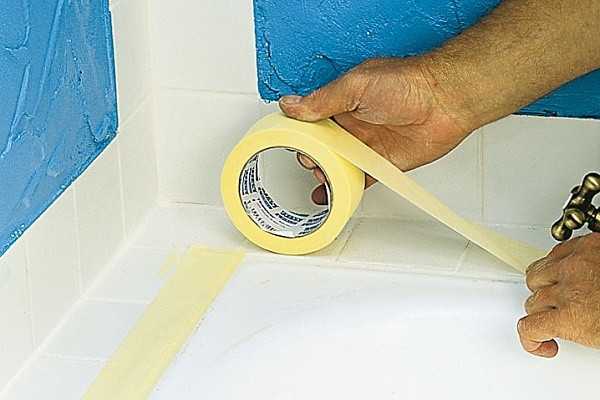
- covering tiles with adhesive tape.
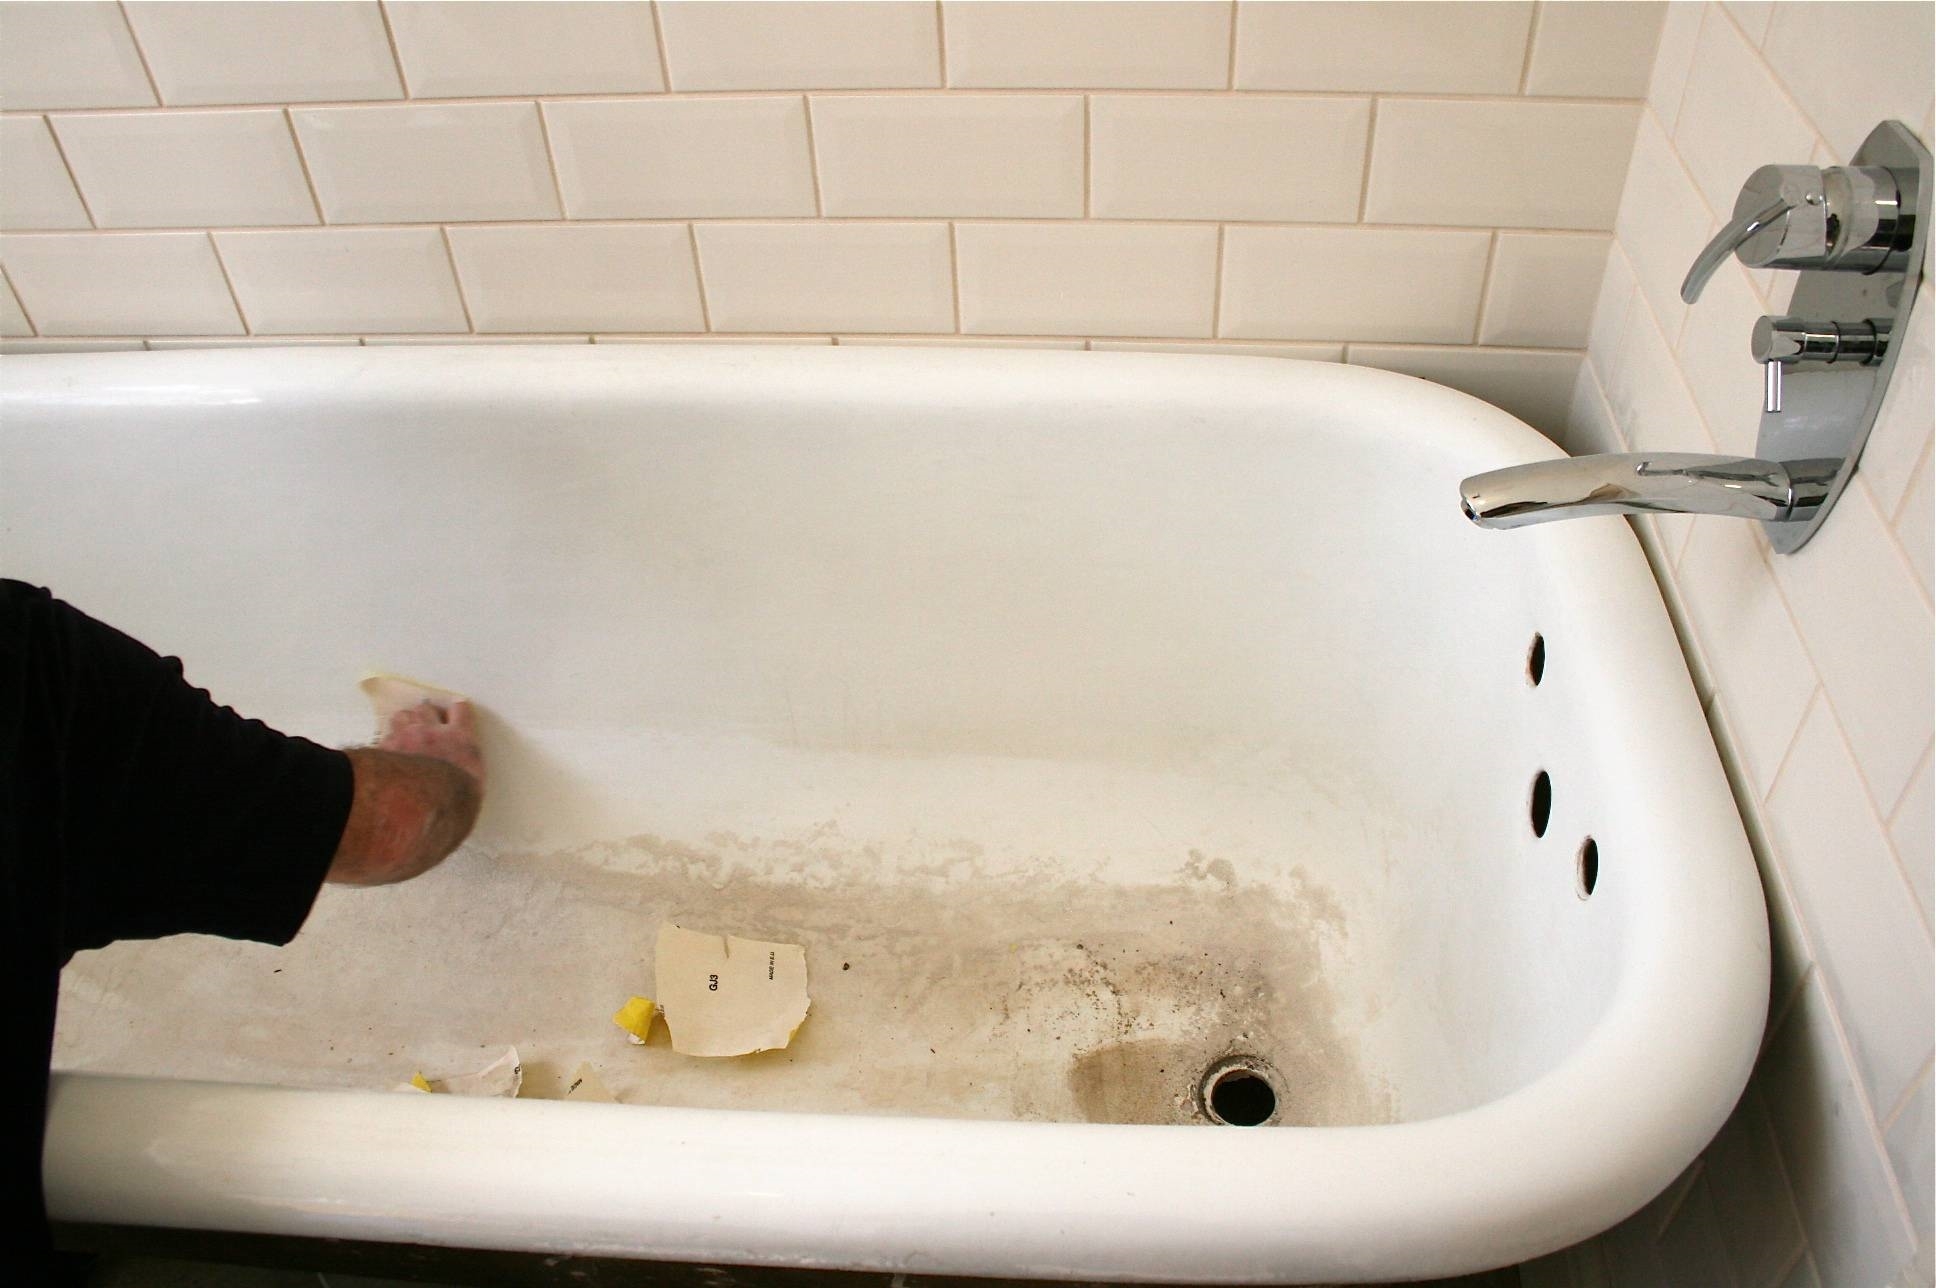
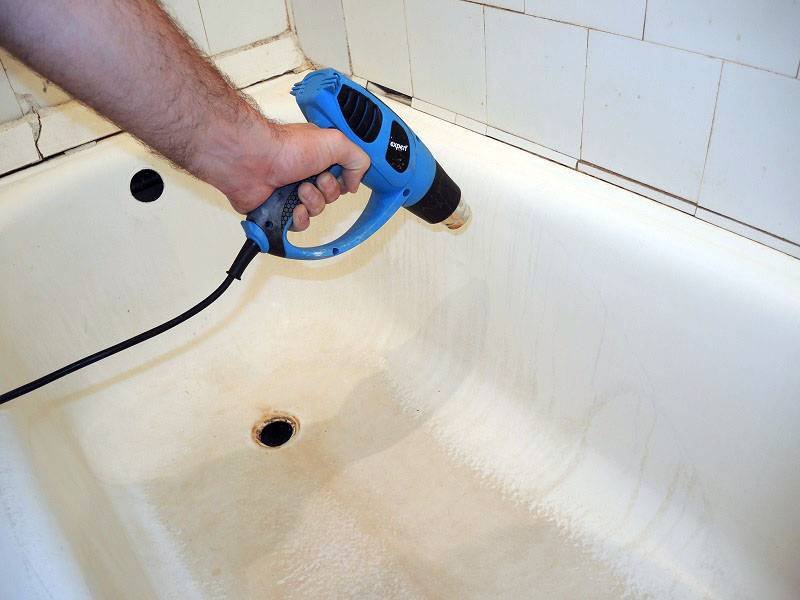
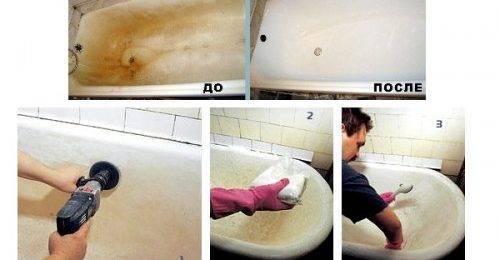
The bath is thoroughly cleaned from various contaminants, for this you need to fill the bottom with oxalic acid, Pemolux or another active detergent. Leave on for 15-20 minutes and then wash off. Now let's move on to sanding.We remove the drain hole clamps and smooth the surface with an electric drill with Durex. We check the result with an LED flashlight, there should be no reflective spots, as well as traces of rust and streaks.
Before degreasing, you need to remove all dust with a vacuum cleaner, wipe the drain holes with a rag moistened with a solvent. Now, using gloves and an apron, pour 0.5 Sanoks, Pemolux into the bathroom and rub it with a sponge over the entire surface of the product in an even layer. You can rest for an hour.
Next, we rinse the bath from detergents, ideally this should be done 1-2 times. We collect a full bath and add 0.5 bottles of acid detergent.
After thorough rinsing, dry the surface with a building hair dryer. We remove the strapping with a drain and proceed to painting the bathtub with enamel with our own hands.
Features of the preparation of epoxy enamel
It is necessary to start mixing all the components after the completion of the preparatory work, the mixture is suitable for 30-45 minutes after preparation.
A little solvent can be added to the composition, which will improve the applicability of the property to the material. Depending on the volume of the base, the right amount of hardener is taken. The ratio of all components can be read on the packaging of the product.
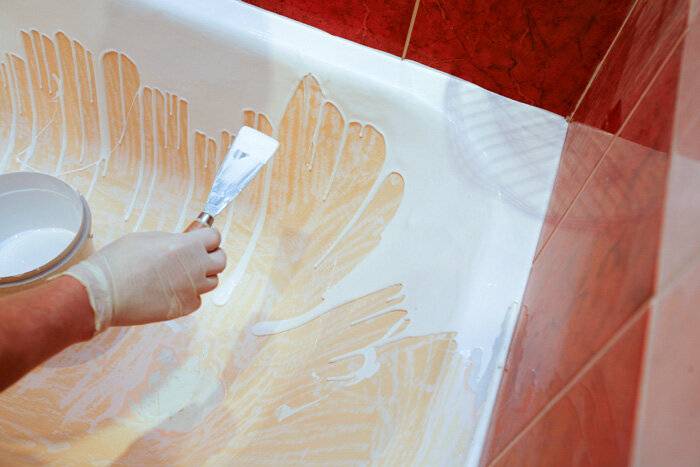
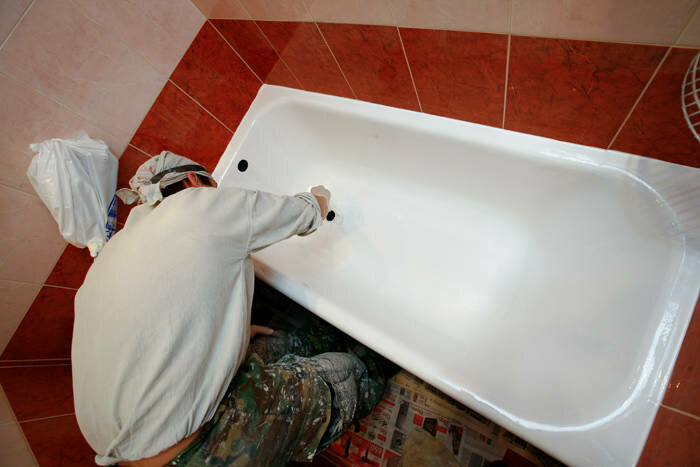
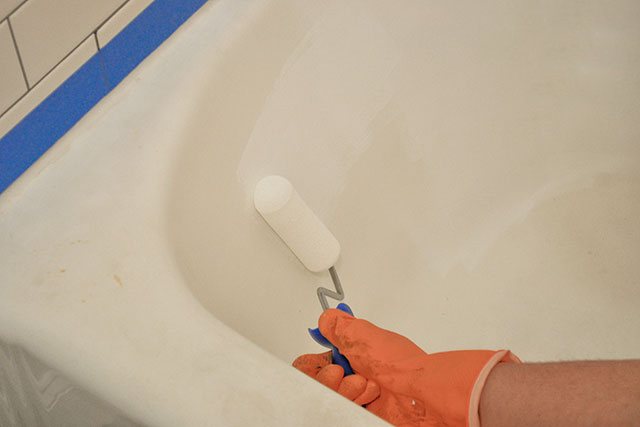
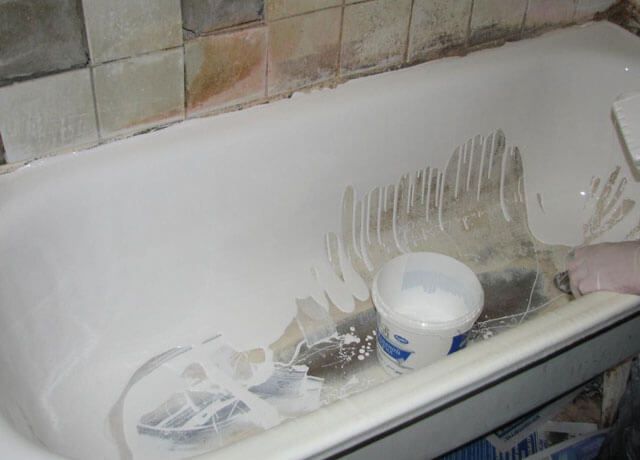
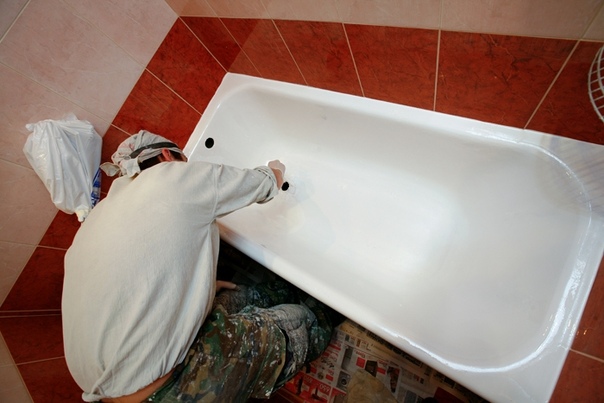
We paint the bath with our own hands, the brush is abundantly lubricated with the composition and rubbed over the surface. Do not touch the painted area with your hands. If villi appear from the brush, they should be removed immediately with tweezers or a gypsy needle.
After the first application, we wait 15 minutes and again we do all the work, from the same place and in the same direction. At the end of the procedure, the bath is closed for 2 days, the more, the better the painted surface will serve.
How to properly paint a bathtub to avoid dripping and sagging? Their formation should be carefully monitored and, if they occur, smear with a brush upwards.
A possible option for the restoration of an old bath, an acrylic liner, or as it is also called a "bath in a bath", is an insert that covers the entire surface of the old container.
Coloring technology
The process at home with your own hands cannot be called simple. The technology consists of the following steps: room preparation, surface preparation, compound preparation, paint application and drying. The most time-consuming operation is the preparatory work, as it takes a lot of time and effort. The quality and durability of the new coating depends on the correct surface preparation. Painting is carried out in the following sequence:
First of all, it is necessary to free the bathroom from all foreign objects, you can perform a wet cleaning of the room to eliminate dust.
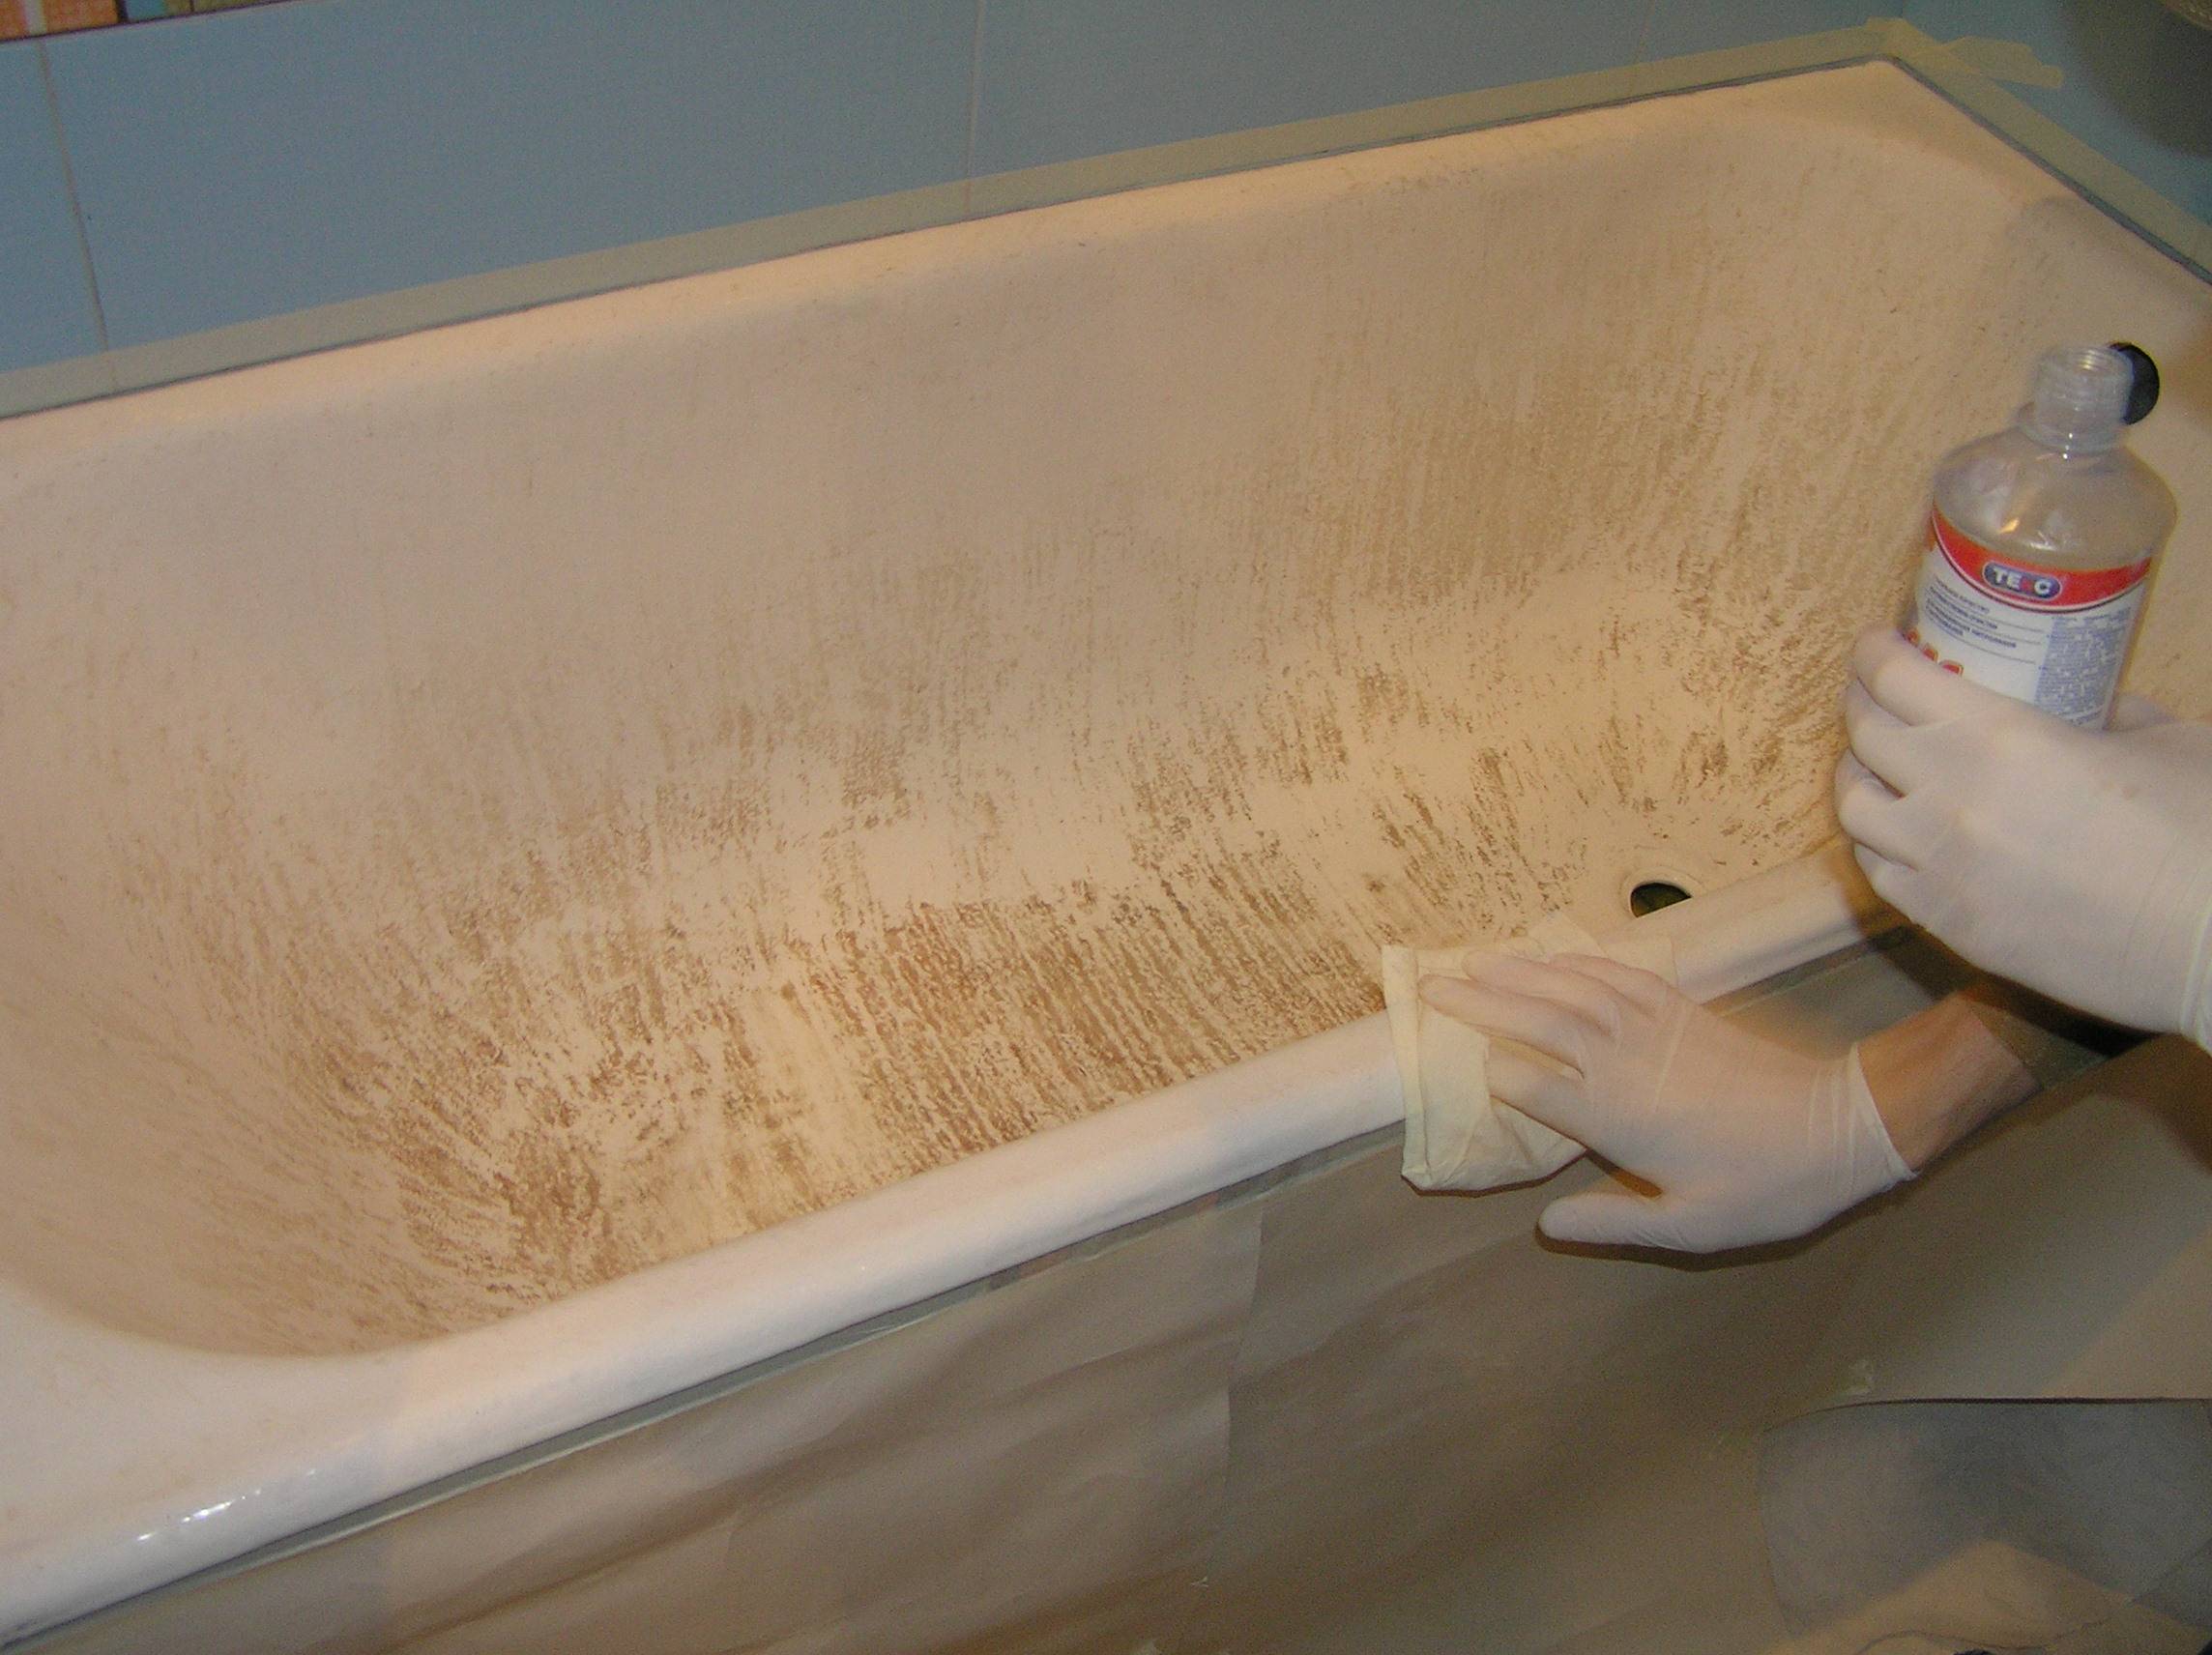
The bath is cleaned of dirt and dust. To do this, an alkaline detergent or oxalic acid is poured into the bottom of the bowl in a strip, and then rubbed with a new sponge from the center to the edges of the container. In this form, the bath is left for 1 hour, and then thoroughly washed with running water.
Using a grinding nozzle on a drill, the enamel layer of the bath is cleaned. Large smudges of rust can be removed with a coarse-grained sandpaper, and then walk over the entire surface with a finer one. The finer the grain of the skin, the better the bath paint will then lie.
After that, the surface of the washing container is degreased with an acid detergent (Sanox, Adrilan).The cleaning composition is also applied to the bottom and walls inside the bath, left for better interaction, and then thoroughly rinsed with running water and dried.
It is important after this stage not to touch the surface with your hands.
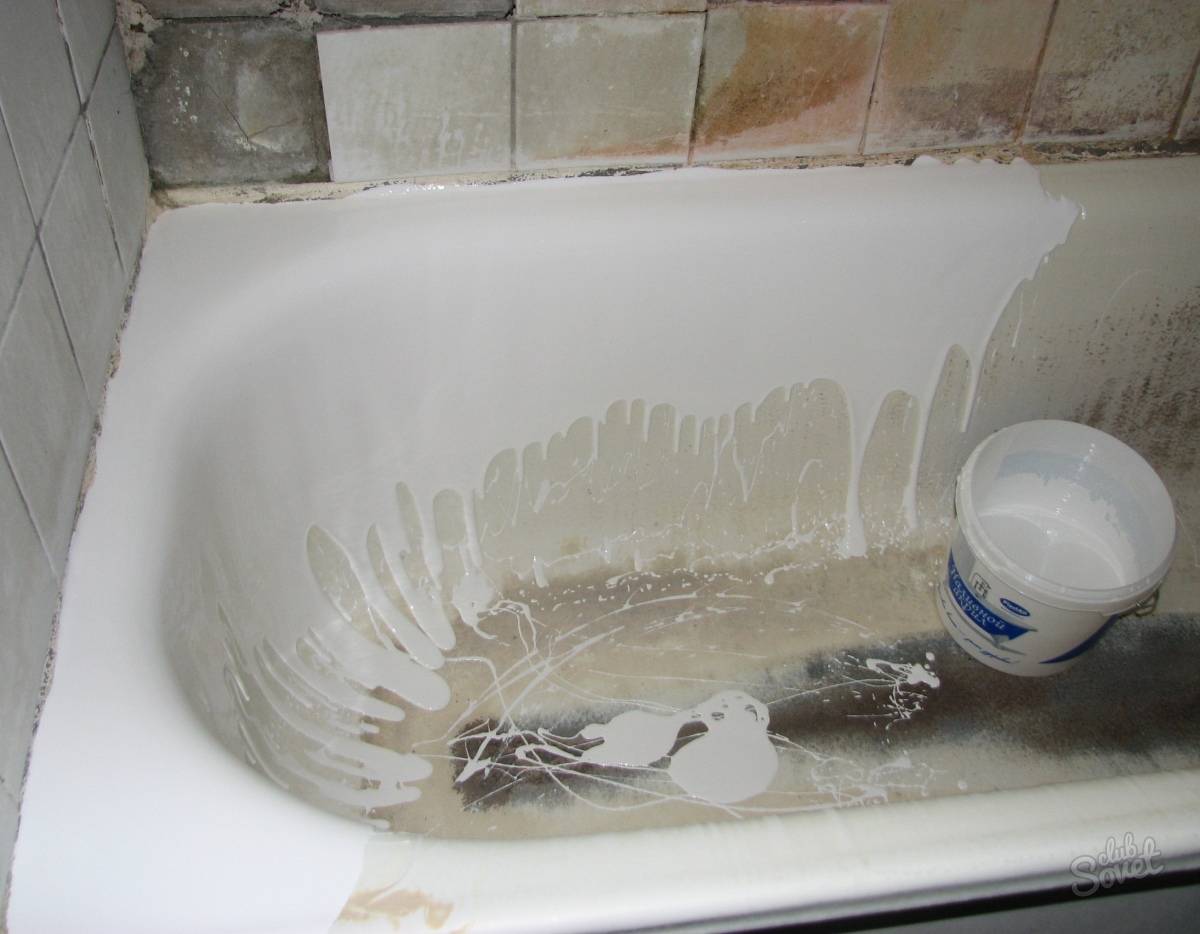
After the preparatory phase begins. Epoxy enamel is applied with a brush, and liquid acrylic is applied with a brush or roller.
Application is carried out in one direction in 2 layers.
Experienced craftsmen say that the most important part of the technology for painting old cast iron bathtubs is drying. When the painting is completed, the bathroom area is closed to prevent dust from entering. Polymerization of acrylic or epoxy enamel takes 3-7 days, during which it is not recommended to use the bath. The first day it is better not to even go into the room. The more time passes from staining to the first wash, the more resistant the coating will turn out.
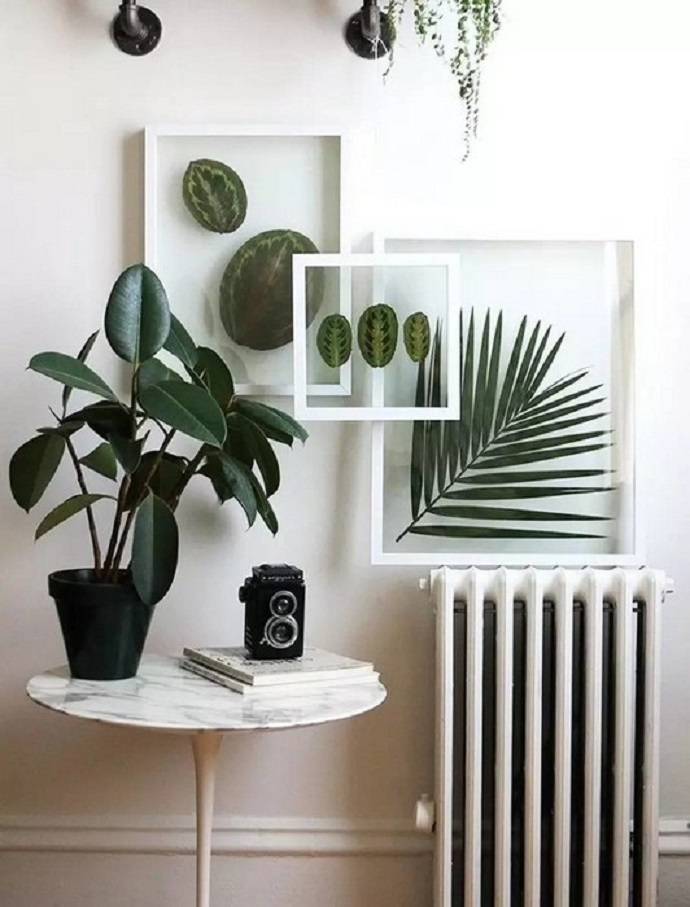
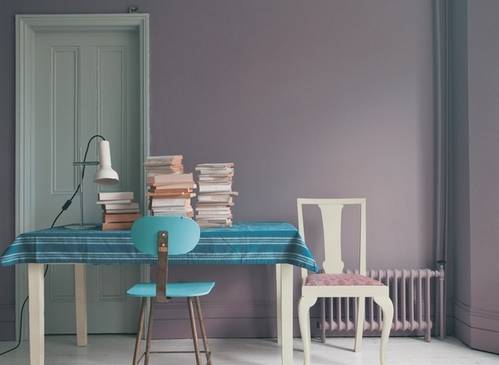
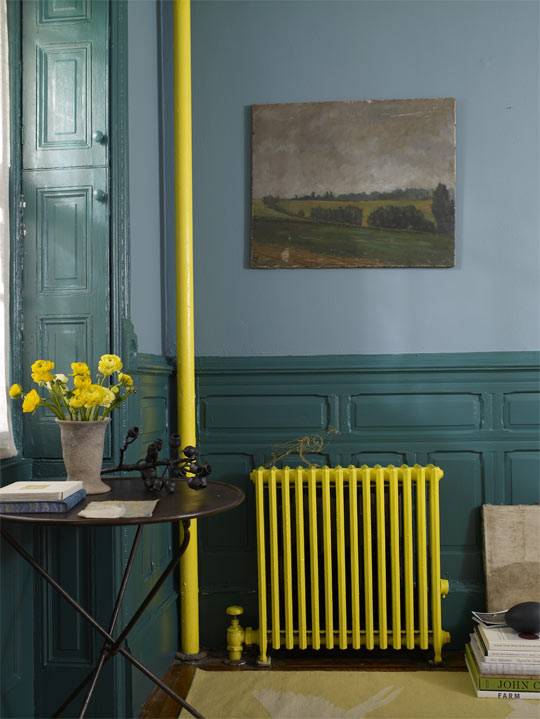
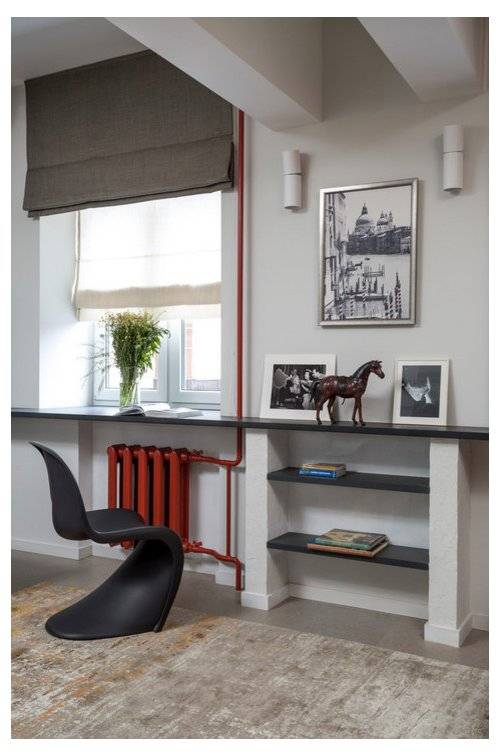
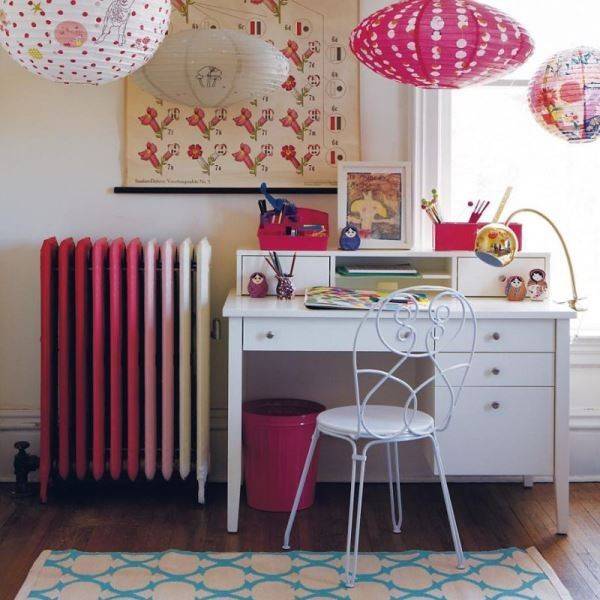
What color to paint a cast iron radiator
White.
Classics of the genre. A classic color that will fit into absolutely any interior, especially if the batteries are traditionally located under white metal-plastic windows and window sills.


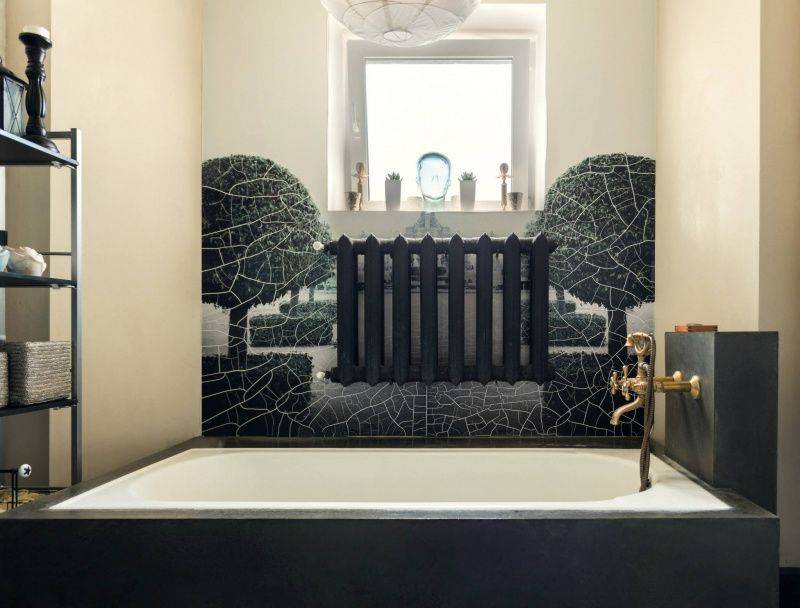
The black.
A color that is suitable for interiors decorated in dark colors. Batteries painted black will not stand out as brightly against dark walls as white ones. There is an opinion that black batteries heat better. But experts say that there is practically no difference. Therefore, black is more about design than about increasing heat dissipation.
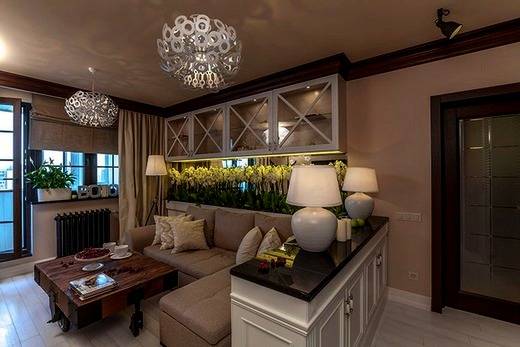
In the color of the wall.
Perfect solution to mask the battery against the background of bright walls. You can choose a shade of painting to match the wall or choose a couple of tones lighter or darker.
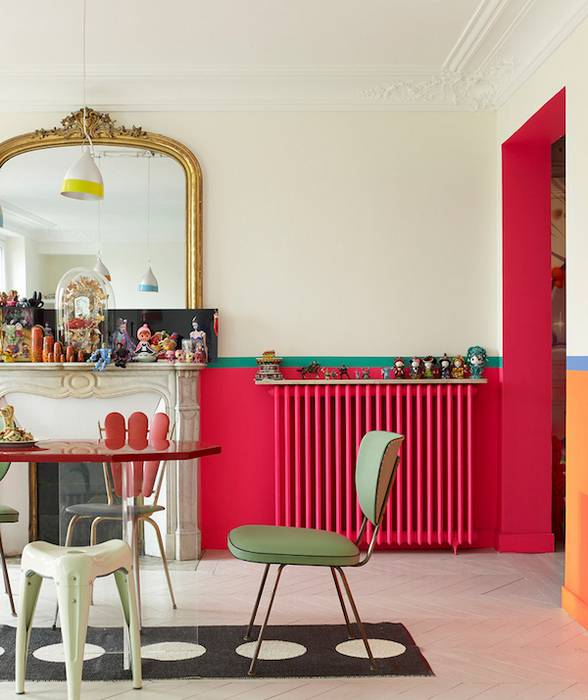
Contrasting color.
A bold solution that is suitable for modern interiors decorated in the style of minimalism, modern, eclectic and related
Such a battery will undoubtedly attract attention, so it is important to correctly place bright accents in the room. Otherwise, it may turn out that the radiators will become the center of the visual composition.
Ombre.
Very interesting and fashionable coloring technique. It consists in a soft and gradual transition from a lighter shade to a darker one. A cast iron battery is ideal for this purpose. The end section is painted white, for example. Each next section has more and more saturated color.
How to paint cast iron batteries you now know
If there is a need to buy new ones, we recommend that you pay attention to. Cast iron bathroom paint is designed for the restoration of old products. She saves her from disposal, because the bathroom is a necessary room in a house or apartment.
Many residents of apartment buildings have cast iron products, as they are convenient and practical to use. Cast iron bathtubs - a design in which you can swim, wash clothes. They have a long service life
She saves her from disposal, because the bathroom is a necessary room in a house or apartment. Many residents of apartment buildings have cast iron products, as they are convenient and practical to use. Cast iron bathtubs - a design in which you can swim, wash clothes. They have a long service life
Cast iron bathroom paint is designed for the restoration of old products. She saves her from disposal, because the bathroom is a necessary room in a house or apartment.Many residents of apartment buildings have cast iron products, as they are convenient and practical to use. Cast iron bathtubs - a design in which you can swim, wash clothes. They have a long service life.
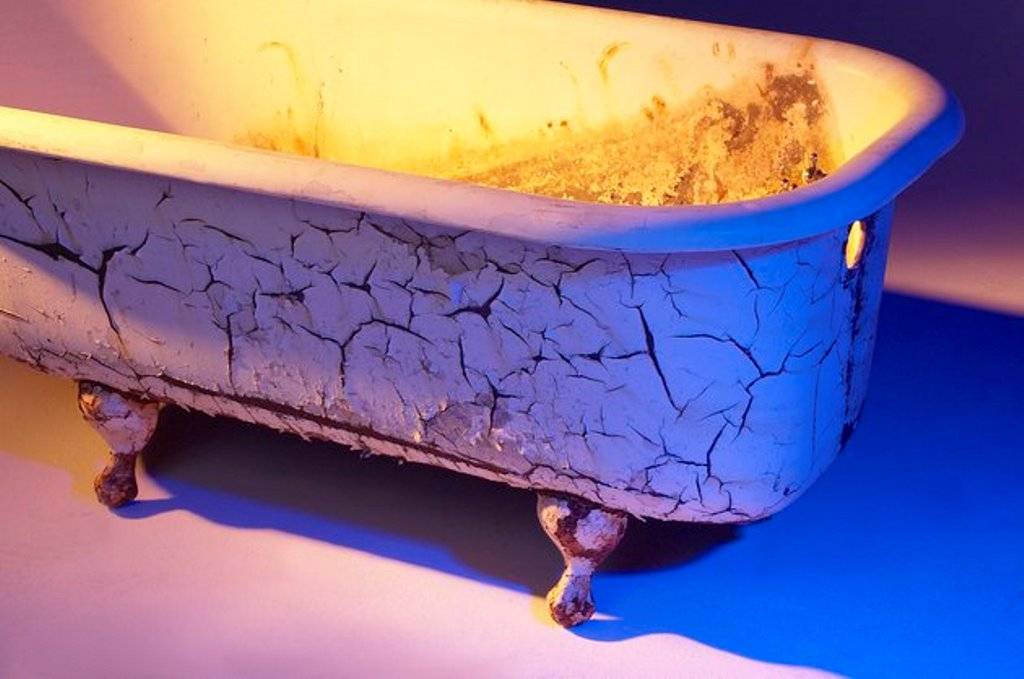
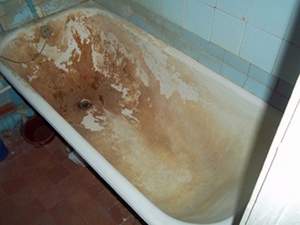
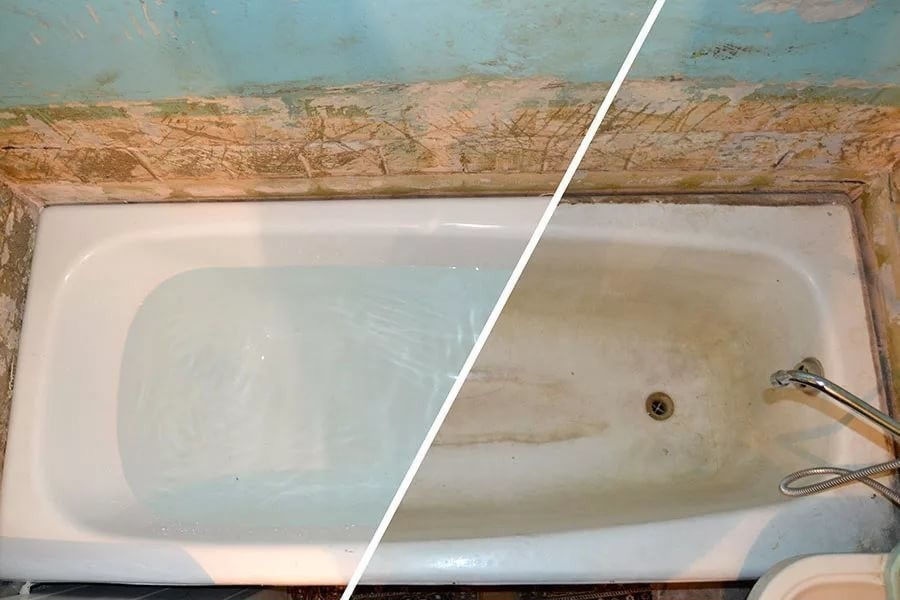
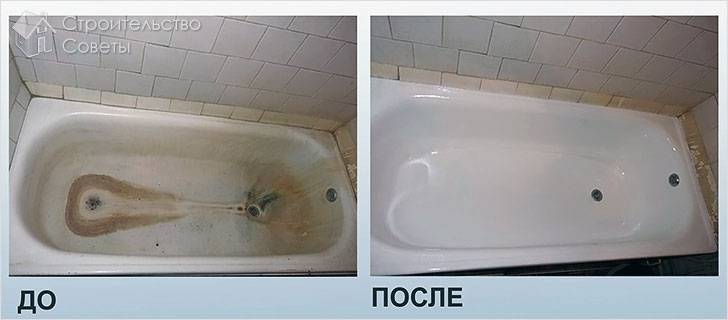
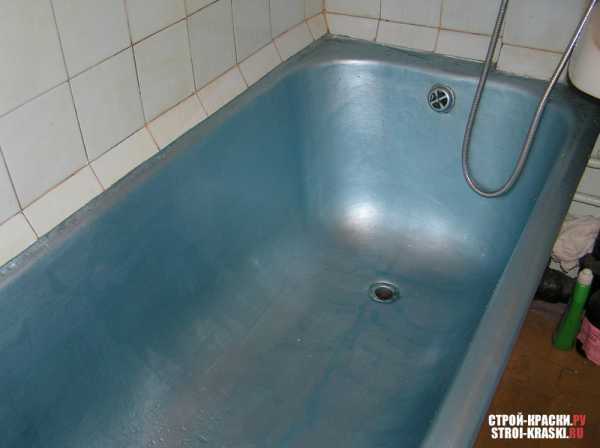
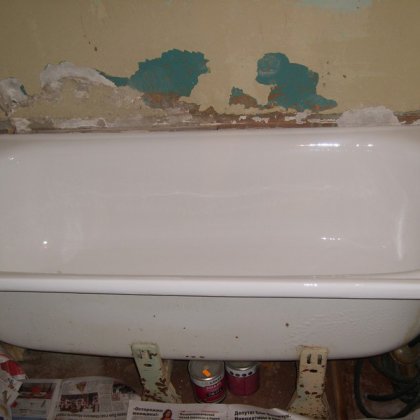
But after mechanical and chemical influences (chips, scratches, detergents), the coating inside eventually becomes unusable. Acquires a gray tint, cracks, yellowness. You can correct the shortcomings without calling a specialist, with self-painting of the product. Painting a cast iron bath at home with your own hands is the perfect solution.
For painting, it is necessary to choose only a dye for metal structures.
This method has a number of advantages:
- Large selection of tones of paint and varnish coatings;
- The price of the dye saves a lot of money;
- The ability to paint a cast-iron bath without calling specialists;
- Saving time and effort, fast execution;
- No unpleasant odor after the dye dries;
- Nice glossy finish.
However, this method of updating the surface has disadvantages:
- The outer coating must be treated with a grinder before applying the composition, and after that with a soil mixture;
- It is necessary to apply a dye for an old cast iron product only after treating the coating with an antifungal compound;
- There are acrylic solutions that dry for a long time - three days.
What can be painted cast iron tub? First you need to find the appropriate paint, only then begin work on the surface treatment of cast iron.
"Bath to bath" or acrylic liner
Acrylic liners
If you do not want to carry out hygiene procedures for several days, using a basin or visiting a bath, then the method of inserting an acrylic liner will suit you perfectly.The process of self-restoration in this way takes no more than three hours, and you can use the bathroom the very next day.


In addition, the liner made of durable sanitary acrylic significantly reduces the thermal conductivity of the bath, as a result, the water cools very slowly.
For the best result, it is important not only to choose the right size liner, but also to correctly distribute the adhesive composition (foam and sealant from Henkel). bath measurements bath measurements bath measurements
bath measurements bath measurements bath measurements
Step 1. Armed with a screwdriver and a grinder, we dismantle the strapping elements.
Dismantling the strapping
Step 2. Preparing the bath to install the liner. We clean the entire surface with sandpaper, a grinder, remove debris with a vacuum cleaner and degrease the surface. Wipe any drops of water dry. This measure is necessary to improve the adhesion of the adhesive foam to the plumbing.
Step 3. The liners are transported with a technological edge, which we carefully cut with a grinder before installation.
Step 4. After the edge is cut, insert the liner into the bath and mark the technological holes. To do this, draw circles with a marker, sticking your hand under the bathtub and circling the drain and overflow holes.
Acrylic insert in the bath
Step 5. According to the marking, we drill technological holes.
Step 6. Apply two-component foam and sealant. We insert a bottle of sealant into the gun and distribute it around the drain and overflow holes. Next, we take the foam, we introduce a special composition into the balloon with a syringe, which will not allow it to swell excessively.From bottom to top, we apply foam in stripes to the bottom, walls, sides of the vessel being restored.
Foam application
Step 7. We insert the acrylic liner into the bath, gently press it with our hands, leveling it. Remove excess sealant and foam.
Installing the liner
Step 8. We make the installation of the siphon (strapping).
Step 9. We fill the bath with water so that the foam, while solidifying, does not force out the light liner. The next day, you can drain the water and use the updated bathroom.
Fill the bath with water and leave for a day
In your free time, you can install a decorative screen under the restored bath, as well as protective bumpers on the edges that come into contact with the walls.
Before starting hygiene procedures, do not forget to remove the protective film from the insert.
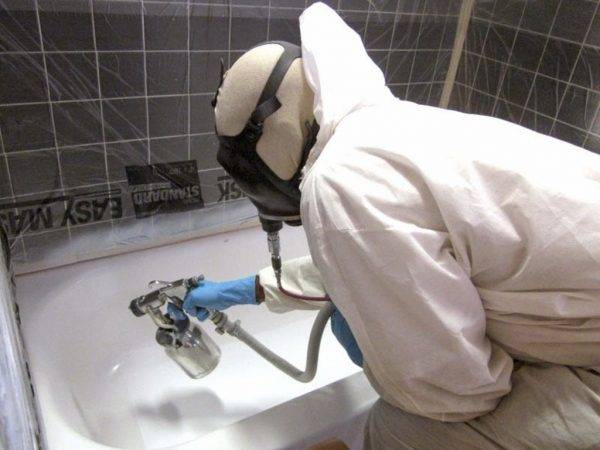
With the help of a balloon
This is a less durable option. With such a repair of the bath, it is guaranteed to last only a year, and then problems may begin again in the form of yellow smudges and chips.


It is not recommended to paint the bath with a spray can for beginners. Must have experience with similar painting work. Otherwise, the result can be very sad.
 Shake the bottle beforehand: its contents will become uniform in consistency due to the metal ball inside
For professionals, this method of painting has a number of advantages:
- the employee does not need additional tools and equipment;
- spray paint dries faster;
- using a spray can achieve a perfectly flat surface - stripes and relief will be excluded.
In addition, the choice of paints in cylinders is very wide, and they are suitable for bathtubs of any material.As for the technology, everything is simple here: painting the bath must be carried out strictly according to the instructions attached to the can.
All work is carried out in a respirator. At the very beginning, the craftsmen paint the most difficult places - the hard-to-reach surfaces of the sides. Next, you can proceed to the sides and bottom of the bathroom.
To get a quality result, it is important to remember some rules for spray painting:
during operation, it should be at a distance of approximately 10 cm from the surface to be painted;
painting should go smoothly and in no case stop;
skipping sections and leaving something for later is strictly prohibited, since such squares and rectangles will stand out against the general background;
it is important to prevent smudges, because to eliminate them you will have to interrupt the painting.
It is advisable to apply up to 3 layers of paint. This is done as the layers dry. Non-professional craftsmen are not advised to rush the process - the better the lower layers grab, the longer the new coating will last. By the way, the layers should not be too thick. After all, the thickness of the paint will not affect the quality and the degree of adhesion.
For those who are going to paint the bathtub with a spray can, it is better to immediately take one in reserve in the store. Often, even with the most accurate calculations, just one is not enough. And while painting the bath, there will be no opportunity to interrupt the process and go to the store again, alas.
After painting the bath with a can, as with other methods of painting, it is recommended to close it for a day. The paint should harden as hard as possible.
 Covering the bathtub with a new layer of paint will make its surface more resistant to microorganisms.
To prolong the life of the bath, the main thing is to take care of it and remember the simplest rules:
- never soak laundry with detergent in it;
- do not wash it with aggressive detergents;
- do not leave the bath filled with water for a long time.
Replacing a bathtub is an expensive pleasure that not every family can afford. What's more, such a move will also entail the start of a major renovation of the entire bathroom, which will result in much more spending and create many additional problems. Therefore, painting is the best option in all respects: it will save the budget, the bathtub will delight you with an excellent view and will last for many more years.
Painting a cast iron bath at home
Restoration of a cast iron bath should be carried out in the following cases:
- If there are mechanical damages or various types of cracks and chips on the surface.
- Yellowed enamel due to improper care.
If you decide to restore the bathroom by painting, then you should take into account its advantages and disadvantages.
The main advantages of self-painting the bathroom:
- Paint is much cheaper than buying new plumbing and installing it.
- Due to the rich assortment of various colors and textures, you can choose exactly the tone that fits perfectly into the interior of the bathroom.
- You have the opportunity to carry out the painting process yourself without the involvement of outsiders.
- This procedure does not require much time and physical effort.
Minuses
Unfortunately, in addition to the advantages, there are a number of disadvantages:
- Before interior painting, it is necessary to carry out a number of preparatory work - leveling and priming.
- The need to treat all surfaces with an antifungal agent.
- Unpleasant and pungent smell of paint.
- The chips remain quite visible.
Choosing a paint
High-quality painting of a cast-iron bath at home depends entirely on the paint you choose. To date, the best option is to use an enamel spray, which greatly simplifies the painting process.


Also, when painting, acrylic is often used. It is very easy to use, so even a non-professional can work with it. This is due to the fact that acrylic paints spread over the surface in a uniform layer, so the thickness of the coating will be the same everywhere.
To date, for painting a cast-iron bath inside, the following coloring mixtures are the most popular:
Jobi. This is a fairly high quality and durable paint. Due to the fact that it has a moisture resistant property, it is an ideal option for the bathroom. Its main advantage lies in the budget price position.
Tikkurila. One of the most famous brands. In this case, it is better to choose Luja, since this mixture contains not only paint, but also a primer.
dulux. It is a leader among manufacturers of paint and varnish coatings
For bathroom painting, you should look at “Dulux Reallife Kitchen & Bathroom”.
It should also be taken into account that the materials used for painting the inner and upper surfaces differ significantly from each other.
How to paint a cast-iron bathtub outside?
For these purposes, it is better to use alkyd-based materials that have a thick consistency.
Alkyd coloring mixtures have a number of advantages:
- Given that the outer surface of the bathroom is not so exposed to moisture, such mixtures are quite durable.
- Low price point.
- Ease and speed of application.
- Dries out within a day.
Required inventory
In order to paint a bath at home, you will need the following materials and tools:
Roller or brush;
- Drill;
- Sanding nozzle;
- Paint knife;
- Tweezers;
- Acetone or special solvent;
- Rags (it must be lint-free).
Stage 1. Preparatory work
Before you paint the bath at home, you should carry out a number of preparatory activities. This is necessary so that the paint sets well and lies evenly:
We clean the surface. This should be done with alkali chemistry. After using it, rinse well and wipe the surface dry.
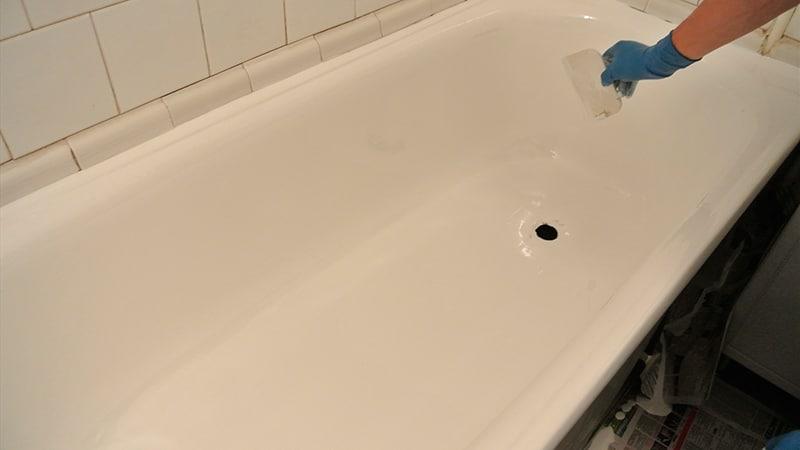
- Removing the top layer. You can remove the entire enamel or just the top layer - this is purely your choice. This procedure should be carried out using an electric drill with a grinding nozzle.
- Clean the tub again and dry it naturally or with a hair dryer.
- Already on a dry surface with a roller, apply a primer.
Stage 2. The staining process
After the primer has completely dried, you can begin the process of painting the bathroom:
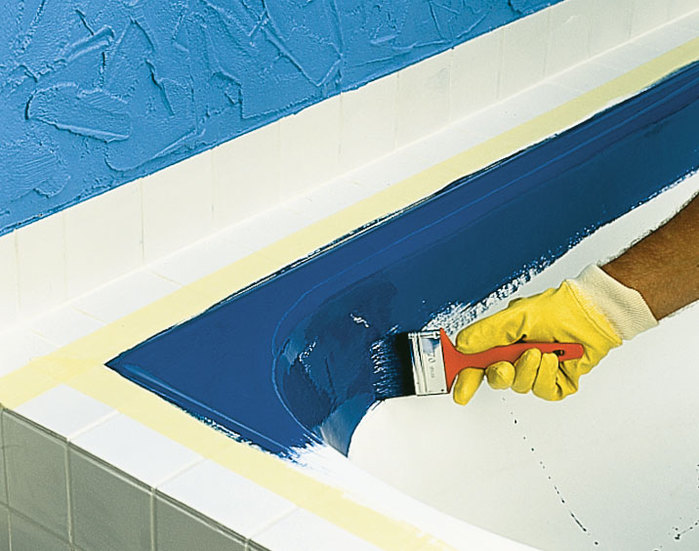
- First, paint over the sides by applying a thick layer of paint on them, after which it will gradually drain.
- The side walls of the bathroom must be painted in the same way, only taking into account the previously applied layer.
- Your next task is to evenly distribute the paint around the perimeter.
Stage 3. Drying
After you have finished, the bathroom should be closed for 10 to 24 hours to dry. This is necessary so that various contaminants and villi do not get on the painted surface.
Consider also other options for how to restore a bath at home.
Briefly about enamels
Kinds
Acrylic (latex) paint is the main component of acrylic. Also applies to two-component coatings.
In most cases, to restore the coating of the bathtub with acrylic, a bulk method is used.
Alkyd enamel - contains components such as alkyd resin, organic solvent, vegetable oils and auxiliary ingredients.
Advantages and disadvantages of enamel coatings
| Dye | Epoxy | Acrylic | Alkyd |
| Advantages | Even coverage. High resistance to aggressive chemicals. Doesn't thin out. Suitable for metal and cast iron | Holds color for a long time. Resistant to all sorts of damage (shocks, chips). Low thermal conductivity. Suitable for steel, cast iron, acrylic | Non-toxic. Retains color for a long time. It is applied to all types of a covering and ceramics. |
| Flaws | Toxic. The finished solution quickly hardens. There may be smudges during application. Loses whiteness quickly. | Toxic. Big expense. Do not use detergents containing acids and alkalis. Improper application may damage the integrity of the coating. | Perfect surface preparation required. Big expense. Application is difficult. |
All types of paints are produced in aerosols. Their main advantage is easy, fast, uniform application that does not require special skills. Loyal price.


Minuses
The main disadvantage of aerosol enamel is a thin layer and a limited range of colors.
It is worthwhile to approach the choice of enamel in spray cans for the bathroom carefully.
Ways to restore the coating of the bath
The main methods of bath restoration:
- applying a new layer of enamel paintwork to the inner surface;
- painting with liquid acrylic;
- installation of a special acrylic liner inside the container.
To deal with the issue of restoration, you need to know the features of its structure and production. The enamel coating of steel and cast iron surfaces is in many ways similar to the glass poured inside the font. The strength of the layer is quite high, it withstands small impacts that can periodically occur during transportation and installation indoors.
When painting in production, it sequentially performs several operations:
- Grinding castings with abrasive wheels of different grain sizes.
- Puttying existing defects and shells.
- Removal of grease stains and dirt.
- Phosphate treatment in order to obtain a phosphate film that creates high adhesion to the primer and subsequent dyes.
- Primer with organic paints.
- Coloring with dyes based on liquid glass. For white paints, magnesium carbonate is used. For a blue tint, cobalt oxide is used, and for green, copper oxide is added.
- Sintering of paintwork in ovens at a temperature of 850 ... 870 ° C for one and a half to two hours.
As a result of high-temperature processing, the vitreous component of the dye is released into the outer layer, creating a gloss. It is the upper part of the paintwork that is the enamel. Of course, it is impossible to reproduce such a process in an apartment or a private house, since it is difficult to imagine the presence of a kiln outside the enterprise.


