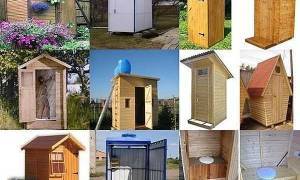
- Closets without a cesspool: the main varieties and their features
- Requirements for seats in the country toilet
- Country toilet and shower project under one roof
- Preparation of the base for construction
- How to make a toilet in the country with your own hands: a drawing and step-by-step instructions for creating a peat toilet
- How to build a country toilet with a cesspool with your own hands: dimensions, drawings, manufacturing instructions
- What you need to work
- The device of a cesspool for a toilet in the country
- Do-it-yourself country toilet: step by step instructions from a to z
- How to install ventilation ducts in a country toilet with your own hands: photos and drawings
- Drafting
- play closet
- How to make a country toilet with a cesspool
- Country sewerage scheme
- Volume calculation and material selection
- Pit arrangement
- What are country toilets without a cesspool
- What is it: country peat or dry toilet
- What other toilets are there for giving without smell and pumping
- Tires are a popular gardening material
- Cement Garden Crafts
- Paths on site
- We make flower beds and flower beds
- Shower with a cabin made of wooden beams and car tires
- Shower room from corrugated board
- Summer shower from a metal frame with a swing door and a polypropylene awning
- Foundation or supports
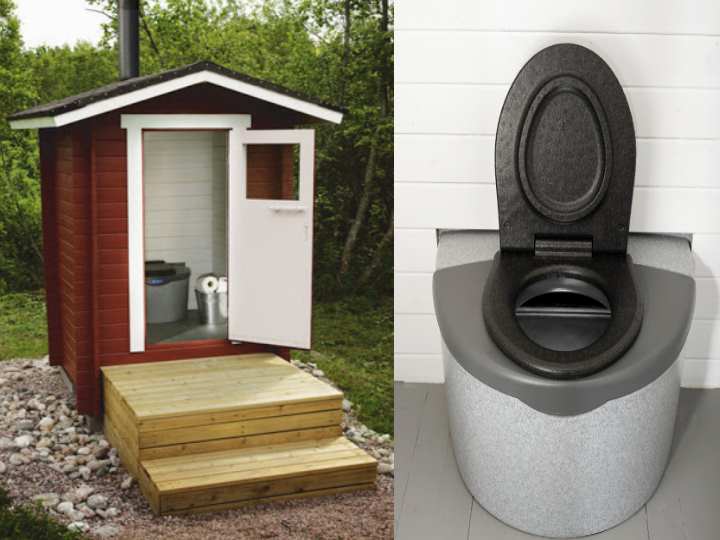
- How does this dry closet work?
- Backfill products
- Faction division
- Ventilation device
- Toilet in the country without a pit
- The main stages of installation of summer showers and commonly used materials
- Shower room from a metal pipe with 2 sections
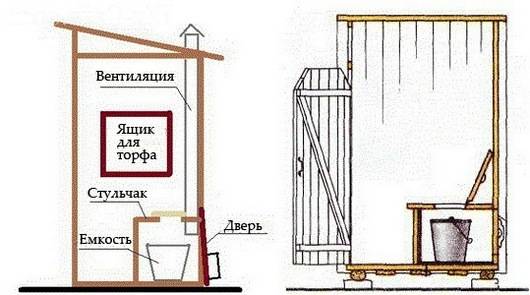
- The device of a country powder-closet
Closets without a cesspool: the main varieties and their features
A sewer pit is considered the simplest and most budgetary way to solve the problem with a toilet in a personal plot. But even in this case, there are limitations in relation to structures of this type. The installation of pit latrines is limited to the following conditions:
- the soil of the summer cottage consists of limestone or shale soil;
- groundwater passes too close to the surface;
- toilets are expected to be used by a large number of people.
All these factors do not allow organizing a toilet based on a cesspool on the territory of a suburban area. The way out of this situation will be the construction of latrines of a completely different type, based on a different principle of action.
Requirements for seats in the country toilet
A do-it-yourself seat in a country toilet must meet the following requirements:
- Convenience is above all. A person sitting on such a seat should not feel discomfort, for this you need to take into account several parameters - the height of the pedestal and its shape.
- Structural strength and reliability. To make a pedestal with your own hands, you need to take into account the weight, or more precisely, such a structure should easily support the weight of not only a child, but also an adult. Therefore, when choosing materials for the construction of a pedestal, it is necessary to take into account not only aesthetic qualities, but also practical ones.
- Hygiene.If the podium is made of wooden beams, then they definitely need wood impregnation and varnishing. It is necessary to process both internal and external surfaces, this will greatly simplify the process of cleaning and processing the podium. In addition, the structure must be treated with antimicrobial and antifungal agents.
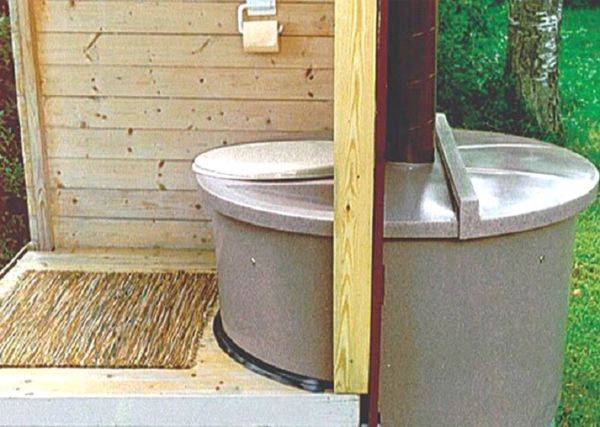
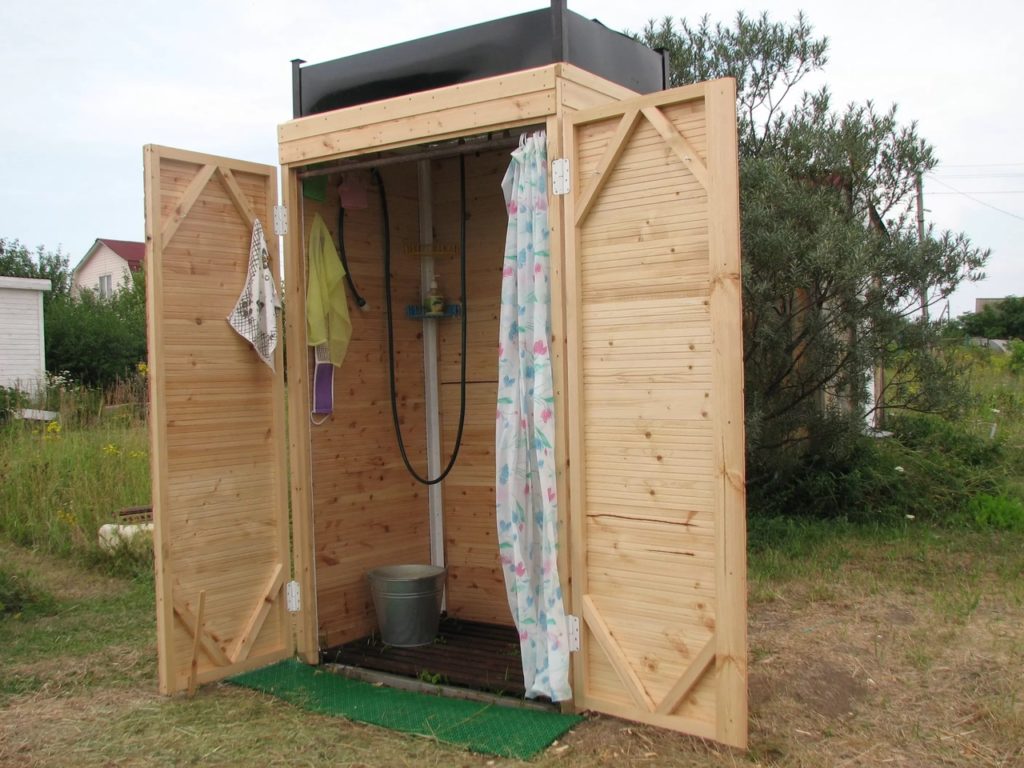
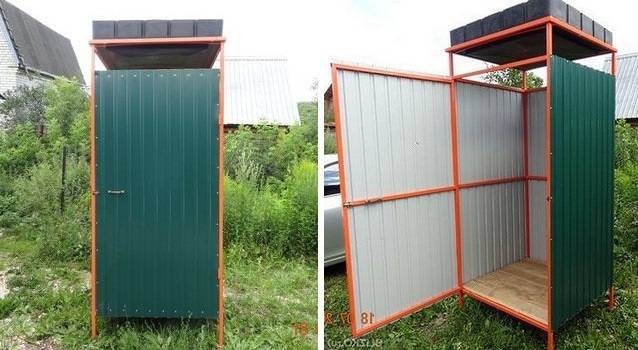
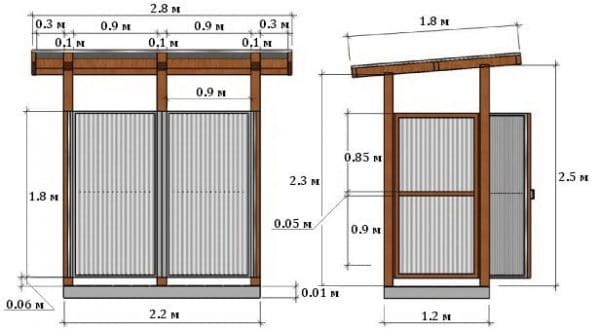
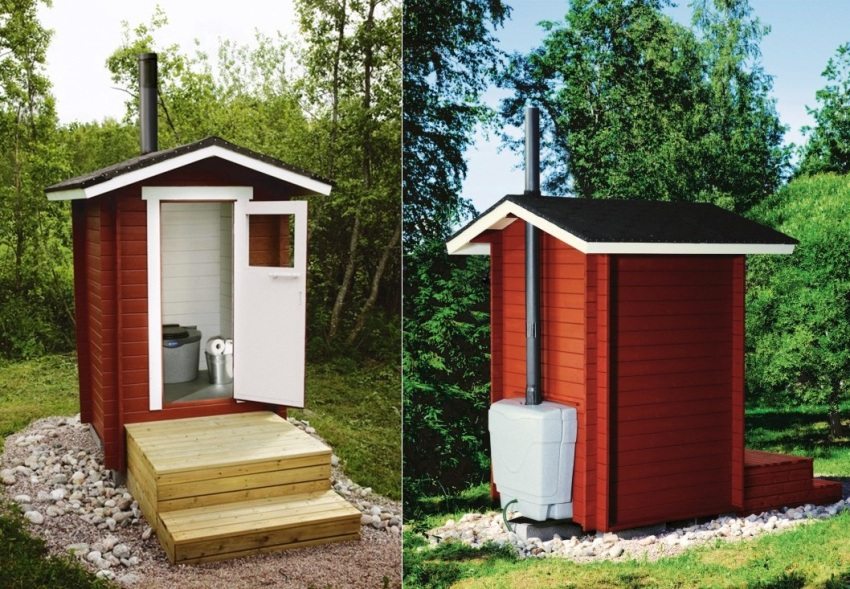
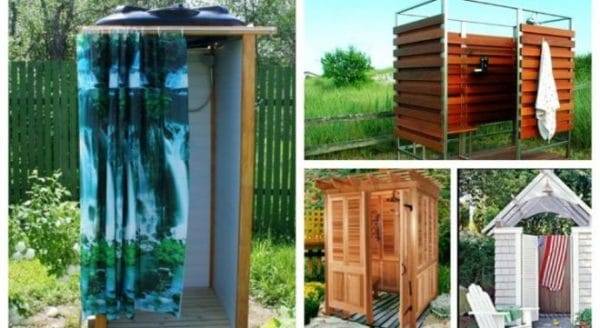
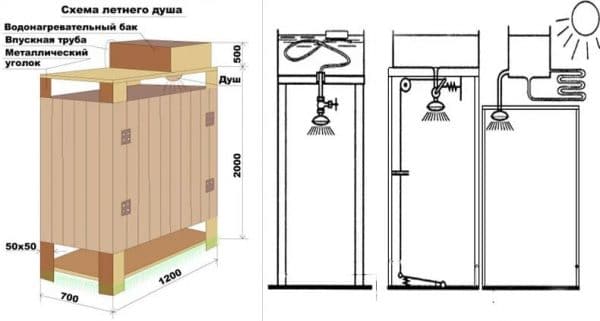
Country toilet and shower project under one roof
A toilet is good, but a toilet with a shower is even better. Both of these buildings create the comfort needed in a summer cottage. By combining these designs, you can save a little on material. Consider a project country toilet with shower and its execution.

The toilet with a shower has a common wall: this will help save on building materials
The proposed diagram shows that the toilet and shower have a common wall. This is the cost of building materials. This project is designed for the installation of a dry closet.
If a cesspool is used, the scheme is slightly modified.
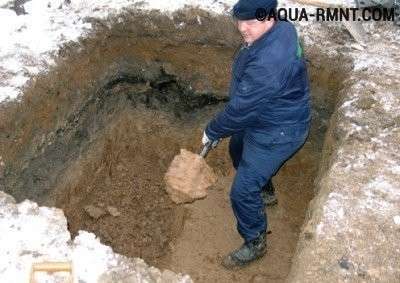
For the construction of such a structure, they first dig a foundation pit and strengthen its walls, and only then proceed to the construction of the building itself.
Preparation of the base for construction
First of all, a square section pit with a side of 4 meters and 0.3 cm deep is dug out for construction and covered with gravel somewhere at 0.2 m.
After careful tamping of the foundations, the formwork of wooden panels for the foundation is knocked down for a foundation 0.3 m wide and 0.5 m high.
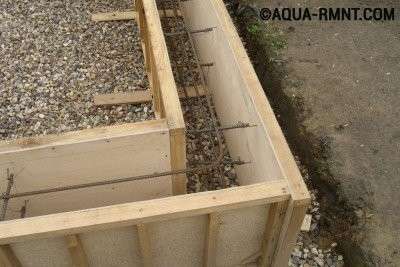
To make the foundation stronger, it is necessary to reinforce it.
Sand-cement mortar is prepared and poured into the formwork.
Crushed stone is used as a filler. When the concrete sets, the boards are removed and the defects are covered with mortar.
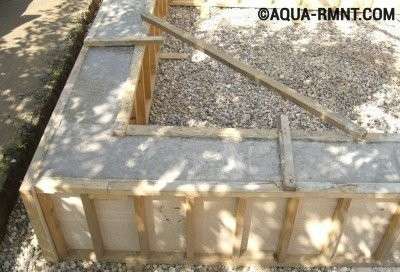
After the formwork has been removed, the defective areas are sealed with mortar.
The next step is the installation of sewer pipes.
How to make a toilet in the country with your own hands: a drawing and step-by-step instructions for creating a peat toilet
Peat toilets are no less popular among summer residents, as they can offer many advantages to many owners of suburban areas. The method of sprinkling waste with a peat substrate is justified by several advantageous advantages at once:
- Peat has a good absorbency in terms of odors. With it, you can forget about the unpleasant moments associated with the operation of the restroom on the street.
- Due to the high level of hygroscopicity, the substrate absorbs moisture well, so that the frequency of cleaning the drive can be reduced. In other words, the toilet can be used for a longer period of time without the need to empty the storage tank.
- The processed mixture can be used to fertilize the site, since peat, even in its pure form, contains bacteria that help turn organic waste into nutrient compost for the soil.
How to build a country toilet with a cesspool with your own hands: dimensions, drawings, manufacturing instructions
A toilet with a cesspool is a more familiar option for giving us. We will tell you in more detail how to build it correctly, consider all the stages of work.
What you need to work
Before you make a street toilet, you need to prepare:
- edged board;
- a metal barrel for a pit;
- cement-sand blocks 25 × 18 × 19 cm as a base;
- beam 40 × 60 mm;
- corners, self-tapping screws;
- waterproofing;
- building level;
- corrugated board;
- waste oil.
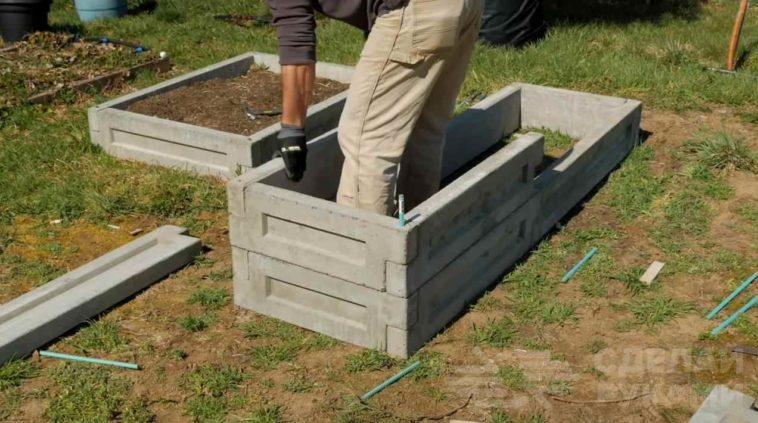
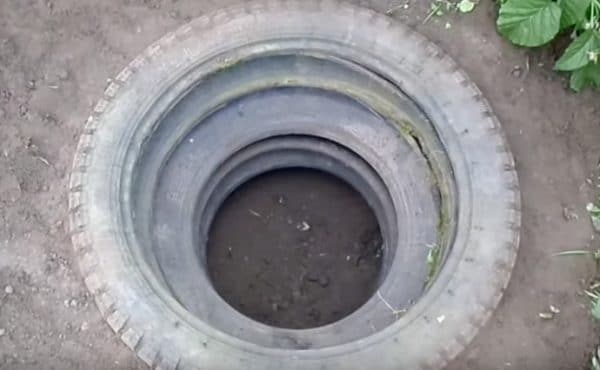
The device of a cesspool for a toilet in the country
The construction of a toilet in the country with their own hands begins with a cesspool, each owner independently chooses a more convenient option for himself.
| Illustration | Action Description |
|
| From car tires. You need to pick up several tires of the same diameter and dig a hole a little larger. You can fill the bottom with a layer of gravel, and fill the wall with pebbles and broken bricks |
|
| From brick. First you need to dig a hole 1 × 1 m² or 1.5 × 1.5 m², the bottom can also be concreted or covered with a layer of pebbles |
|
| Install a plastic tank, sprinkle with soil, put a toilet on top |
|
| Install concrete rings, their installation will require the involvement of a crane |
|
| Pour a monolithic structure |
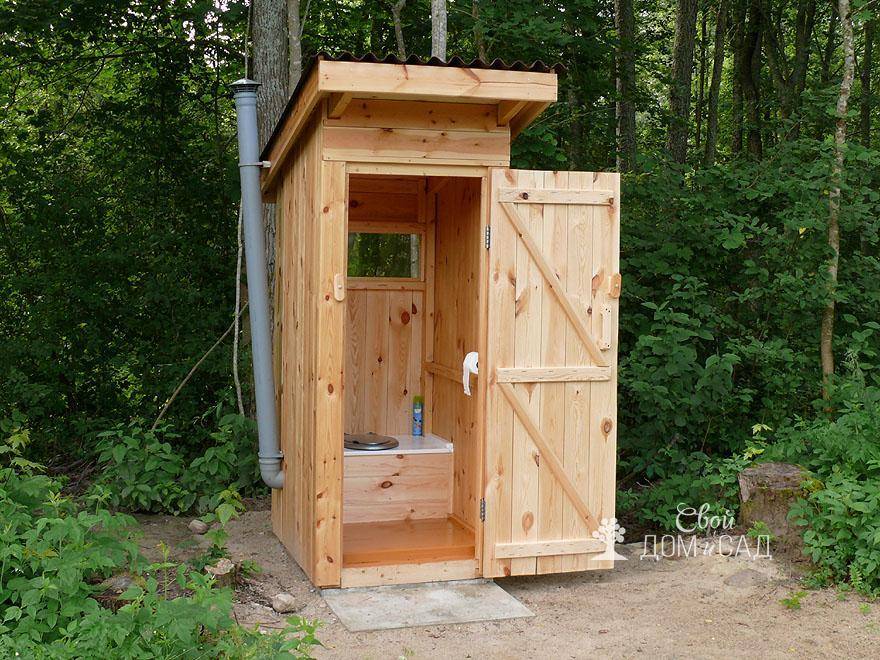
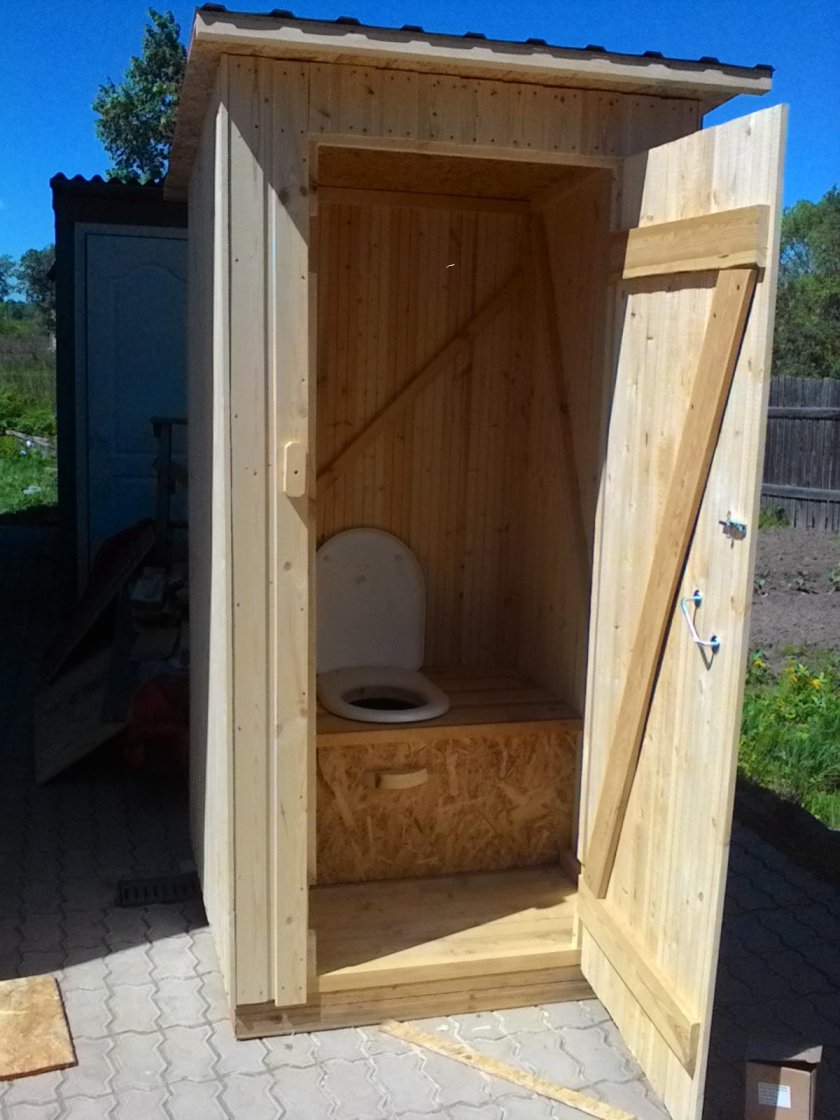
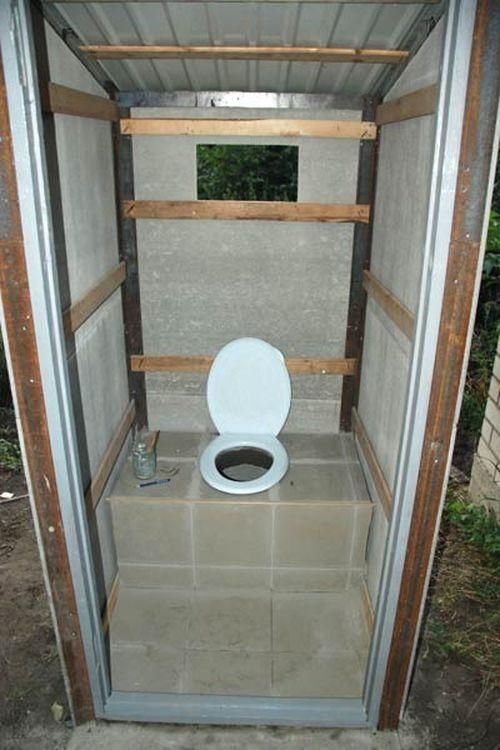
Do-it-yourself country toilet: step by step instructions from a to z
We propose to build a small and very simple country toilet with a pitched roof with our own hands. Step-by-step photo descriptions will help in the work.
| Illustration | Action Description |
| Make markings on the ground according to the diameter of the barrel and dig a hole. Remove the bottom and top from the barrel, install it in the pit and sprinkle with soil | |
| Fill voids with cement-sand mortar | |
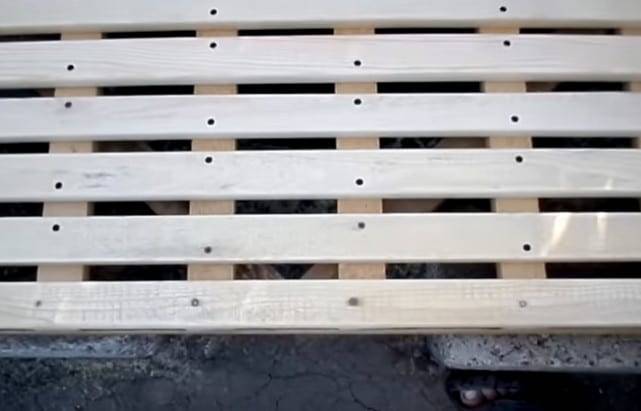
| For the bottom trim, take a board 100 × 50 mm and connect it with mounting brackets. Be sure to check the diagonals | |
| Strengthen the structure with self-tapping screws from the outside | |
| Cover the boards with used machine oil, which will prevent the wood from rotting, in addition, it has water-repellent properties | |
| After the oil has been absorbed and the solution has hardened, mark the toilet and level the surface | |
| Under the foundation blocks, make markings on the ground, dig holes about 30 cm deep, tamp the soil and fill in the rubble | |
| The installation of each block must be checked with a level | |
| Cut waterproofing on each block, lay the first piping line on it | |
| Prepare the boards for the second strapping line, coat them with machine oil, lay them on the first layer and screw them to the base | |
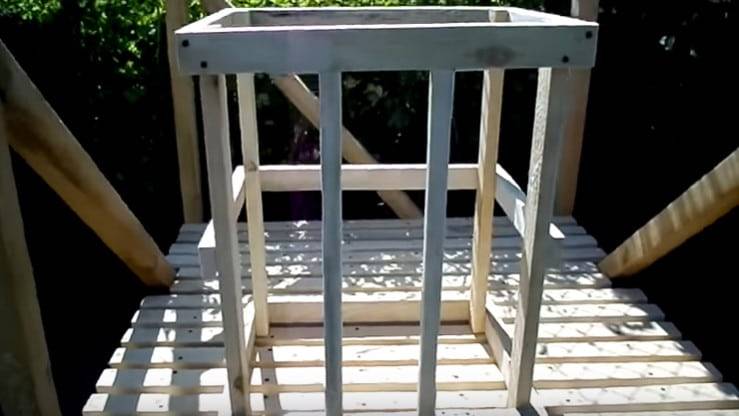
| From a bar 40 × 60 mm, install vertical racks on the corners | |
| At a height of 90 cm, fix the corners, lay a horizontal beam on them | |
| Mount the toilet frame. Jambs can align the verticality of the racks | |
| Before laying the floor, it is necessary to fix 2 additional beams to the strapping and coat them with used oil. Then screw a board 25 mm thick onto the screws. The size of the hole turned out to be 24 × 36 cm | |
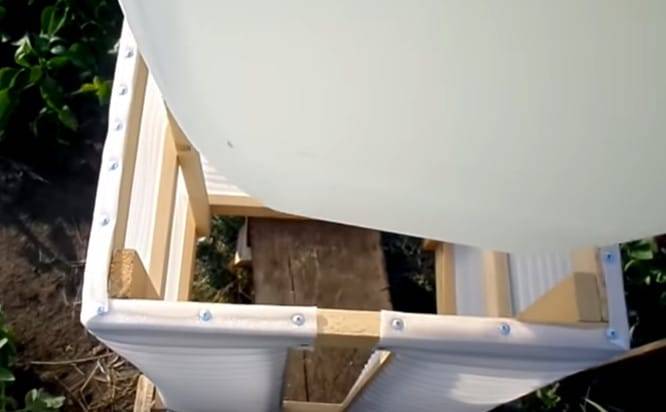
| Sheathe the frame of the toilet from the outside | |
| For the door frame you will need a bar 40 × 60 mm, for sheathing - a board 25 mm thick | |
| Coat all boards with used oil | |
| Fix corrugated board on the roof, close the foundation with a board painted with used oil, and sprinkle with earth |
In more detail, the entire master class can be viewed on the video:
Watch this video on YouTube
How to install ventilation ducts in a country toilet with your own hands: photos and drawings
For a small structure, natural ventilation is sufficient, this is the easiest and cheapest way to establish additional air exchange for both the main zone and the pit.
For a pit, a PVC pipe with a diameter of 11 cm or more is perfect, which should be fixed vertically.
The upper part should be 0.2 m higher than the roof. Some distance must be left between the lower boundary and the waste so that draft occurs. If you follow these recommendations, the air exchange will be excellent for the timely removal of methane from the tank.


It is easy to install a plastic pipe with your own hands, you should definitely fix a deflector on the top, thanks to which the system works much more efficiently, in addition, it will prevent water from freezing on the structure. If you choose a model with a weather vane function, the flow rate will be increased.
For more information about installing ventilation in a country toilet, see the video:
Watch this video on YouTube
Drafting
There are several tips:
- Do not make a wooden toilet too low. A tall, sexually mature person, while inside, should not touch the ceiling with his head. This rule can be attributed not only to the ceiling, but also to the front door - it should not be too low.
- The ceiling is made (approximately) half a meter above the level of the door. We can say that such an input will be overpriced, but it is not.
- The "reference" can be the size of the front door to an apartment, house - it is convenient to pass through such an opening. The door should be upholstered with a seal - protection from wind, cold and noise. Isolate noise - bring comfort!
- A wooden toilet should be done soundly, you should not save material.
- Banal advice, however - a dug hole (as unnecessary) can be covered with earth, and the structure can be moved to another place.
An experienced summer resident understands that winter brings not only the New Year and joy, but also a lot of snow. It will put pressure on the roof, and the autumn parting of snow can “tear down” the walls and turn into disrepair the place that people visit several times a day. When making a drawing, it is worth planning it, taking into account the temporary features of the weather!
We hope these tips will help and your vacation in the country will become even more comfortable and inspiring! Good luck!
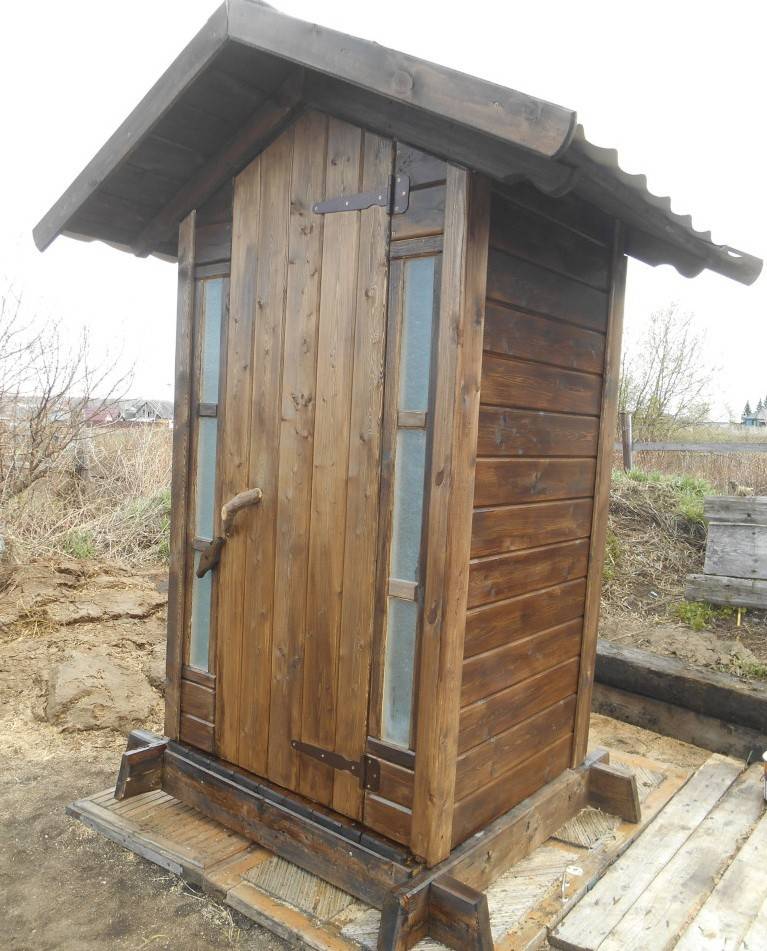
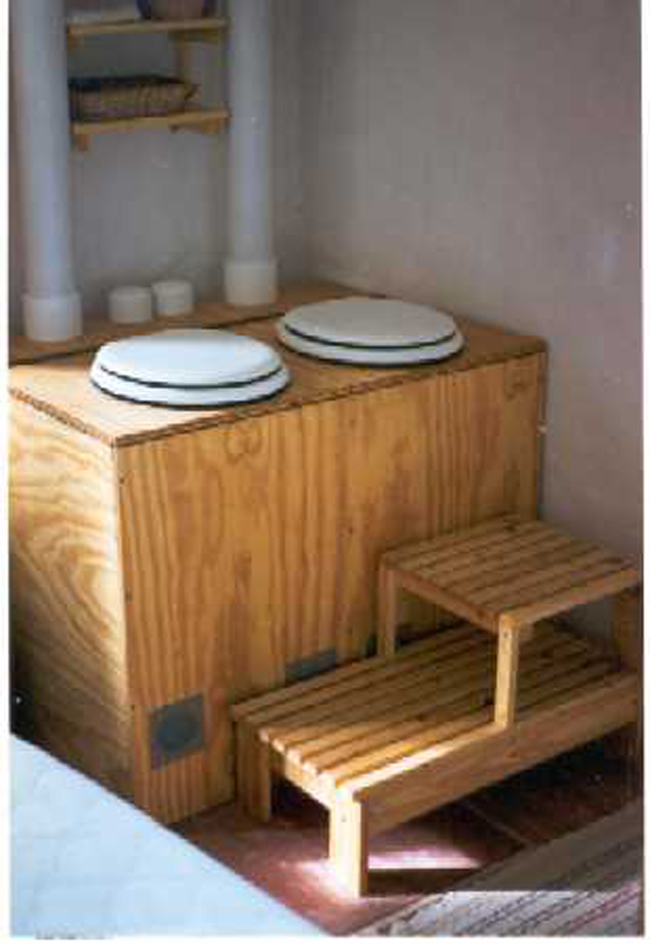
play closet
Backlash closet - a type of toilet connected to a sealed cesspool. The otkhodnik is located behind the foundation, with which it is connected directly or by means of an inclined pipe. It is equipped with a hatch through which it is conveniently cleared of waste. The bottom of the container is tilted towards the lid so that waste accumulates next to it
Unlike a traditional pit latrine, a walk-in closet can be installed inside the house. This eliminates the need for additional insulation of the structure. This type of toilet is suitable for permanent use in homes without a sewer connection and is built without the possibility of further movement.
How to make a country toilet with a cesspool
Designing a country toilet looks like this:
- development of schemes and drawings;
- calculation of the volume of the cesspool;
- choice of material and design.
Country sewerage scheme
The scheme of external sewerage depends on the location of the toilet itself. This can be either an isolated room inside the cottage, or a separate cabin on the site not far from the garden house. But the main thing is the choice of a place for storage capacity. The location of the cesspool must meet the requirements of the standards for minimum distances:
- from home - 8-10 m;
- from the fence with the neighboring plot - 2 m;
- from the water supply line - 10 m;
- from the water intake point - 50 m;
- from the reservoir - 30 m;
- from trees (garden) - 3 m.
Also take into account the proximity of the access road for the sewage truck. And although this is a country toilet with an odorless cesspool, during the pumping out of the contents, unpleasant “aromas” will be heard from the pit and from the machine itself.
When choosing the size of the pit, take into account that the bottom of the tank should be no deeper than three meters from the surface.
Volume calculation and material selection
The volume is affected by the characteristics of the effluents and the number of residents. And this volume should not exceed the capacity of the barrel of sewage trucks that serve this area.
If the toilet is in the house and all types of waste will be drained into the container (toilet, personal hygiene, laundry, kitchen), then the daily volume of water consumption per person is taken to be 200 liters. For three residents - 0.6 m3. If the dacha is visited only on weekends and holidays, then the volume of effluents per month will not exceed 6 m3.
To the calculated value, you can add 25% of the reserve for salvo discharge as a result of the arrival of guests - a total of 7.5 m3 during the month. So the car must be called at least once a month. The capacity of barrels of domestic sewage trucks is in the range of 3.25-11.0 m3.
For a country toilet in the yard, you can make a separate fecal sewer with a cesspool near the cabin, and for gray drains (shower, washbasin, kitchen), lay a two-chamber septic tank with a filter well.
In this case, the daily volume for a cesspool for a family of three will be about 100 liters (for each 5-6 visits per day with a cistern volume of 6 liters). And if you put a tank with two drain buttons, then even less. And a cesspool with a capacity of 7.5 m3 will have to be pumped out twice during the entire season.
For this volume, three rings KS20.9 are suitable. The volume of one ring is 2.83 m3, the volume of the entire tank is 8.49 m3.
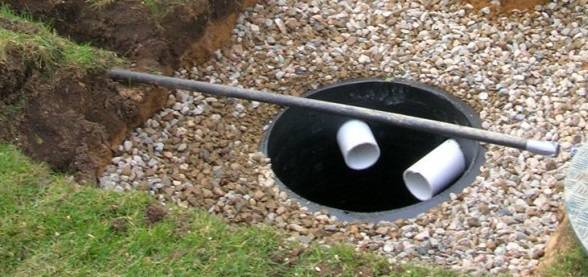
Pit arrangement
The step-by-step algorithm for arranging a pit from concrete rings looks like this:
- Planning a site for a pit.
- Mark the route for pipes from the toilet to the pit.
- Dig a pit and a trench.
- Form the slope of the trench towards the pit at the rate of 2% (2 cm per 1 m). The point of entry into the container should lie just below 30 cm from the top edge.
- Level the bottom of the pit.
- Rammed the bottom of the trench and pit. Fall asleep pillow from a layer of sand and gravel.
- Install the bottom PN20.
- They make rings on top of each other. The seams with the bottom and between the rings are sealed with mortar.
- Coat the rings with bituminous mastic.
- Insert the inlet pipe. Seal the entry.
- Install the ceiling with holes for the hatch and ventilation.
- Mount the hatch and ventilation pipe.
- Backfill around the pit.
What are country toilets without a cesspool
A large assortment of country toilets makes it difficult to choose owners. If you still do not know which type to buy for a summer residence, we suggest that you find out with us all the pros and cons of each model.
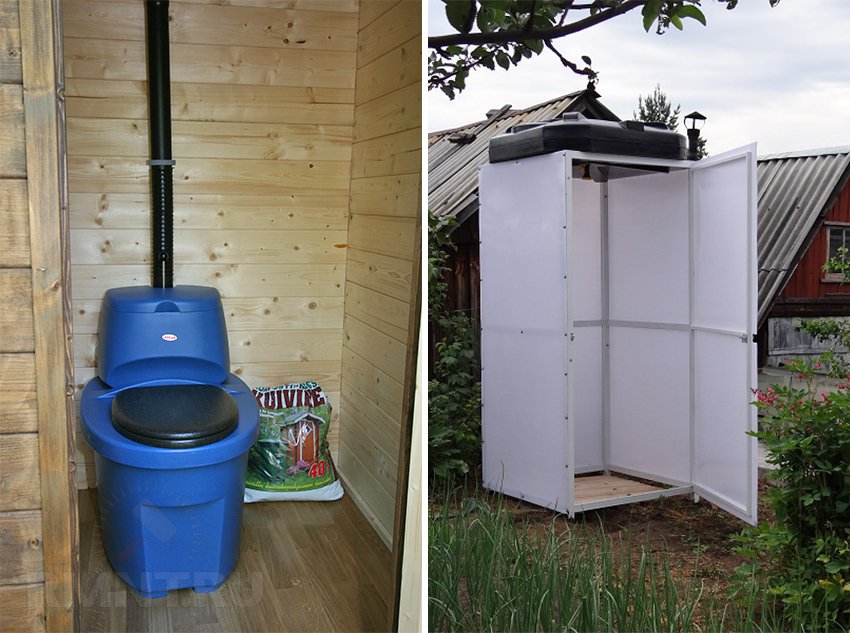
What is it: country peat or dry toilet
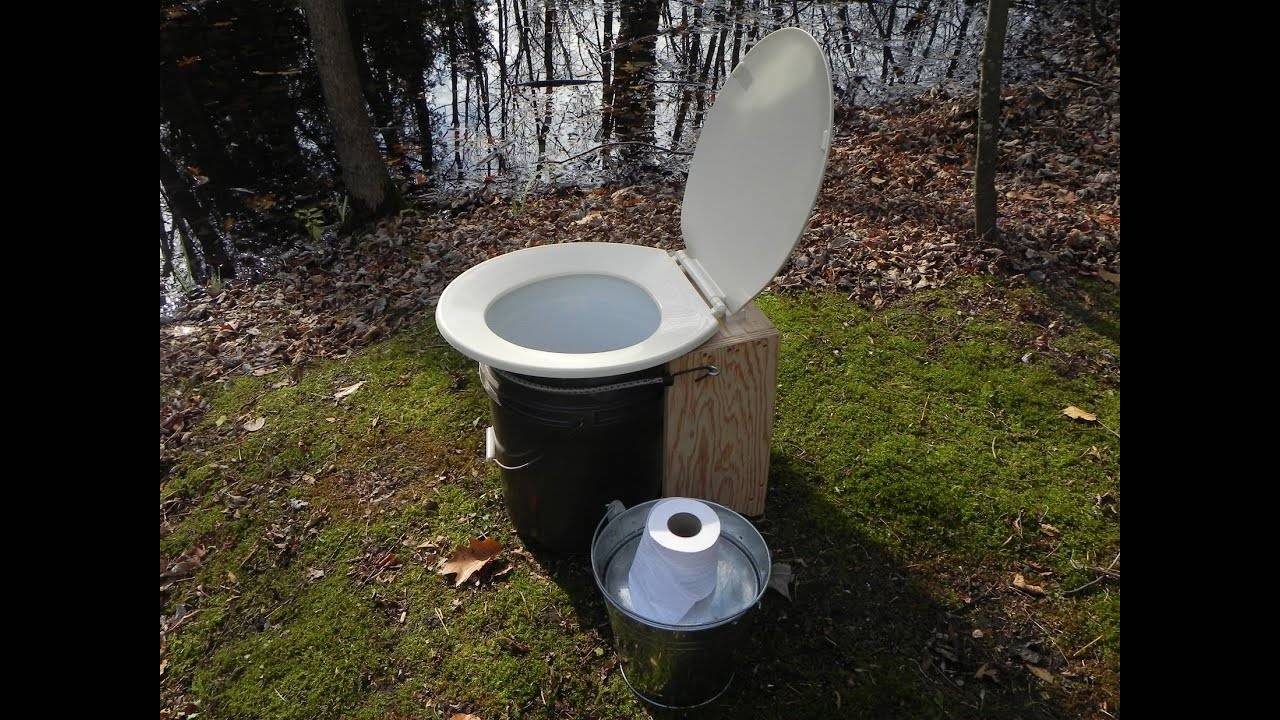
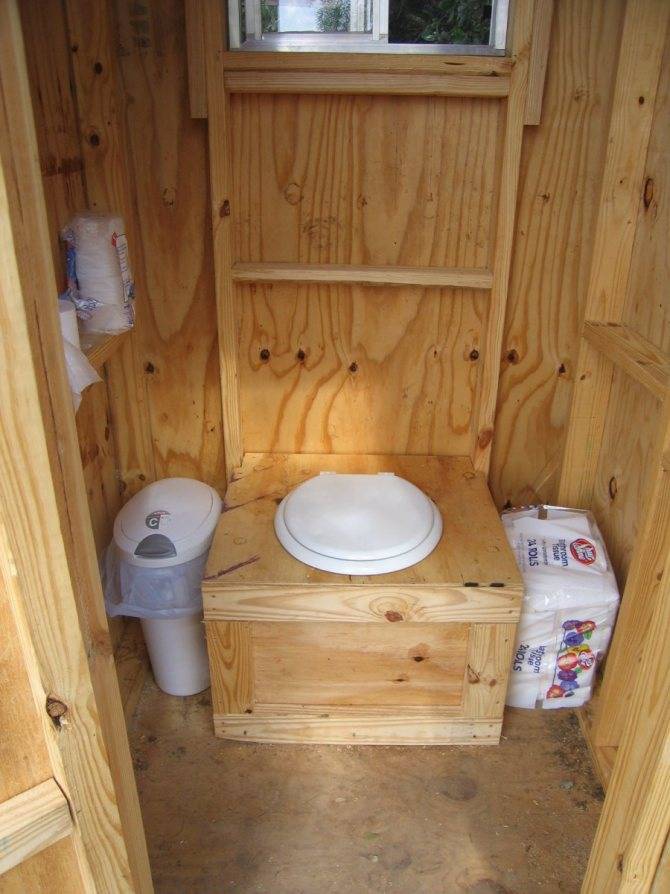
A country dry toilet is the name of an outdoor latrine in which a toilet seat with a lid is placed. Waste products are collected in an easily removable container. Nearby, in convenient access, they usually put a container with peat for powdering sewage.
Of the advantages of a country peat dry closet, the following can be distinguished:
- complete elimination of odor;
- preventing the reproduction of insects;
- many subsequently use waste mixed with dry material as fertilizer;
- this is one of the most budget options;
- such a model can be installed anywhere on the site, since it does not affect groundwater in any way.
The container should be cleaned at least two to three times a week. The contents can simply be poured into a compost pit or tank, in which the contents should be poured again with a mixture of peat and earth.
Dry material in order to save money and to increase the volume can be mixed with the ground of a convenient excavation of the container; a small door is usually made in the back wall of the toilet
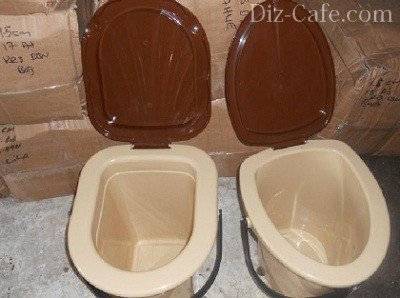
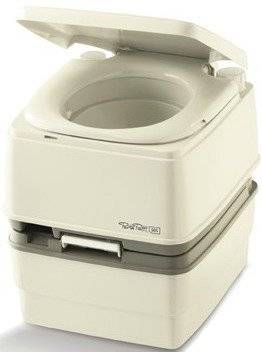
What other toilets are there for giving without smell and pumping
Another good option for giving is a chemical closet, consisting of two modules. The top has a seat, a water tank and a flushing device. The lower one is equipped with a completely sealed waste container, so unpleasant odors are completely eliminated.
When the tank is completely filled, it must be emptied. To do this, you will have to pour the waste into a specially designated place and refill it with water, adding a new portion of the reagents.
We note the following advantages of dry closets:
- compactness;
- ease of installation;
- hygiene;
- high wear resistance.
According to consumer reviews, there is only one significant drawback for a dry closet for giving: constant spending on reagents. The cost of the model directly depends on the volume of the tanks and the availability of additional options, for example, a container full indicator, an electric pump for flushing the liquid.


Modern dry closets look pretty nice. For toilets, it is better to choose biological environmentally friendly reagents.
Not many summer residents know about the existence of electric toilets for the backyard. Modern models consist of two independent containers for receiving solid and liquid waste. Liquids are discharged into the ground or evaporate. It is also possible to connect to the sewer. Solids are dried to a powder state by a compressor.
Let's highlight some of the main advantages of electric models:
- the main advantage of the models is their rare cleaning, you need to empty the tank no more than twice a year;
- containers do not require the use of chemical or biological reagents.
Of the negative features, the high cost and the need for electricity supply for the operation of the tanks should be highlighted. In addition, ventilation will need to be installed for each container.
The device of an electric toilet for a summer residence Solid waste residues after drying with a compressor
Related article:
Tires are a popular gardening material
You can make various useful things for the garden with your own hands, even from old car tires.
From tires for cars, you can make not only classic fences for fencing the territory, but also a lot of other things. For example, garden paths between beds.
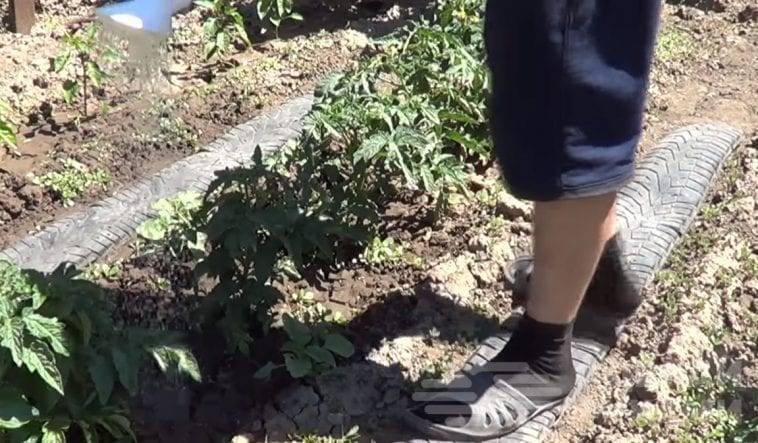
They are good because weeds will never grow under them. And it’s also convenient to walk along such rubber paths between the beds after heavy rain - you don’t have to get stuck in the mud.
And from car tires you can make large flower beds that will serve you faithfully for many years.
Therefore, we take all these ideas into account, and draw up our summer cottage. It will be beautiful and comfortable. Car tires are a cheap material, and getting it is not a problem.
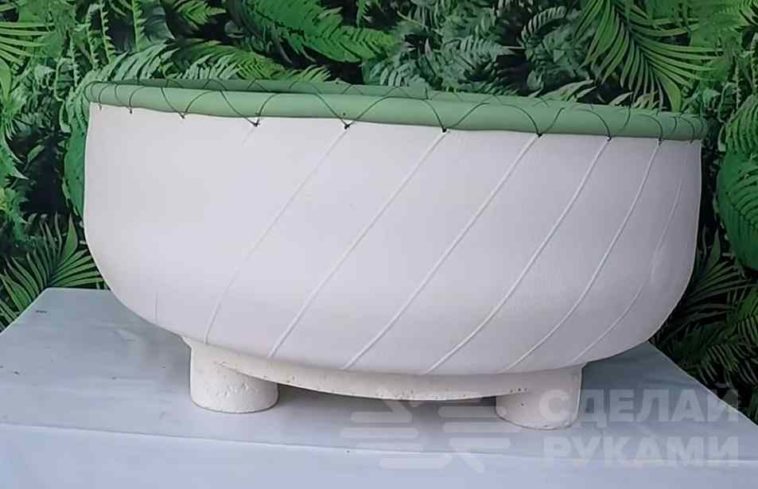
Cement Garden Crafts
One of the easiest and most affordable ways to design a summer cottage is to use all kinds of cement crafts.
In the country, such products can be found very often. Firstly, because they are easy to make with your own hands. Secondly, they are durable and look beautiful, especially if they are painted.
A lot can be done from cement in the country. For example, it can be any unusual decorative figurines or flower beds, pots.

Flower beds and plants in the country can be made both large and small, stationary and portable, and even suspended: on chains or ropes.
All these ideas will certainly come in handy if you plan to equip your garden with your own hands.

Various decorative cement decorations can be made using drawings downloaded from the Internet as a basis. As you can see, creating a beautiful environment in the country is not so difficult.
Paths on site
Cement is a versatile material. From it you can not only create various crafts for decorating a summer cottage and flower beds, but also paths for a garden.
There are a lot of options. For example, you can make a path out of cement that will imitate a decorative stone.
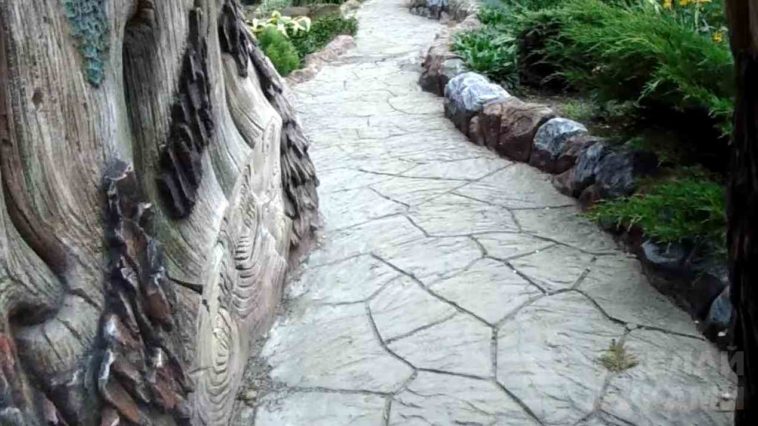
Despite the fact that the process is quite time-consuming, all the effort expended is worth it. Such a path looks very cool, and you can’t immediately distinguish it from natural stone.
You can also make a path from cement mortar and bricks. This option is a little easier in terms of labor costs, but it also looks original.
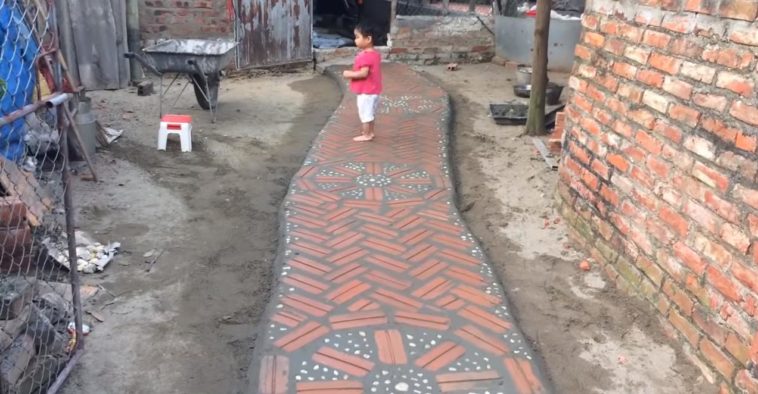
Well, and most importantly, this is one of the budget options, especially if you have stocks of old bricks on the site. In this case, you only need to buy sand and cement.
Country decorative paths can be very different - and on our website you will find only the best ideas. Be sure to look.
We make flower beds and flower beds
Various flowers and garden plants can be grown not only in pots, but also planted in open ground. In such cases, you can make decorative fences.
To make fences for flower beds and flower beds in the country with your own hands, you can use a variety of materials.
For example, decorative fences can be made from cement and plastic boxes for vegetables and fruits. The texture can be different: in the form of bricks or wood bark.
With the help of such fences, you can limit the territory of small gardens and at the same time decorate the summer cottage.
And from the same cement mortar and plastic bottles, you can make very beautiful decorative figures in the form of mushrooms with your own hands, which are ideal for decorating flower beds on the site.

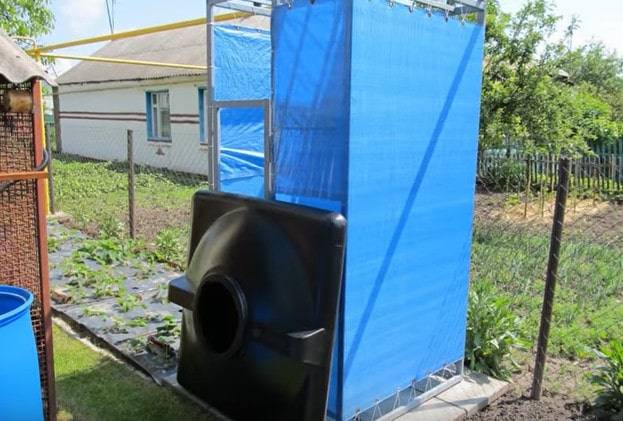
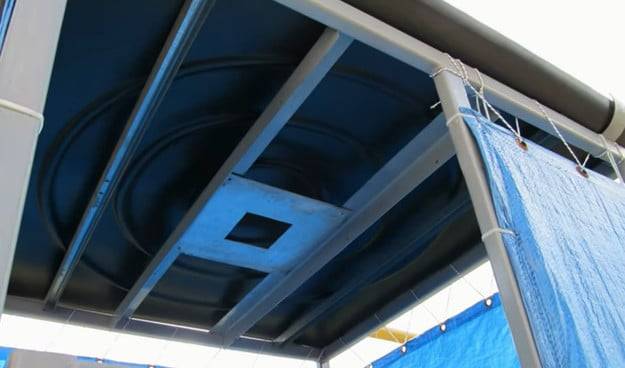
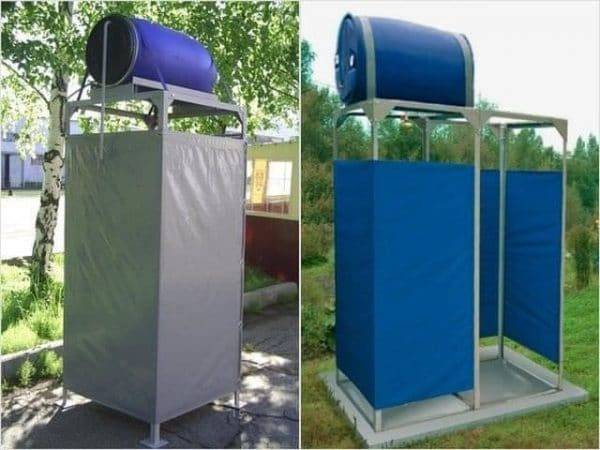
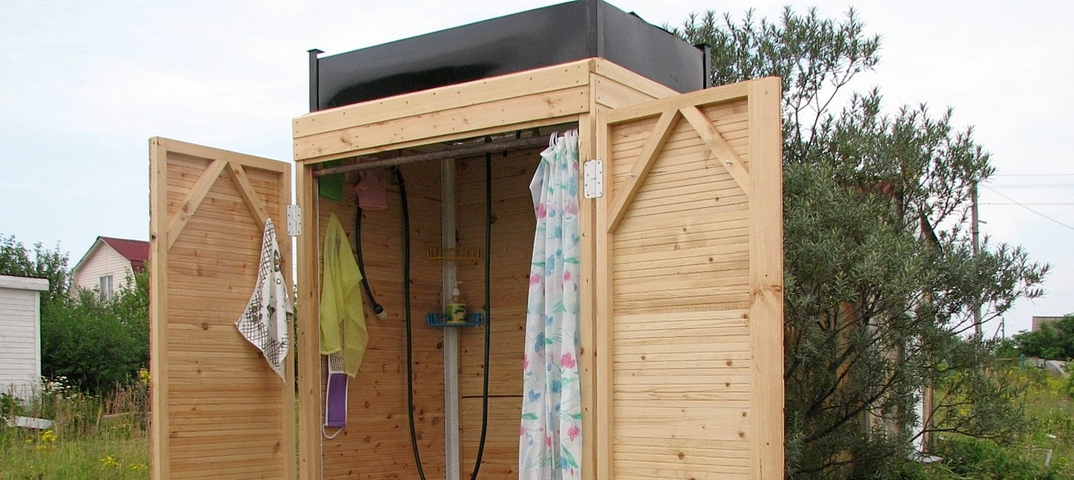
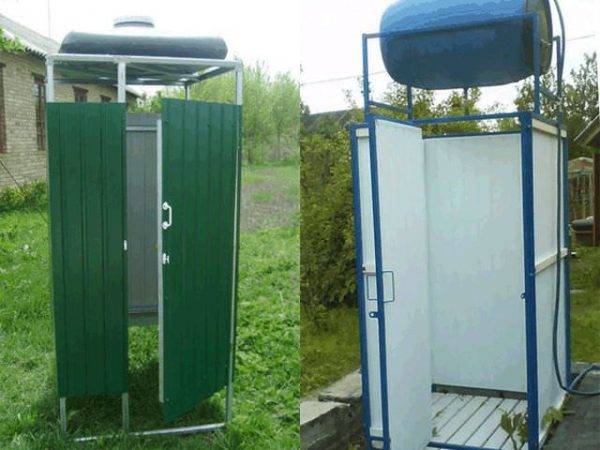
Shower with a cabin made of wooden beams and car tires
The simplest and most comfortable outdoor outdoor shower can be made from a wooden frame and plastic wrap, as in the photo below.
To work, you need the following materials:
- wooden beam: 50 by 50 by 3000 mm - 10 pcs; 20 by 50 by 3000 mm - 10 pcs.;
- mounting angles at 90° - 36 pcs; at 135° - 16 pieces;
- self-tapping screws of different lengths from 1.5 to 10 cm;
- loops;
- polyethylene foam for walls - 10 m;
- profiled sheet;
- car tire;
- water tank for 50 or 100 liters.
You will also need any means for treating wood from decay.
Do like this:
Prepare the cabin frame according to the preliminary drawing. The assembly steps are on the video below.


Dig a hole, install a car tire in it.
On 4 blocks around the perimeter of the pit, install a booth.
Lay the floor from the rail.
Treat the frame with impregnation for wood from decay. After drying, sheathe the booth with polyethylene foam.
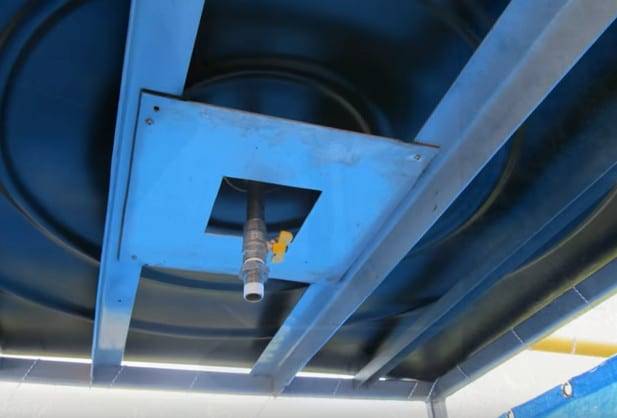
Assemble the frame for attaching the tank. Sheathe it with polyethylene foam, screw it to the profiled sheet for the roof.
Pass the hose, fix the watering can.
Hang up a curtain.
The cabin is ready. It's easy to do and can take 1-2 days.
Shower room from corrugated board
A shower cabin with a metal frame and corrugated walls will last a very long time.It is quite simple to make it, but for mounting the frame you will need a welding machine.
To install the cabin, you need to dig a drain hole and strengthen it if necessary. The cabin is dug into the ground with legs.
To assemble the cabin you need:
- profile pipes 30 by 30 mm for racks 220 cm high;
- profile pipes 30 by 20 mm;
- corrugated board 200 cm.
Do like this:
Cut blanks for racks and crossbars from pipes, weld them. You need to leave 15 cm for the legs, then the total height from the floor to the roof is 205 cm.
- Weld the door frame, put it on the hinges.
- Clean up all joints.
- Prime and paint the frame.
- Lay the floor from the board.
- Sheathe the walls, the door with corrugated board, leaving the windows.
- Roof galvanized.
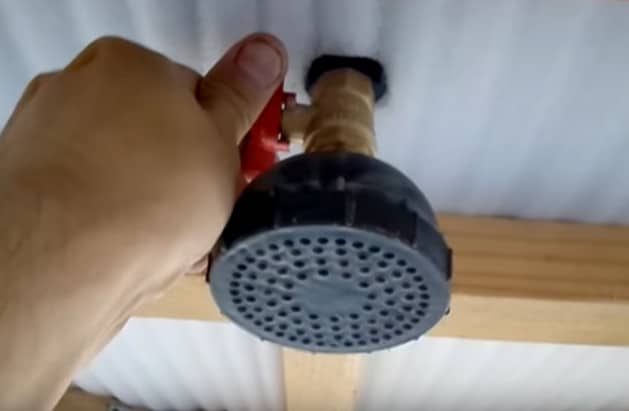
Then you can install the tank on the roof, cut a hole, remove the hose with a watering can. Inside, you can, if desired, wind hooks or make a small shelf.
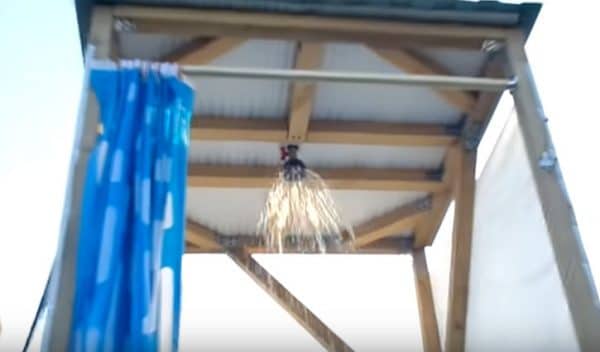
Summer shower from a metal frame with a swing door and a polypropylene awning
If it is possible to weld the metal frame yourself, then you can make a reliable summer shower with an awning. Wall cladding can be changed as it wears, and the frame will last a long time.
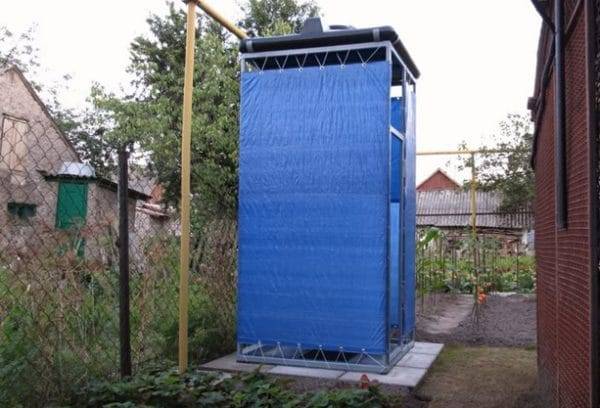
If desired, the cabin can be installed for a long time in one place, then you need to dig a drain hole under it. In this case, you will have to lay the floor or make a pallet with a drain. If there is no desire to make a hole, the booth can be portable with a smaller tank.
For work you need:
- metal pipe 40 by 25 mm;
- polypropylene film with eyelets on the edges;
- tank-roof 115 by 115 cm matte black, so that the water warms up well.
The sequence of actions is as follows:
Cut a metal pipe and weld the frame according to the drawing.
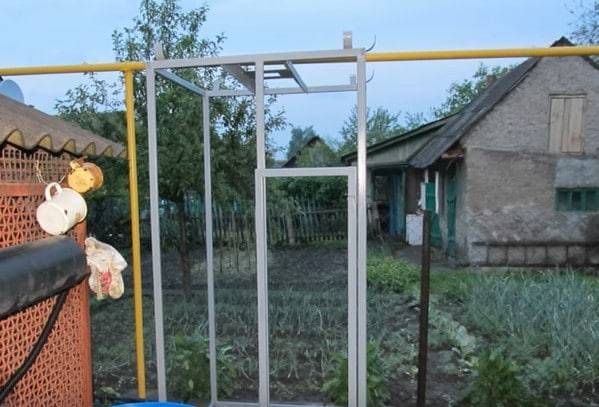
Weld the door and put it on hinges.
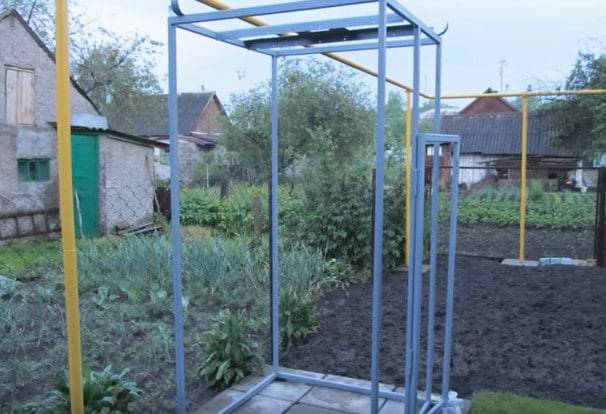
From above, weld the crossbars for the frame under the water tank.
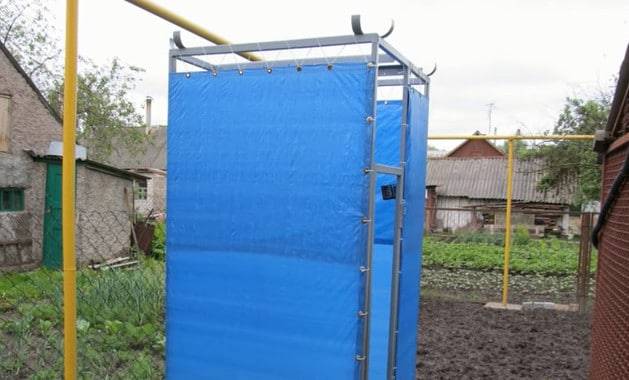
Wrap the frame with polypropylene with eyelets using a rope. The door can also be covered with a film.


Install the tank top. It is made in the form of a square 115 by 115 cm. Its capacity is 200 liters.
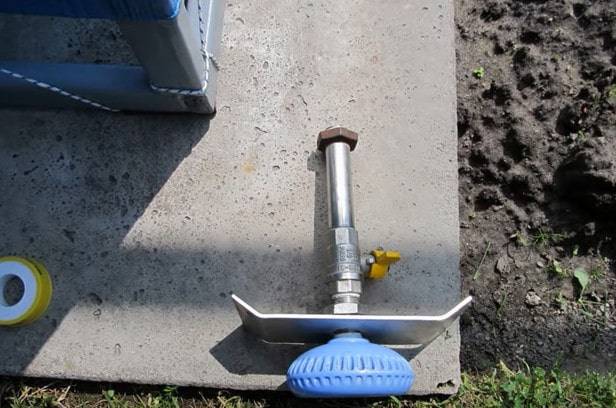
Screw a faucet with a diffuser to the tank.
The cabin is ready. Inside you can hang a light plastic shelf. The cabin is installed on the ground, legs are dug in for reliability.
This is a very simple and quick version of how you can make a summer shower in the country or on a hike with your own hands from the simplest materials at hand. All these materials are not difficult to take with you, as they take up little space and have almost no weight, and there is always a bottle of water in the summer.
Post Views: View Statistics
642
Foundation or supports
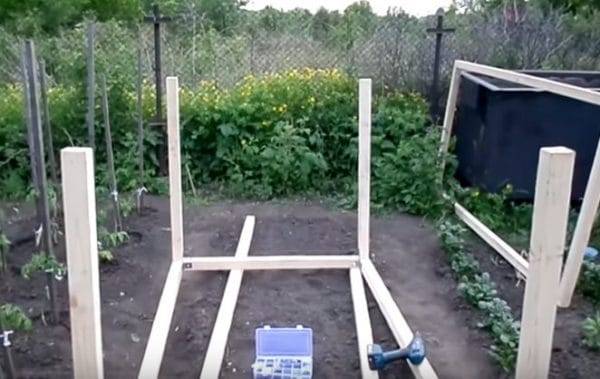
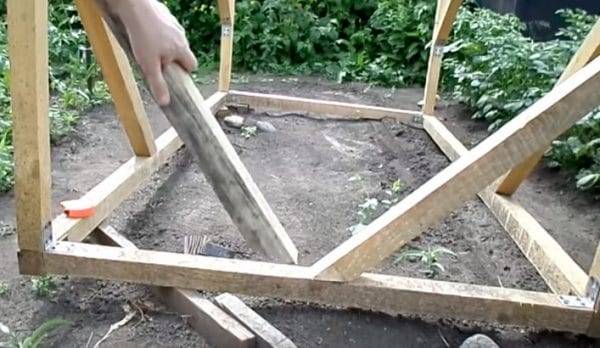
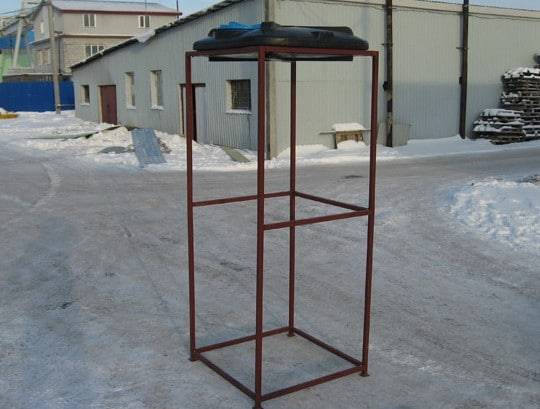
A simple house can be erected as soon as the pit for the remains is completely ready. There is nothing super natural in the mounting process if there is a project:
- The building has an insignificant specific gravity, and therefore it will be enough to deepen 4 supports made of a metal pipe. If it is not there, then it is allowed to make pillars of brick. Existing options for arranging the foundation for an outdoor toilet
- From the bars 5x5 cm the skeleton is equipped. First, put together two rectangles according to the scale of the toilet, and then connect them together with 4 vertical bars, the two rear pillars should be lower than the front ones, by the amount of the roof slope.
- The supports are fixed by mounting a scarf from a bar to give strength to the structure.
- At a height of 50 cm, a toilet seat is mounted, it is worth nailing two bars across to the frame. The process of assembling the toilet frameFinishing the outdoor toilet
- A crate is made upstairs, the step of which will depend on the choice of roofing material. When it is planned to cover the roof with a sheet of slate, an auxiliary crate is not required. The process of sheathing the frame of the toilet with boards
- If you have, say, soft tiles left from the construction of the house, then you first need to lay the OSB sheet, then waterproofing, and only after that install the tiles. The process of covering the frame of the toilet with tiles
- Put two supports, auxiliary in the place of fastening of the wooden carved door.
- Put the prepared frame on the frame, which turned out to be on the base and proceed to the sheathing.
See in the video how to quickly make a foundation for a country toilet.
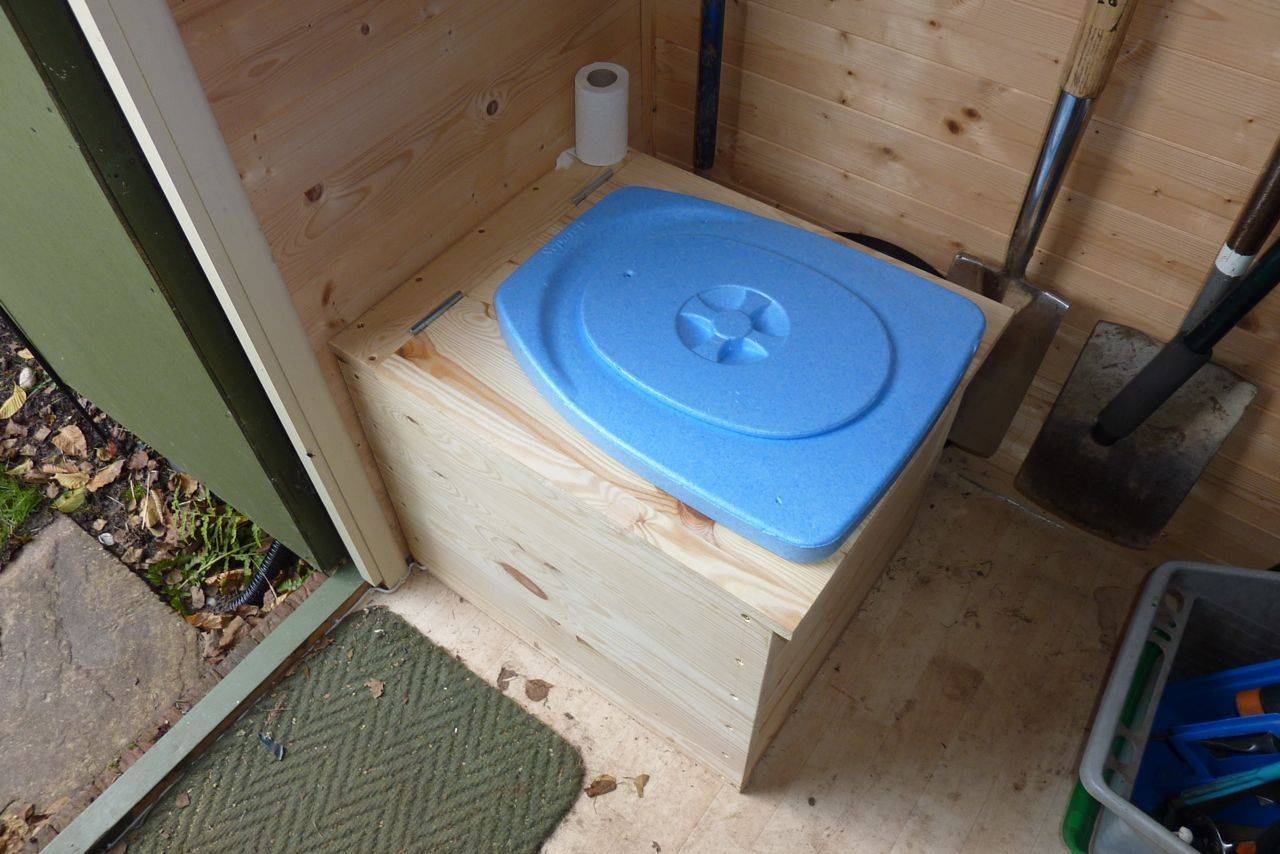
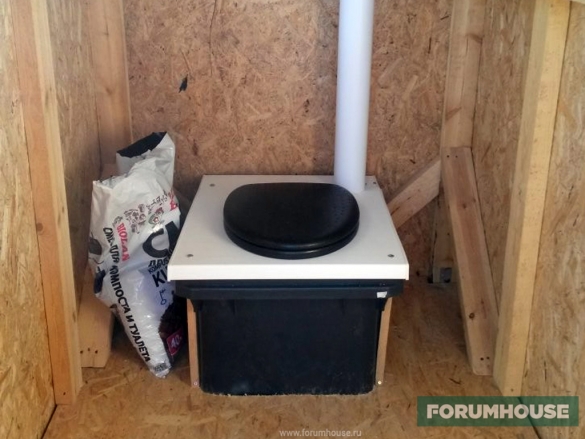
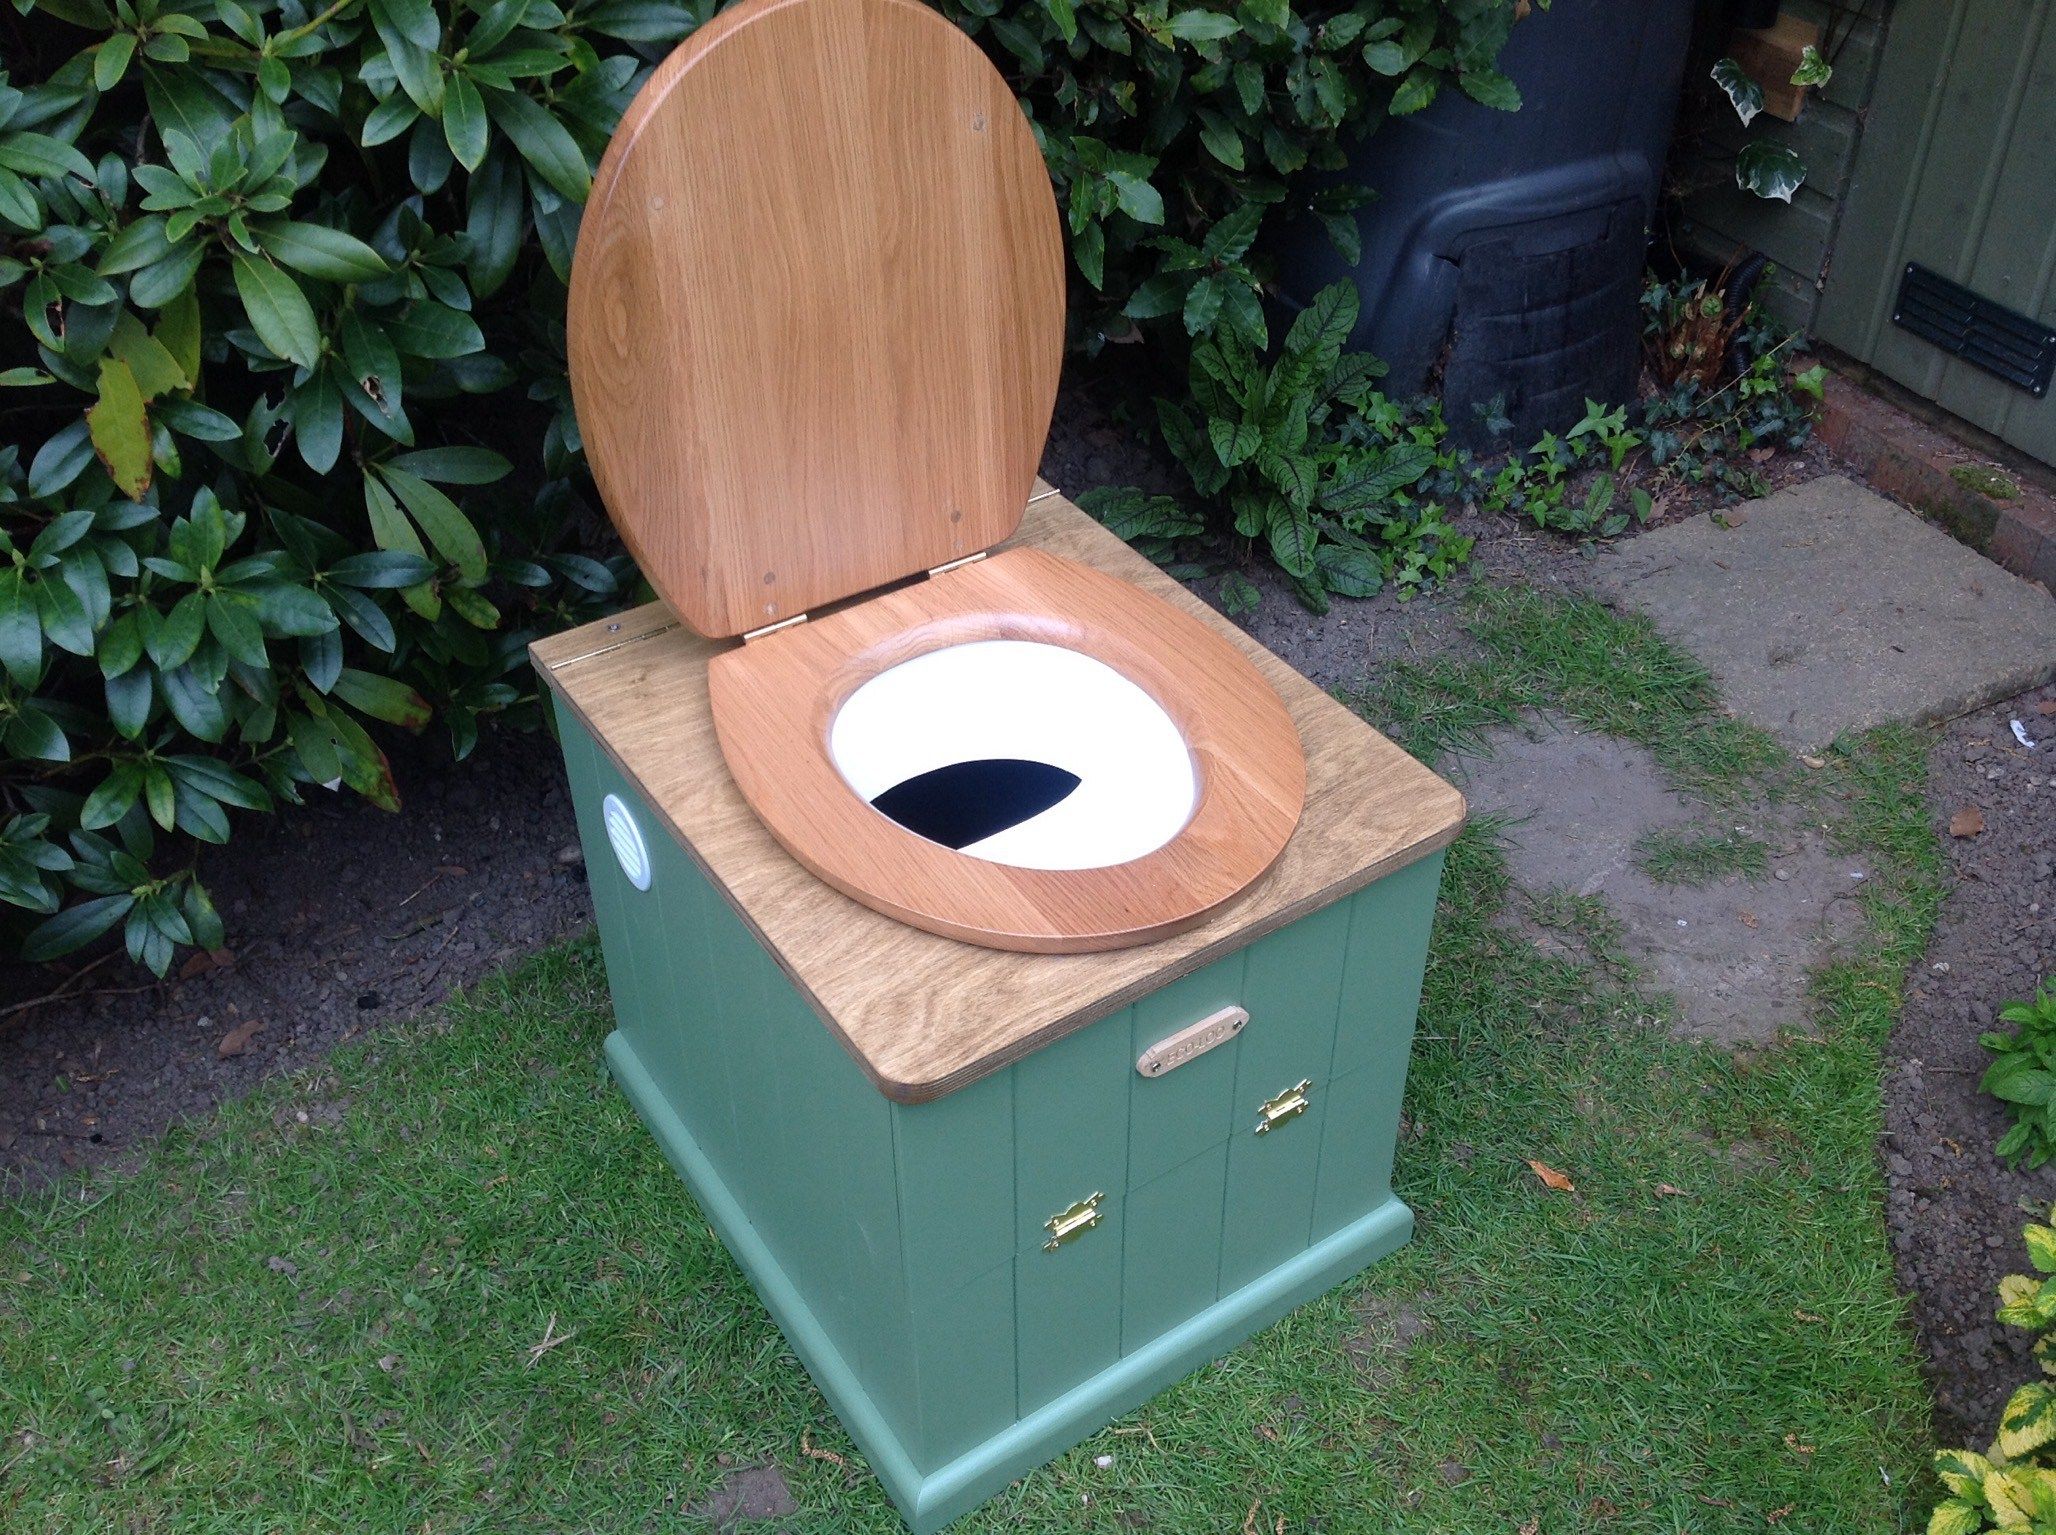
How does this dry closet work?
This is a device in which waste is converted into biologically pure fertilizer with the help of special microorganisms. It can be safely called a dry closet, unlike another variety that uses chemicals. Peat containing microorganisms must be poured into a container. After backfilling, the bacteria begin the work of aerobic decomposition. As a result, the unpleasant smell disappears, so such a toilet can be installed even inside the house. Sprinkling of peat filler is carried out using a special handle, which, turning in different directions, ensures uniform filling of the storage tank.
In a peat toilet, waste is converted into biologically pure fertilizer with the help of special microorganisms.
Usage Feedback such dry closets are mostly positive.
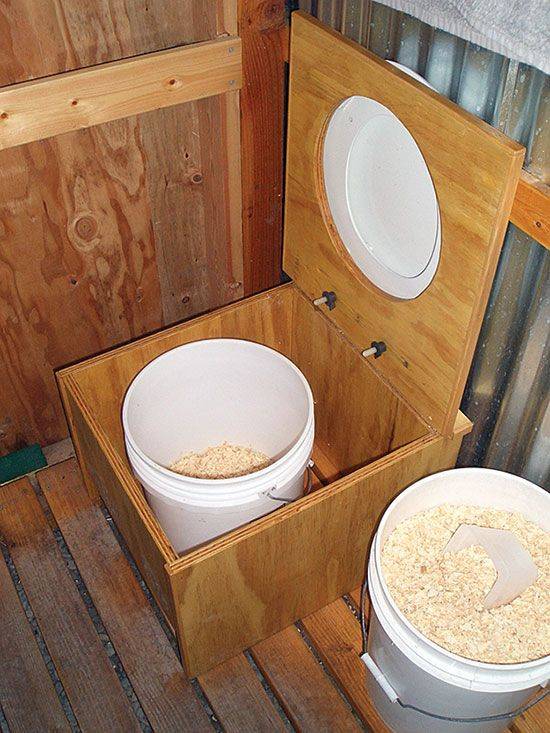
Backfill products
Ordinary peat for a dry closet cannot be used - there are too few necessary microorganisms in it. As a backfill, purchased compounds are needed that contain bacteria that process waste:
- for toilets up to 50 l - peat filler;
- for large dry closets - peat mixed with sawdust, since sawdust is more breathable and composting of waste products is faster. A special filler is required for a peat toilet, ordinary garden peat is not suitable
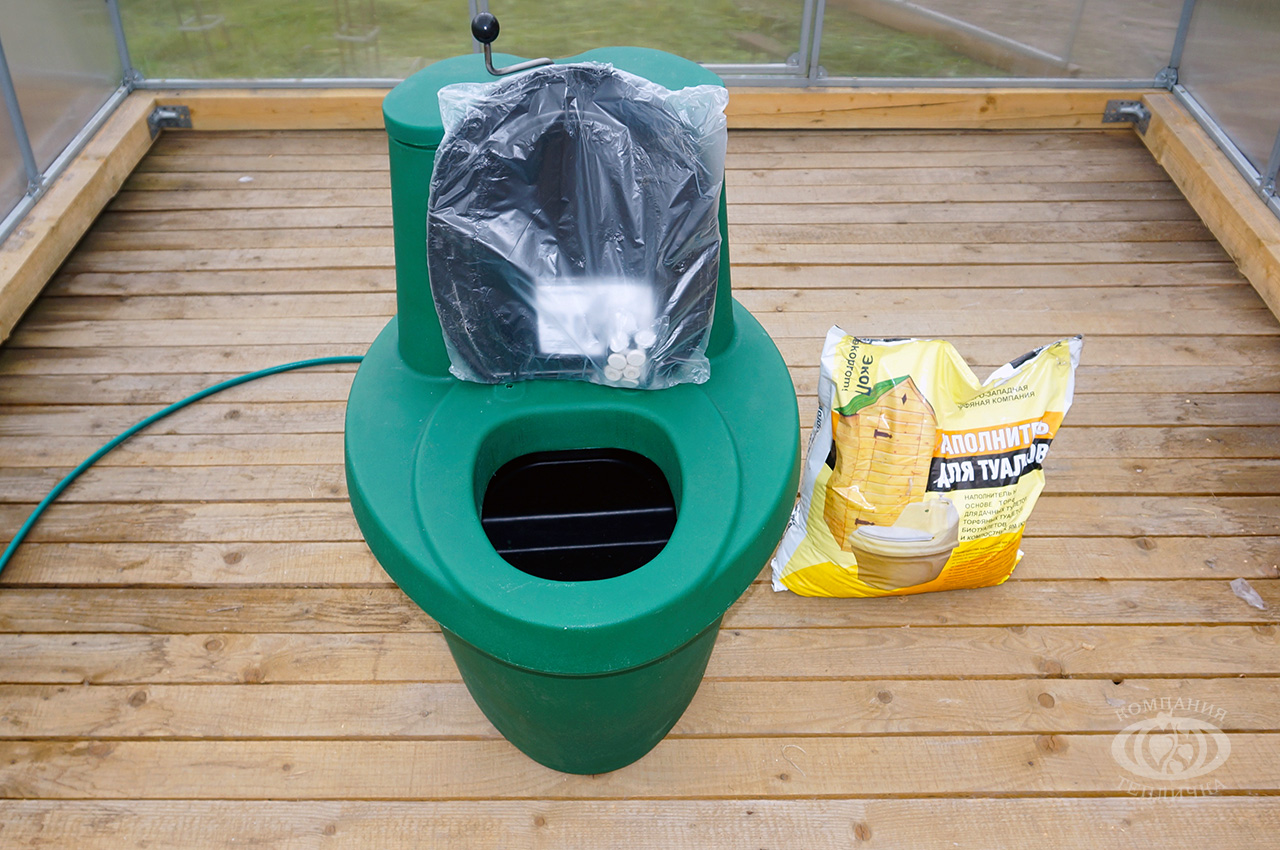
Faction division
The best peat toilet is the one in which the waste is separated into liquid and solid fractions. The former merge into a drainage ditch (moreover, the smell of urine and feces disappears due to passing through the filler).
If you rarely use a peat toilet (no more than once a week), you can do without drainage, since a special filler absorbs urine and it has time to decompose. But if the device is used frequently or many people live in the country, drainage is necessary. The liquid is drained through a hose, passes through several filters and goes outside into a gutter, compost pit, septic tank, or simply into the ground.
In an industrial peat toilet, waste is separated into liquid and solid fractions.
The solid waste fraction under the influence of microorganisms turns into compost, which accumulates in the toilet tank. It must be periodically emptied by pouring the resulting fertilizer into a compost bin. The resulting mass cannot be immediately attributed to the garden, since the full composting cycle takes two years. Empty the peat toilet as it fills up: from once a week to once every three to four months.Since the filling tank is usually quite heavy, sometimes wheels are attached to it so as not to drag it, but to roll it.
Ventilation device
Ventilation is required for such a toilet, otherwise bad odors will seep out of the container - after all, bacteria cannot process urine and feces instantly. In addition, oxygen is needed for the life and activity of microorganisms.
A peat dry closet requires ventilation, as bacteria require oxygen to process urine and feces.
The ventilation pipe must be installed as straight and vertical as possible, since any rotation of it reduces the air draft. Pipe dimensions:
- if the toilet is used a little, you can get by with one pipe 40 mm thick for natural ventilation;
- in case of frequent use by a large family or frequent arrivals of guests, a 100 mm thick pipe and forced airflow with an axial fan are needed.
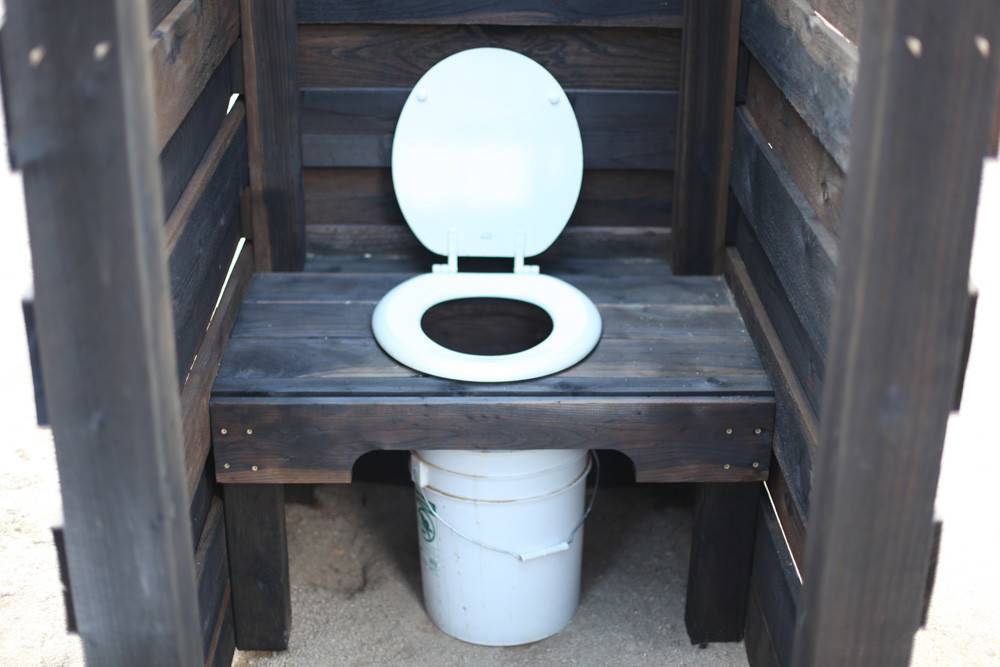
Toilet in the country without a pit
There are three options for how to make a toilet in the country without a cesspool. Although not always odorless. Everyone needs a separate room with exhaust ventilation. And for a peat dry closet, it is better to equip your cabin away from home - according to the device, it resembles a powder closet, which has an unpleasant smell.
There are no unambiguous recommendations when choosing - each type has its own disadvantages:
- Electric dry closets. Two kinds. In inexpensive models, the liquid phase is separated with a discharge into a separate container (or soil), and the solid is burned. In more expensive samples, the waste products are heated until the liquid evaporates, and the solid residue is incinerated. Disadvantages: high cost and volatility.
- Peat dry closets.The processing of faeces occurs due to active bacteria in the composition of the peat-based filler. The tank is divided into three fractions. The gases are forced out. The liquid is clarified to a state suitable for dropping into the ground. The solid residue is disposed of in a compost pit. Disadvantages: performance limited by the tank, smell.
- Liquid dry closet. Three types: formaldehyde, ammonium, biological. The bottom tank with formaldehyde must be handed over for recycling, the contents of the tank with ammonium can be poured into the sewer, and the waste after biological processing into the compost pit. The disadvantage is the limited capacity of the tank.
- Cassette toilet. Equipped with a receiving tank (cassette), which is easily pulled out for change, cleaning and transportation. The volume of such a tank is up to 25 liters. The cassette is filled with an active chemical liquid, which processes all the waste entering it into a homogeneous mass, which is subsequently poured into a compost pit. A special indicator shows when the cassette needs to be emptied. Such a dry closet is compact, easily placed both indoors and in outdoor cabins, without an unpleasant odor. Disadvantages: requires a supply of consumables for use, prolonged stagnation complicates the cleaning operation.
For summer cottages, peat or electric dry closets are suitable, the waste of which can be dumped into the ground - drain the liquid phase, dispose of the solid in a compost pit.
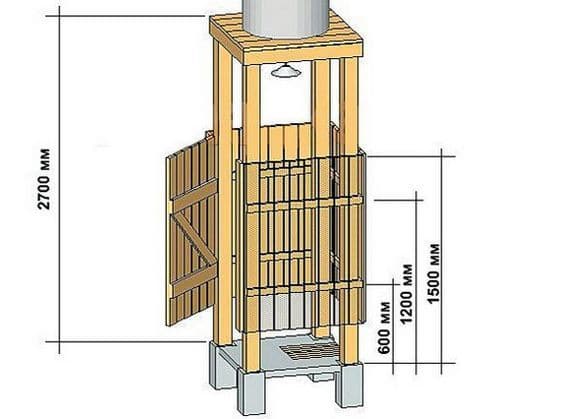
The main stages of installation of summer showers and commonly used materials
You can build a summer shower in the country with your own hands using various improvised materials left over from the construction of a house, barn, fence or greenhouse.Everyone can determine the dimensions of the shower stall based on the height of the tallest member of the family, and make it as wide as the area or amount of material allows. You must first draw a drawing indicating all dimensions.
Then it is important to prepare the area, clear it of debris and plants, mark the perimeter of the future structure. Main steps:
Main steps:
-
- If, as planned, a drain hole is required, then it needs to be dug in width a little less than the area of \u200b\u200bthe shower room, and 80 cm will be enough in depth. To prevent the hole from crumbling, you can make a frame, drive in the bars in the corners and make a screed from the rails.
- Then lay the floor.
- The next step is the installation of the frame. It can be made from metal or wood. Then follows the sheathing and installation of the frame.
- After that, a water tank is mounted on top of the structure and a hose with a watering can is connected.
- If there is an opportunity and desire, you can equip the shower room inside with a bench, shelves.
Also read: How to make a summer chicken coop for laying hens with your own hands
The general principle of operation usually includes all these steps, but there may be various nuances, depending on the design option. Detailed descriptions of work and photos of different showers are presented below.


Shower room from a metal pipe with 2 sections
A summer shower with an additional dressing room can be built in the country with your own hands from improvised materials in a few days. This booth has a total size of 1 by 2 m.
To work on it you will need:
- metal profile pipes 15 by 15 mm in length 6 m and 20 by 40 mm for the frame;
- metal pan;
- water tank;
- any finishing material (cellular polycarbonate, polyethylene, lath).
For convenience, you can first make a drawing and specify all dimensions.You need to start with the framework:
- Cut 6 blanks into vertical racks of 210 cm from a pipe 15 by 15 mm. They will need to be cooked.
- Cut cross bars from profile 20 to 40 and corners. The crossbars must be screwed to the vertical posts at the corners.
- The frame should be coated with acrylic waterproof paint.
When the frame is ready and the place for installation has been chosen, you should dig a hole for draining and mount the structure with a pallet at the bottom and a tank at the top.
After that, only finishing work follows. The floor can be laid out with a rail.
The walls and roof can be decorated with any material that is at hand:
- lath;
- cellular polycarbonate;
- corrugated board;
- dense polyethylene awning.
In the dressing room, you can fix several hooks for towels and clothes, and in the shower itself you can make small shelves for soap.
The device of a country powder-closet
Arrangement of this type of country toilets as a powder closet can be performed anywhere on the site.
Its design does not imply the presence of a cesspool - instead, a sealed container is installed, which is emptied as it is filled with sewage. For this reason, there is no danger of soil and groundwater contamination. This means that there is no need to maintain a distance of 25 meters from a source of drinking water when building a toilet.
Powder closet can have different sizes.
In the back of the frame, holes are created for cleaning work and ventilation (for more details: “Ventilation of a country toilet, we do it ourselves”). A box with backfill is placed in the booth, which can be peat, ash, sawdust. They are powdered with sewage every time after visiting the toilet.


