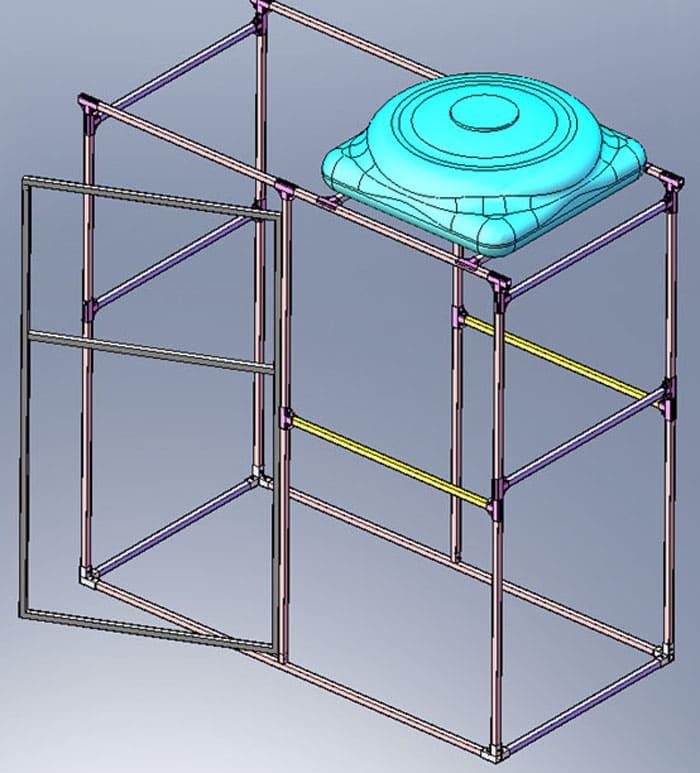
- Installation of a frame for a temporary shower stall
- Shower tank selection
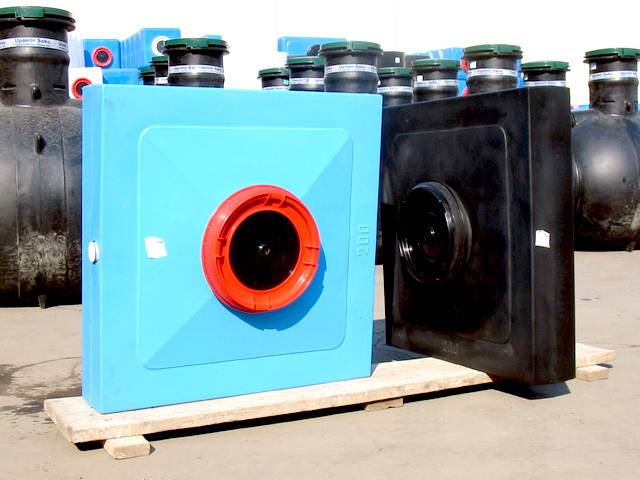
- What is a shower tank?
- Volume selection
- Size and shape
- metal
- Plastic
- Summer shower options for giving
- OPTION #1
- OPTION #2
- OPTION #3
- OPTION #4
- We also recommend reading
- OPTION #5
- OPTION #6
- OPTION #7
- portable summer
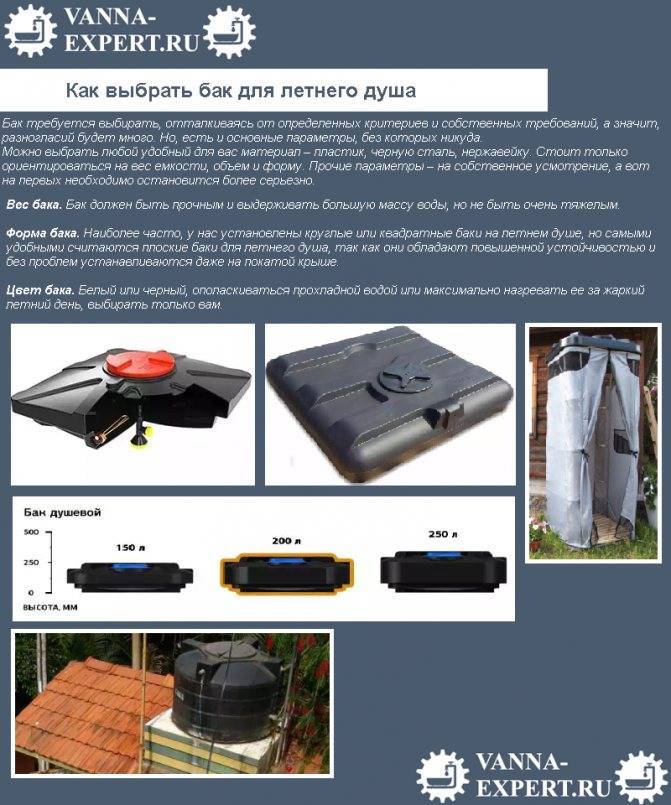
- How to choose a tank for a summer shower
- The main criteria for choosing a tank for an outdoor shower
- metal tank
- plastic tank
- tank shape
- flexible tank
- Summer shower manufacturing costs
- Finished blocks and prices
- Summer shower in a country house made of wood
- Production of support and frame
- Wood treatment from moisture
- Water tank installation
- shower sheathing
- 3.Water tank selection tips
- Projects and schemes
- How to make a summer shower from a barrel with your own hands?
- How to install?
- How to fix?
- Crane installation
- Filling the tank and heating water
- 7. Country shower from corrugated board
- How to choose a tank for a country shower
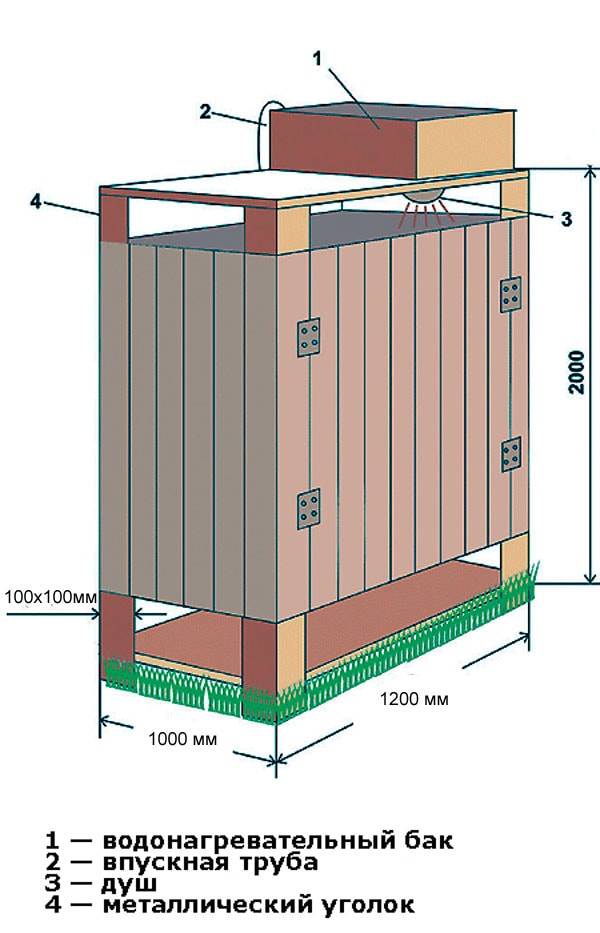
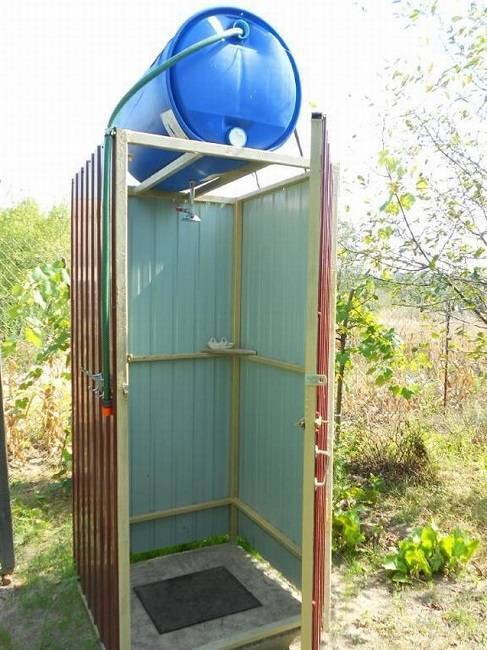
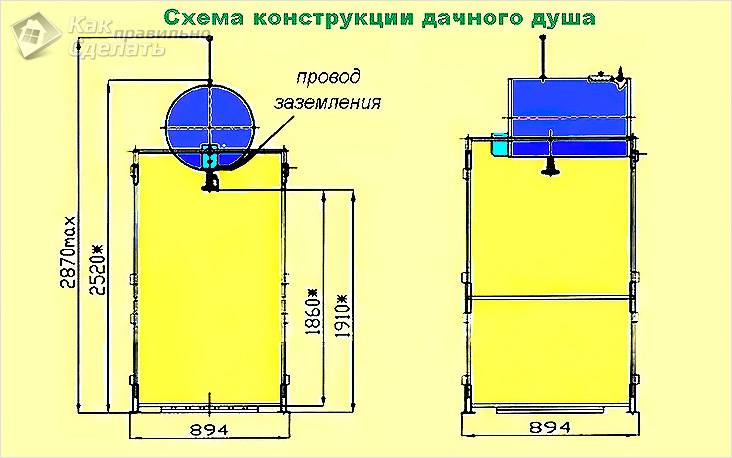
Installation of a frame for a temporary shower stall
If brickwork is performed for a capital structure, then a frame is usually installed for a temporary one: metal or wooden. In the latter case, the tree should be treated with special impregnations that will protect it from insects and moisture, preventing the formation of fungus and mold.
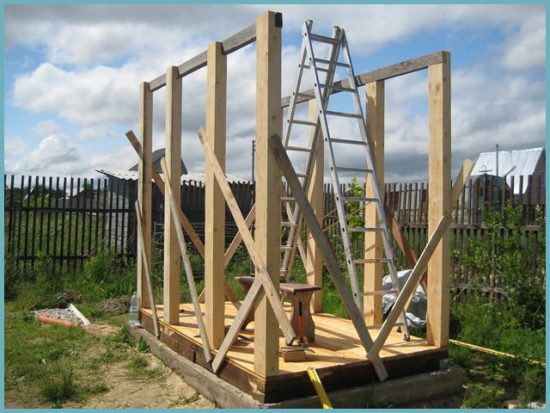 Wooden frame for summer shower
- Marking is done - a rectangle is indicated right on the ground, the sides of which correspond to the dimensions of the future country shower.
- Wooden bars are installed, the width of which reaches up to 10 cm.
- Ligation is performed - starting from the top, the structure is securely fastened with bolts, after which the beams-basis of the shower walls are connected.
- Walls are equipped, for the construction of which you can use both boards and slate or plastic panels.
- Piping is in progress - the plumbing is installed so that the outlet of the pipe under the shower hose is higher than the level of the head (this will provide the necessary pressure for the movement of water). For runoff, a conclusion is made to a sump or to a specially equipped septic tank.
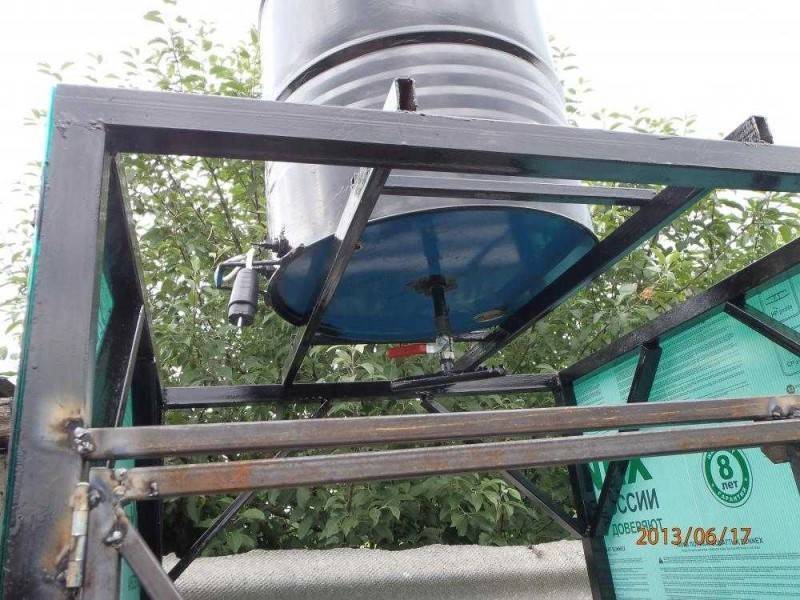
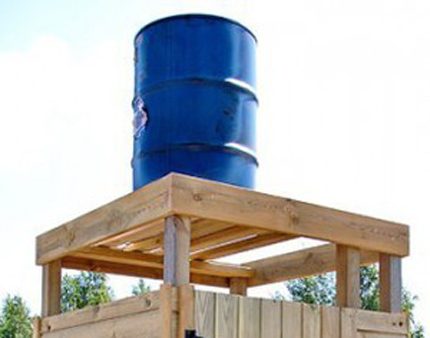
- A tank is installed - a tap is made with a thread, a tap with an appropriate nozzle is placed, after which the barrel rises and is fixed.
Shower tank selection
Modern polypropylene tanks noticeably benefit in comparison with products made of any steel.
Since the polymers used are food grade, you can even drink from such vessels. Steel tanks are more suitable for stationary placement, while water can be transported in polypropylene.
If you build a shower thoroughly - once and for all, then a great option is to use stainless steel.
Galvanized and carbon steels will rust over time. And it's not very hygienic.
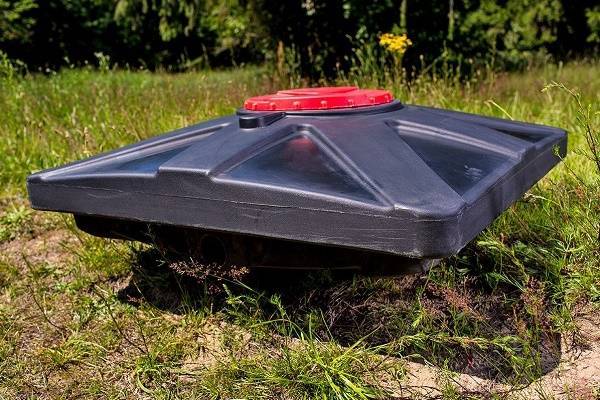
Advice! If you prefer to take a tank without a heating element, then choose a flat shape of the product. The larger the area of the heated surface, the faster it will heat up.
What is a shower tank?
To take a shower in a summer cottage or garden plot was comfortable, you need to choose the right shower tank.It should not give enough water at the same time, but at the same time, it should not be too heavy - the design of the country shower should easily withstand it.
Therefore, pay attention to several characteristics at once:
- volume;
- size and shape;
- material.
Choice is never easy
Volume selection
The minimum size of the shower tank is 50 liters. This amount of water is enough to quickly rinse one person. You should not count on long-term water procedures with such an amount of water. The maximum volume is 300 liters. But such a container can be installed on a solid foundation, so you must also choose the volume with an eye to the reliability of the design.
How to determine the volume of the shower tank? When calculating, it is worth taking a supply of water of about 50 liters per person. This is enough to "wash" without frills. It is clear that you want to have more water supply, but you need to remember that this supply will have to be heated. If the sun in the region is active in summer, problems can only arise in spring and autumn. You can also build a heating element into the tank, but we'll talk about heated tanks below.
Size and shape
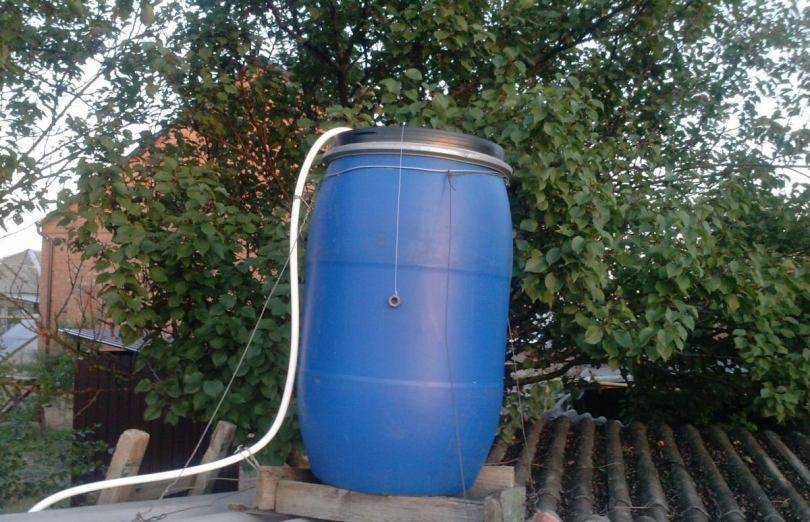
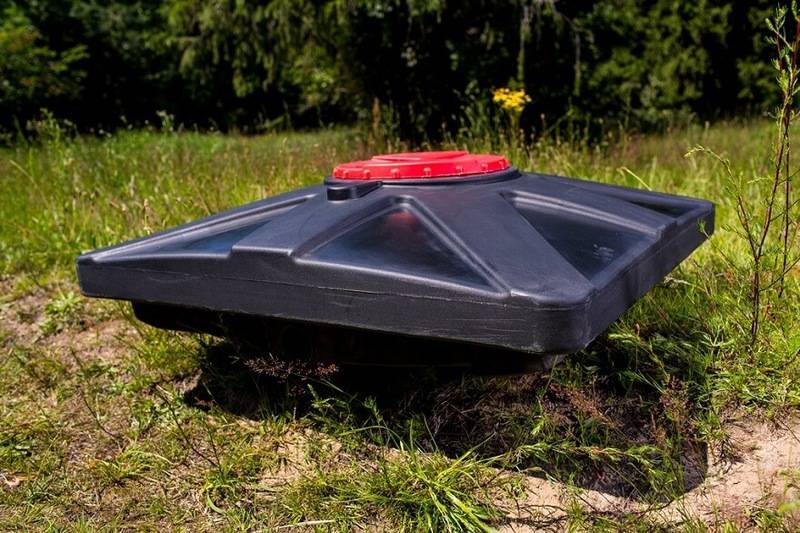
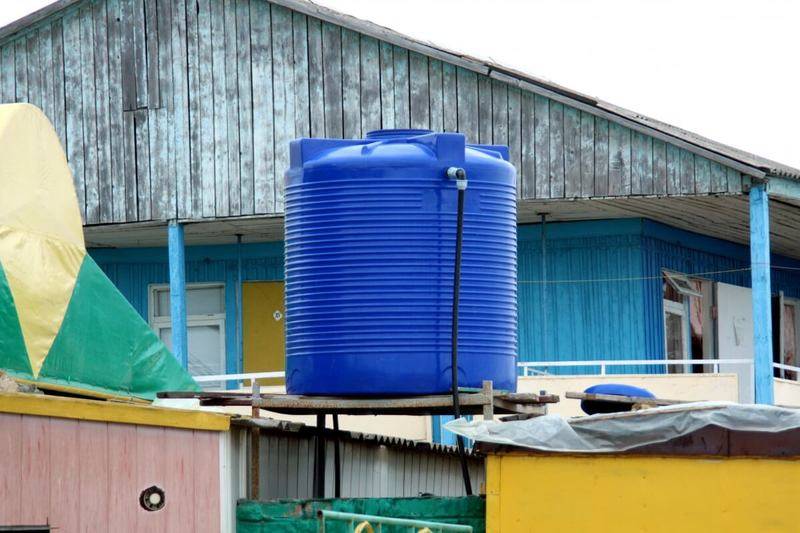
In shape, there are rectangular shower tanks - in the form of parallelepipeds, there are ordinary barrels, there are with a flat bottom and a rounded top. The worst choice is barrels. Due to their design, the water in them warms up weakly, in any case, worse than in flat containers or with a convex top.
Variety of shapes and volumes
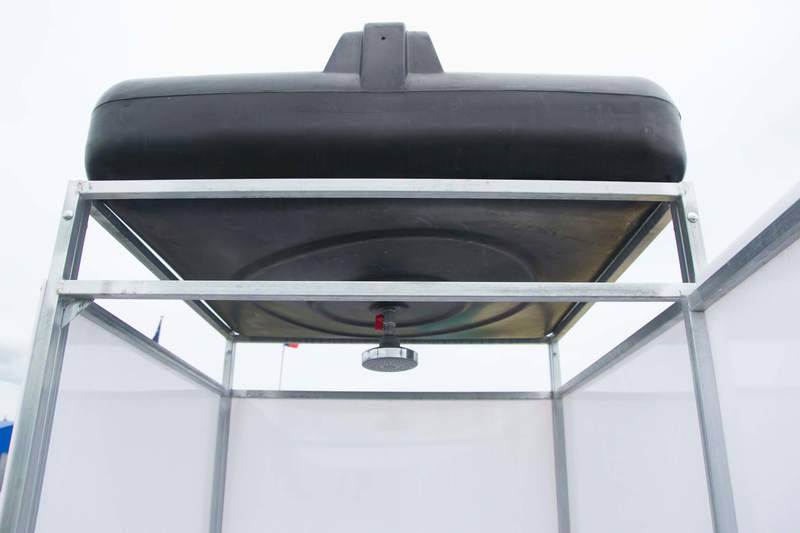
Flat square tanks are also good because they can also serve as a roof for a summer shower. Then the dimensions of the frame should be slightly smaller than the dimensions of the container - so that it fits snugly on the support. This is how you can choose the size of the shower tank - first build a frame, and look for a container under it.But you can do the opposite - purchase a container and build the structure itself according to its dimensions. Although no one interferes, make a roof and put a container on it the way you want.
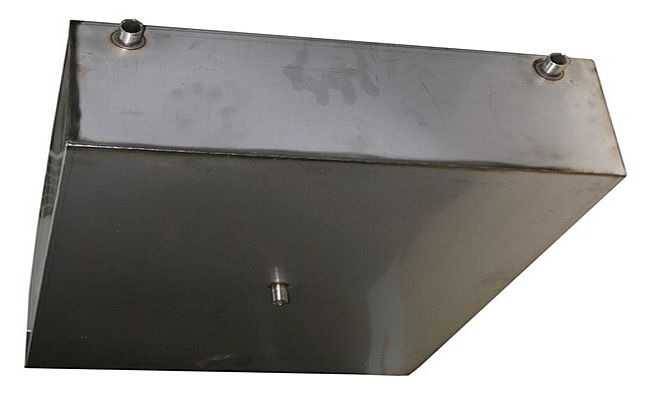
metal
The shower tank is made of metal and plastic. The metal can be structural, galvanized or stainless steel. The best one is stainless steel. They are durable, despite the fact that they are made of thin sheets - the wall thickness is usually 1-2 mm. It's all about the qualities of this material - it does not rust, which means it does not collapse. An exception can only be seams if they are welded by conventional welding (not in an inert gas environment). In these places, alloying materials burn out, the steel acquires its usual properties. The disadvantage of stainless steel shower tanks is their high price.
Stainless steel shower tank - durable option

Inferior to stainless steel containers, galvanized products. A layer of zinc protects the metal from destruction for some time, but, sooner or later, it rusts. To make the protection more durable, the galvanized steel tank can be painted. And this must be done from the inside and outside. Not the best solution, but slightly extends the life of the tank.
Structural steel tanks are the worst - they rust quickly. Here they are painted necessarily, annually updating the coating. These are the most inexpensive water containers, but they do not last long, and the presence of a large amount of iron oxides in water does not affect the skin in the best way.
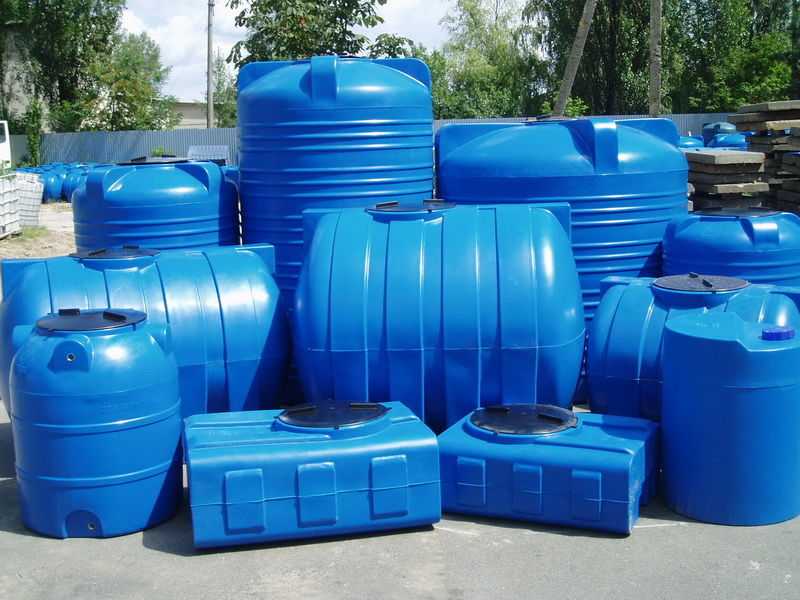
Plastic
Better in terms of operation plastic shower tanks. They are chemically neutral, do not react with water, do not rust. The only thing that can destroy them is a strong blow and frost. And then, there are polymers that can withstand temperatures down to -30 ° C.And if not, then the container must be removed for storage for the winter, because in winter you still won’t use the shower on the street.
Plastic shower tanks can have different shapes
Another plus of plastic water tanks is that they are black, which is why the sun heats up more intensively. A metal tank can also be painted black, but the paint cracks and flies quite quickly, and plastics are tinted in bulk - the coloring pigment is added to the mass and the entire thickness of the material has the same color.


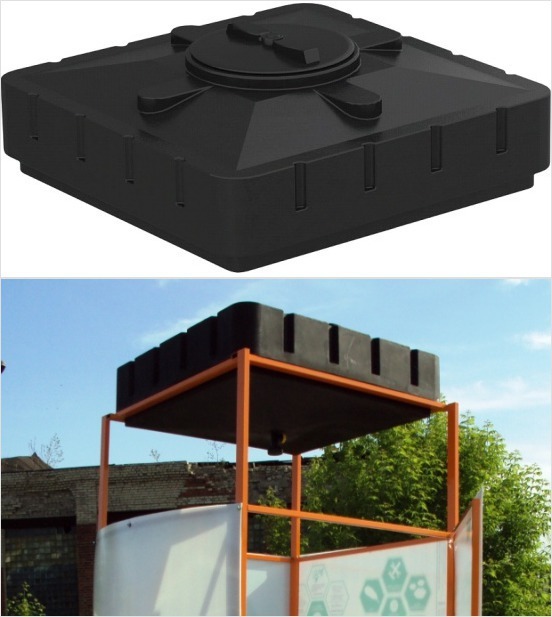

The next advantage is light weight. Despite the fact that the walls of the container are not thin, they weigh quite a bit. However, they also have a drawback - if we talk about flat square tanks, then the minimum volume is from 100 liters. You won't find less. There are miniature shower barrels - here they are from 50 liters.
Another operational point: when installing a large flat water tank on a roof without overlap, it is better to have several intersecting strips that will support the bottom. At the bottom, of course, there are stiffening ribs - thickenings of the same material, but it is better to have additional support.
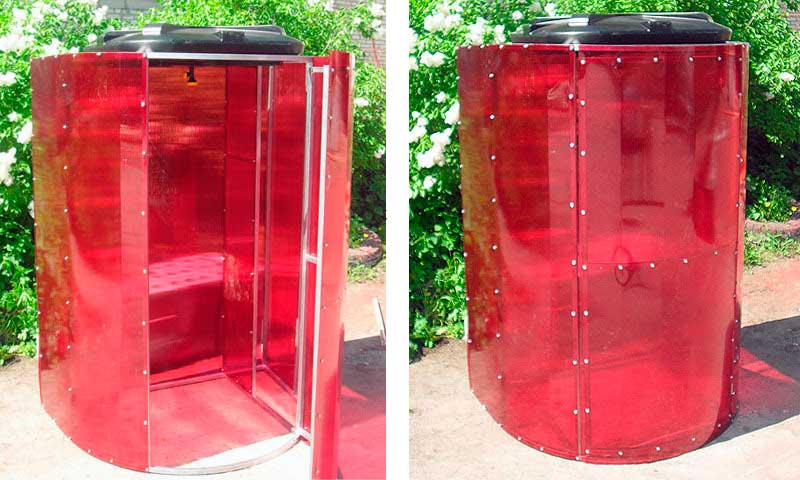
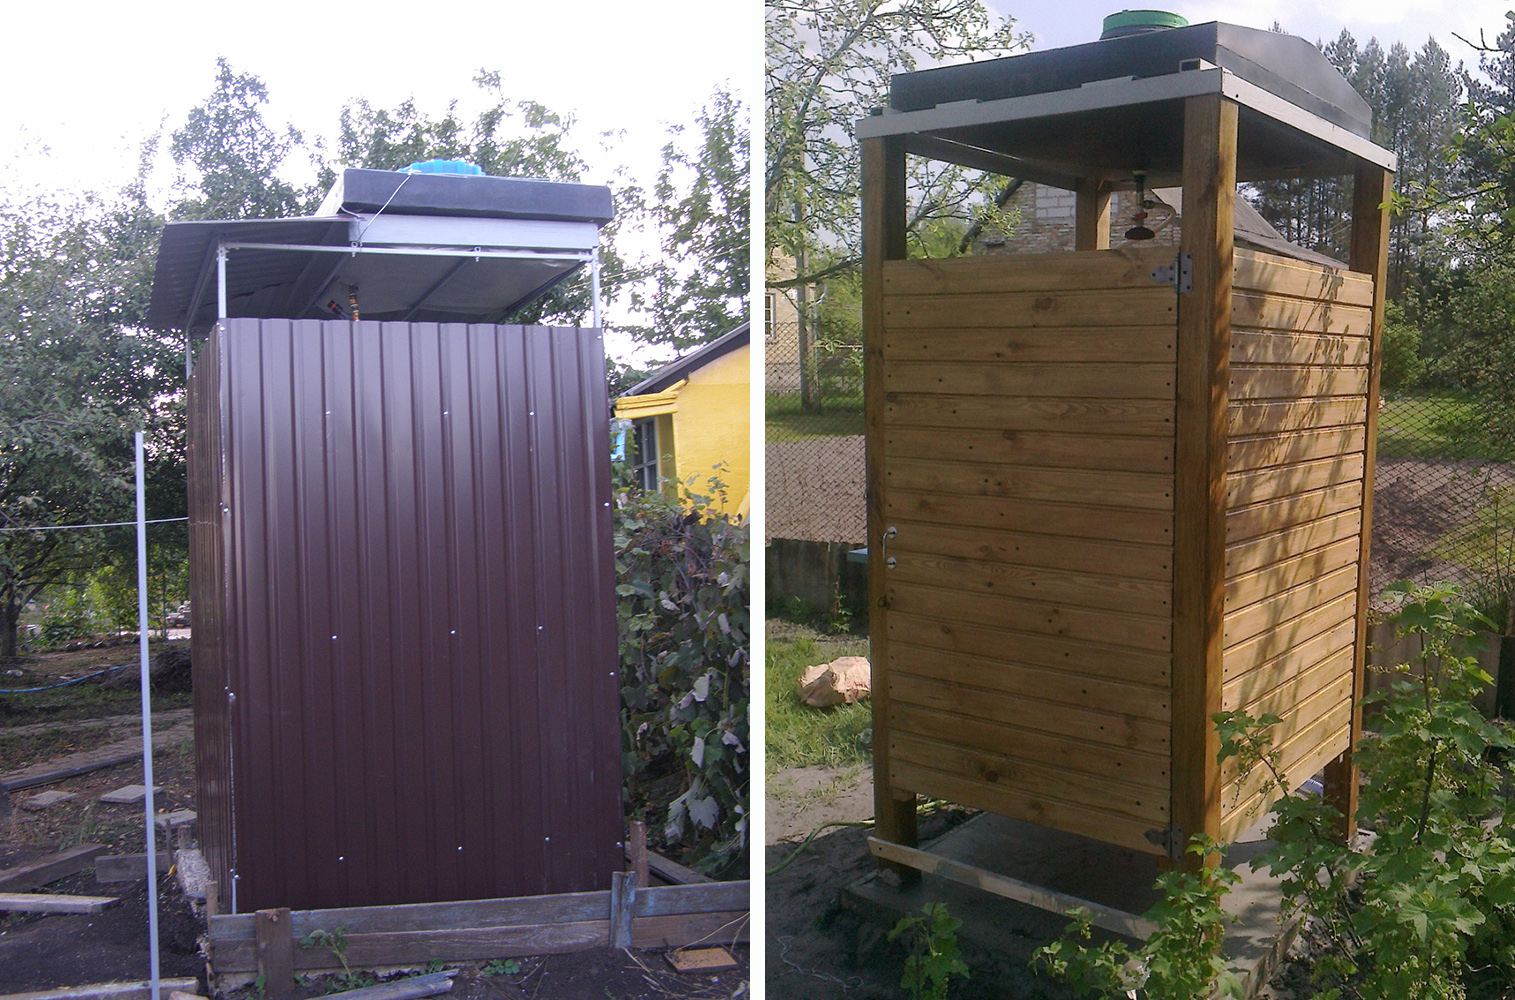
Summer shower options for giving
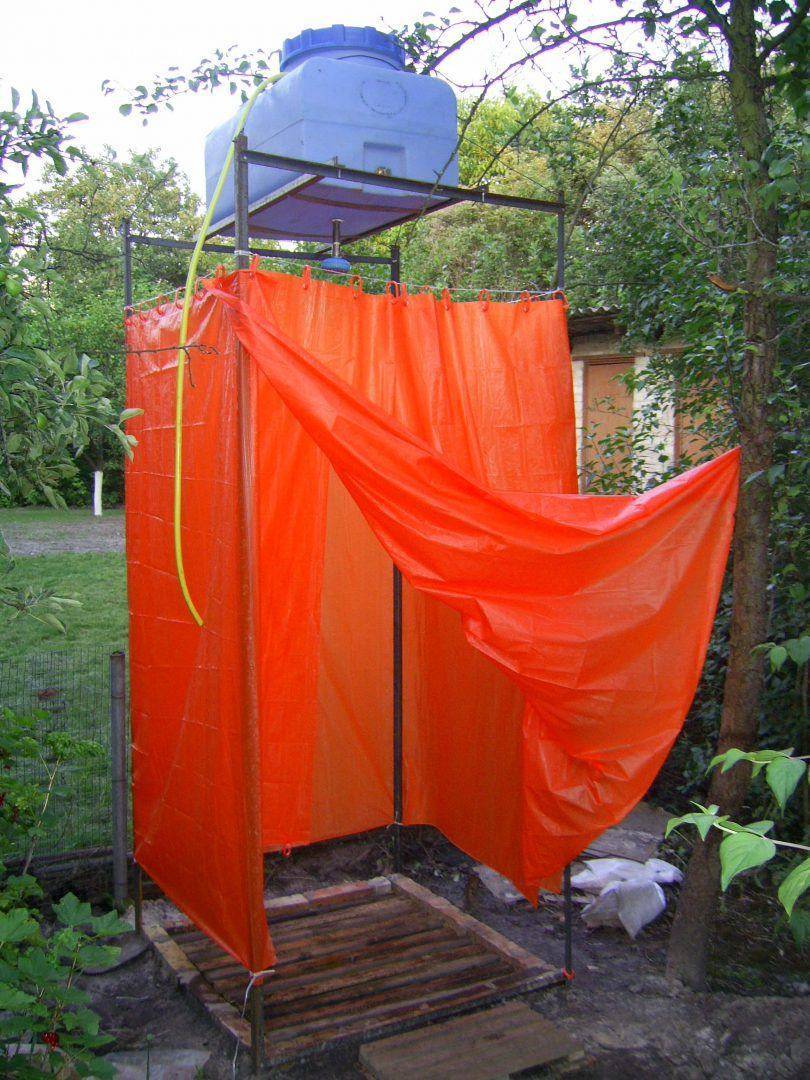
Let's start with materials. It is realistic to assemble the frame from any beams, whether it is a metal-profile pipe, or wooden beams. The walls can be from a wide range of materials, here are examples: sewn up with wood, profiled metal sheets. The best quality and price converge if the summer shower is made of polycarbonate, but you can even use an opaque oilcloth or tarpaulin stretched over the frame.
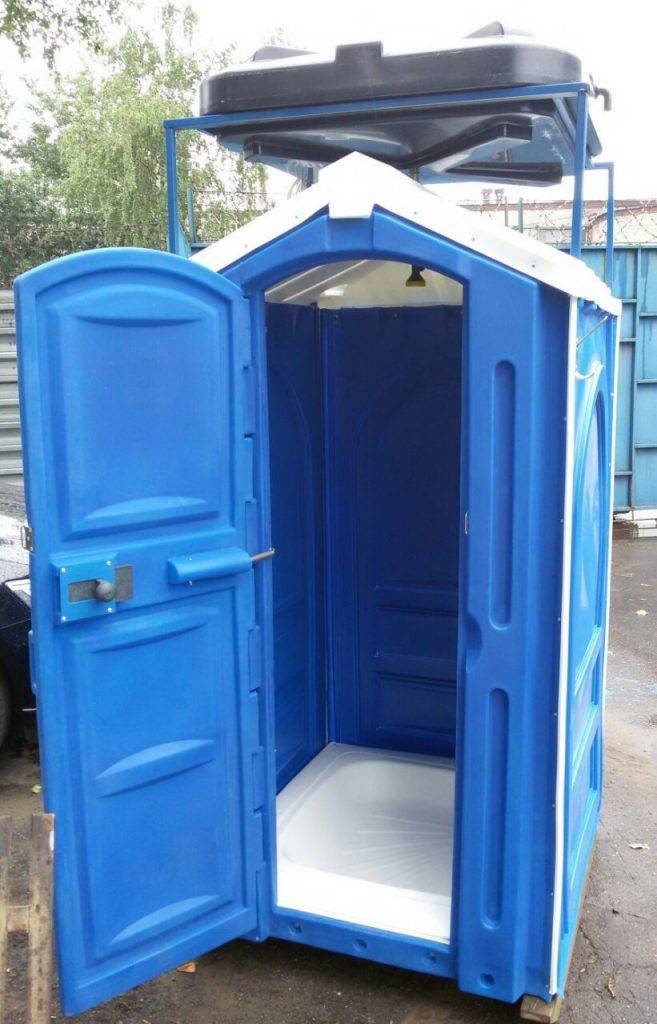
OPTION #1
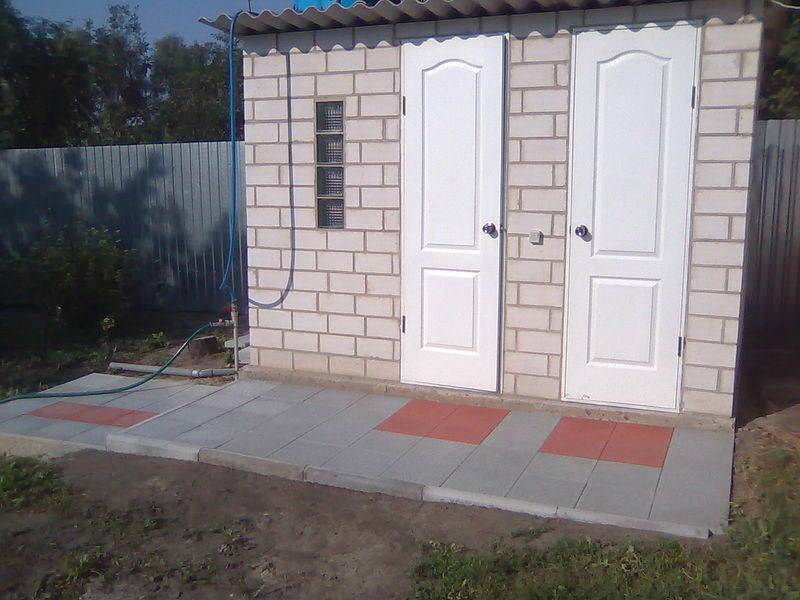
More expensive, but also more reliable, will be a brick or building block shower. The structure can be made combined and a toilet can be built nearby, as can be seen in the photo.Masonry can be lined with any material available for this.
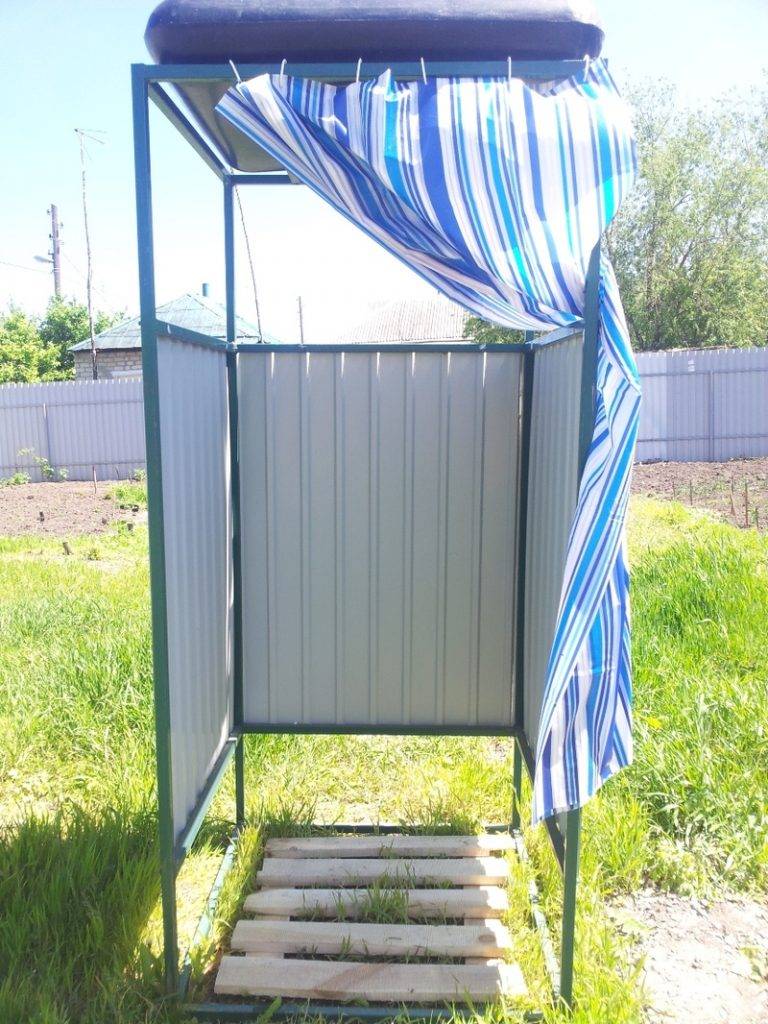
OPTION #2
To assemble a shower from a profile pipe, welding is most often used, but if you do not have the opportunity to use it, then you can fasten the beams through holes and bolts. In order for the corners to become rigid, a “scarf” plate or a diagonal strip of metal is attached to them. Such frames look good covered with tarpaulin or oilcloth, as can be seen in the photo.

Also, corrugated board can be easily attached to the tighter metal base, which will add reliability to the structure in many moments.

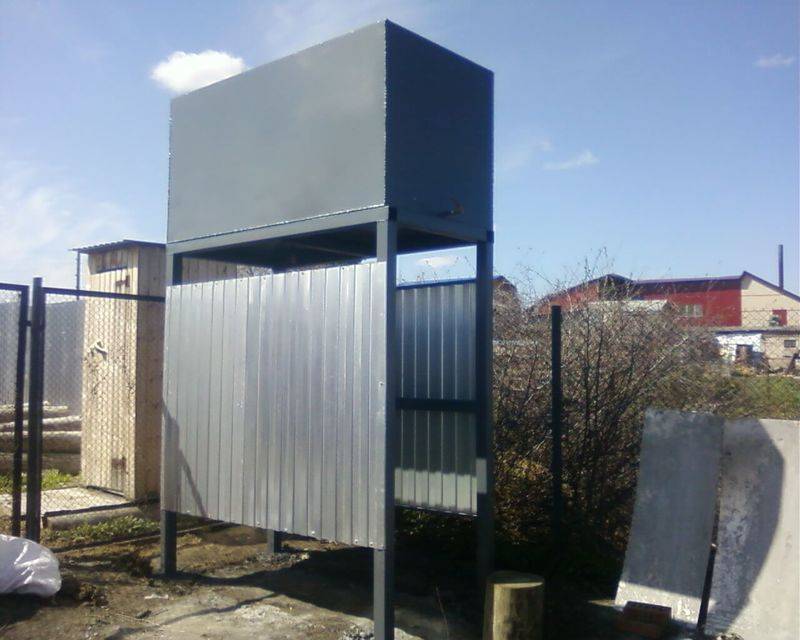
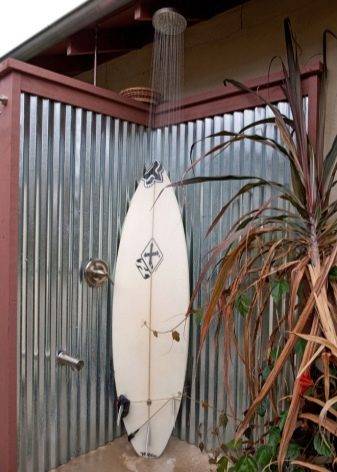
OPTION #3
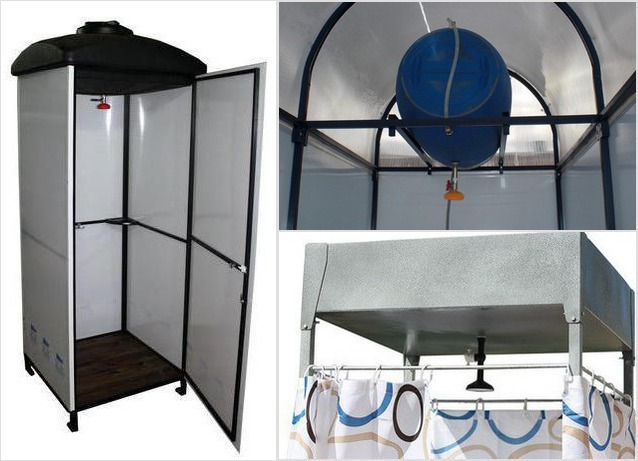
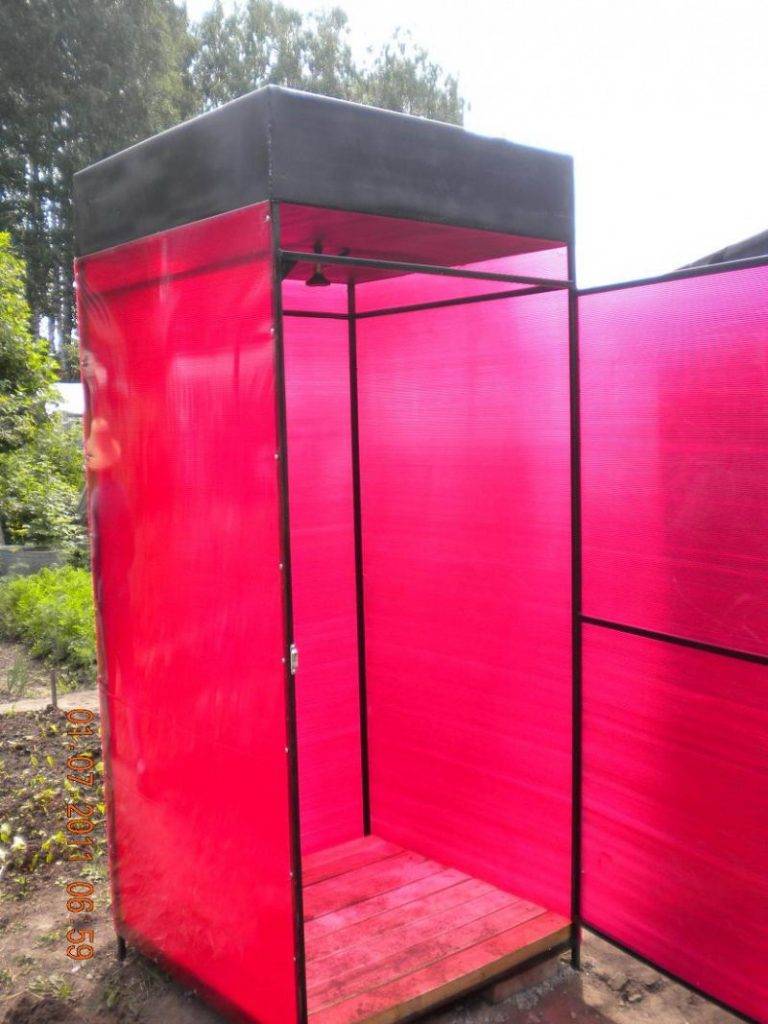
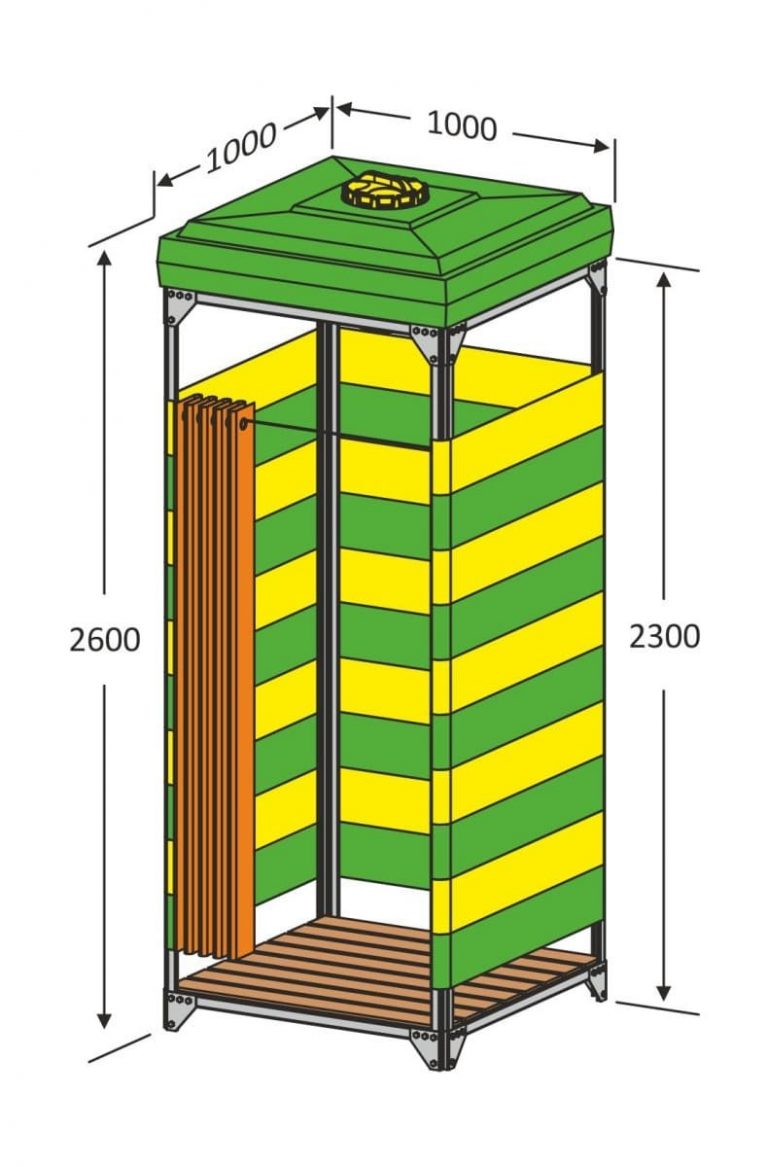
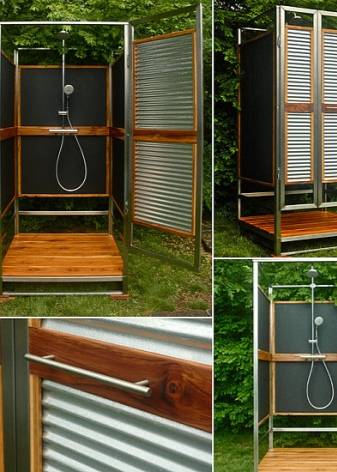
In building hypermarkets, you can find a ready-made shower for outdoor conditions. But there is an opportunity to save money and make a summer shower with your own hands. The general concept has already been described above - the frame is made of corrugated pipe, and the casing is made of polycarbonate. See photos for original examples.
Such designs are designed for the use of a summer shower storage tank, heating will be carried out due to the flat shape of the tank.

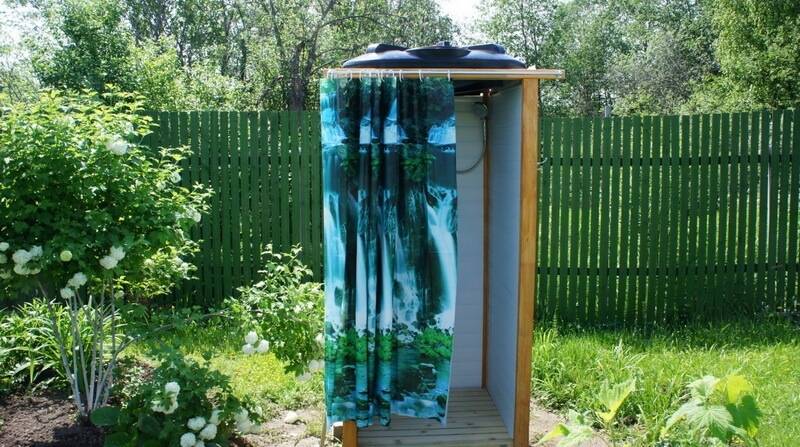
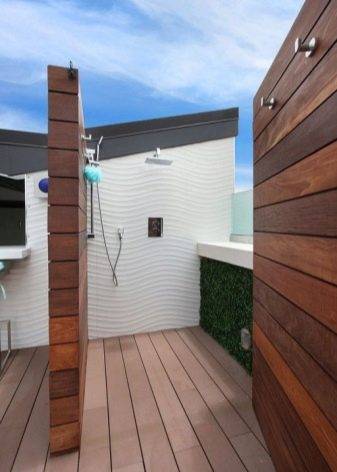
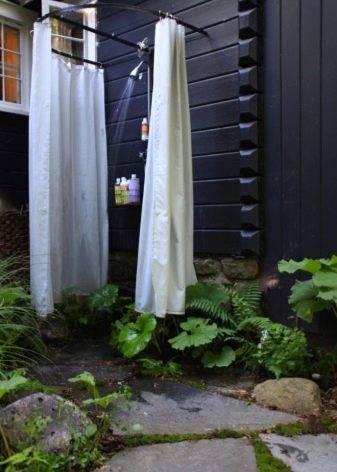
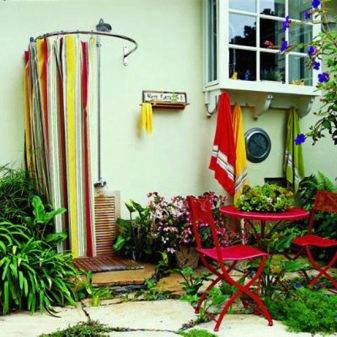
OPTION #4
Another interesting solution would be a combination. For example, three walls can be made of rigid material, sewn up with wood or a sheet of metal or polycarbonate, and the fourth wall can be a screen of opaque film. Unfortunately, it will not work to immerse the water tank on such a design, and therefore water can be let in from the home water supply.
We also recommend reading
This can simplify the task of providing shower water and heating. Thus, with your own hands, you can make a shower with heated water from a home column or boiler.
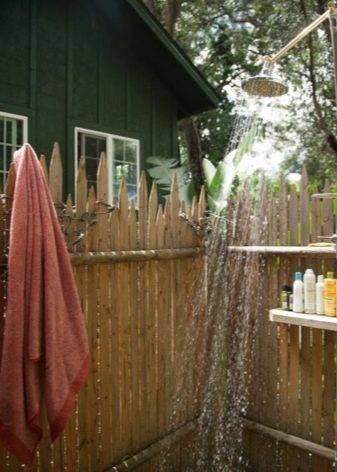
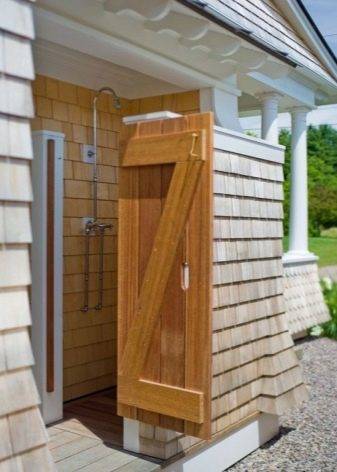
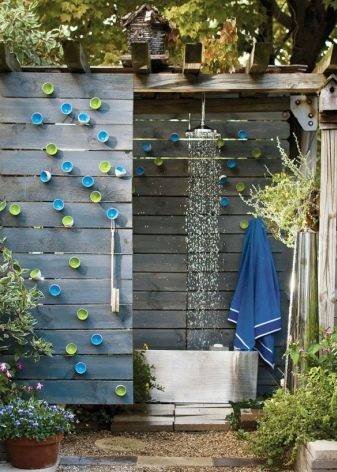
OPTION #5
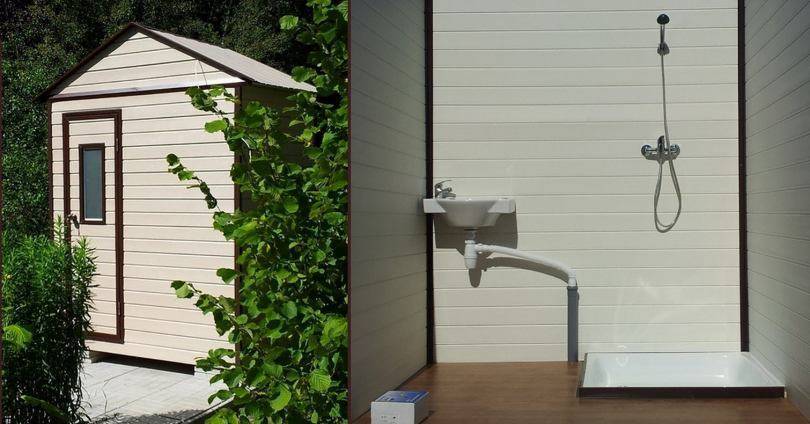
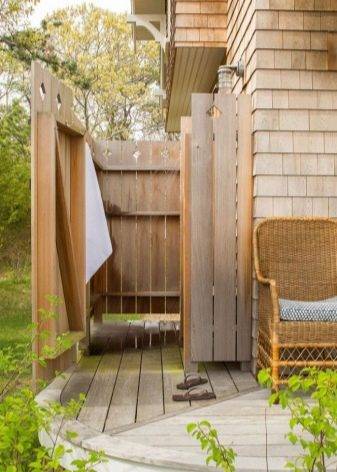
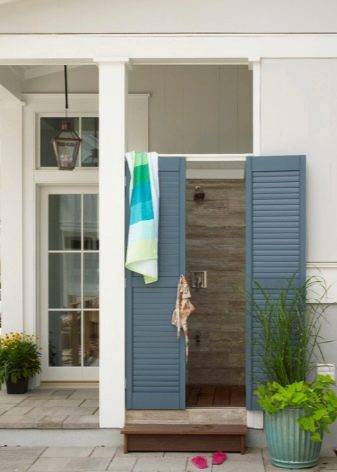
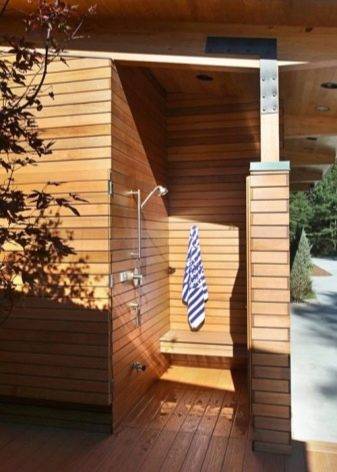
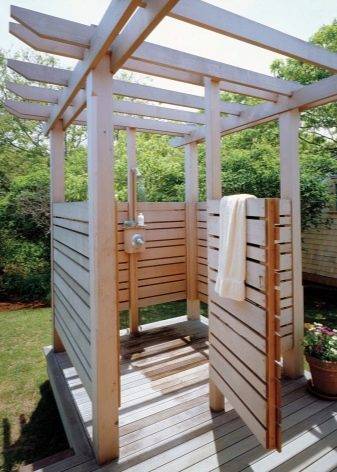
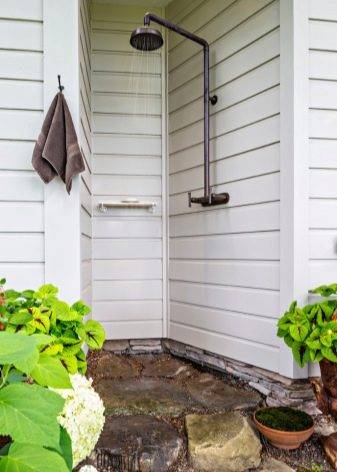
A shower similar to the previous one can be made by attaching it to the house, or rather to its wall. Line the wall with a material that will not allow water to penetrate the wall and bring the pipe for the watering can to a height of about 230 centimeters. In this case, the frame is not needed at all, but if the open version does not suit you, then you can make a screen or curtain that will move along a curved pipe. The floor can be laid out with tiles or other convenient material, having previously made a drain.


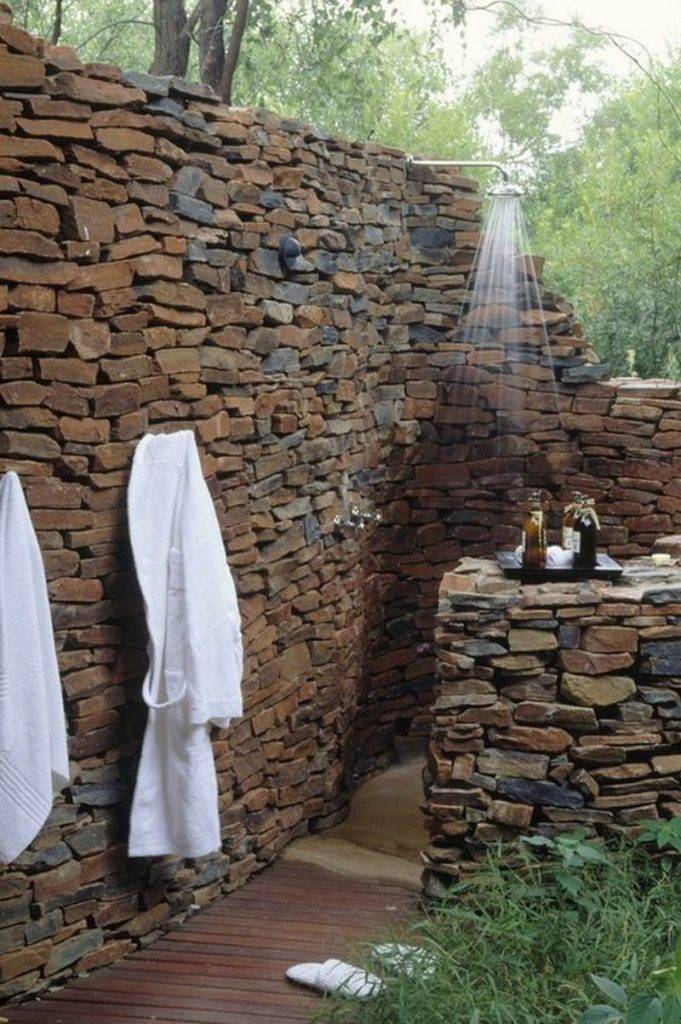
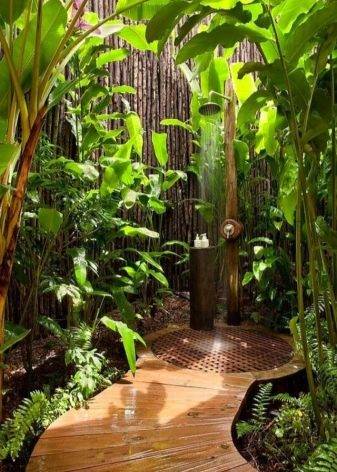
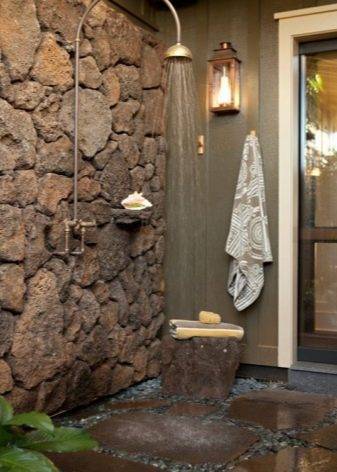
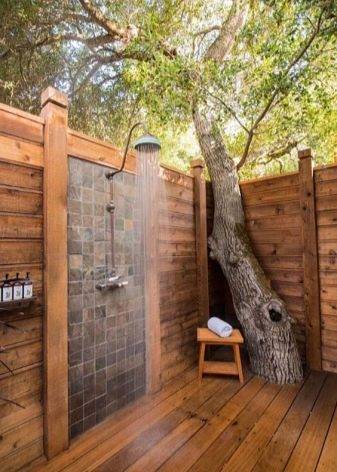
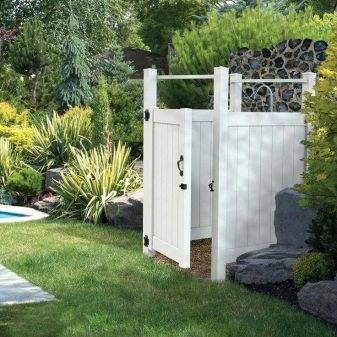
OPTION #6
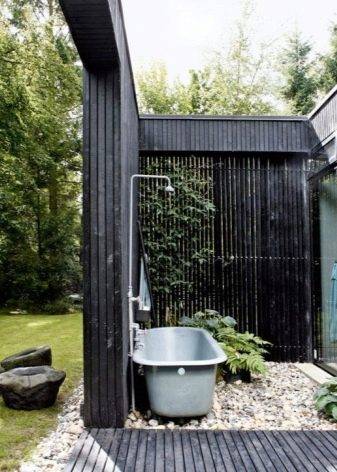
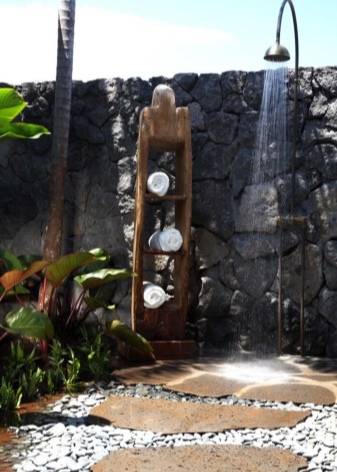
If possible, you can lay out shower enclosures made of natural stone. This solution will fit perfectly into the landscape design of the entire site. In the variant in the photo, water is supplied from a domestic water supply, since the presence of a barrel can disrupt the aesthetics of the structure. The stone was laid out without mortar, because its flat shape allows the whole structure to stand securely.
OPTION #7
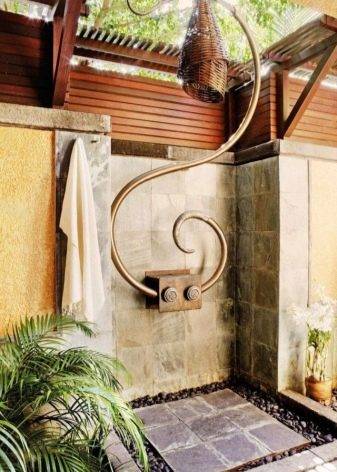
A budget option for a summer shower is the use of materials from tree branches. The frame can be made from thick and even branches, and the walls from bending vines or long branches.
This option is not only quite cheap, but also looks original. The water supply due to the fragility of the frame is carried out from the water supply.

portable summer
Let's start with the simplest models, which do not even require cubicles or large capacity devices. There are mobile showers that work on the principle of a foot pump. The source of water is any container that you put next to you - a bucket, a basin, a tank - whatever you have. You lower the end of the hose connected to the foot pump into it, which most often looks like a rug.
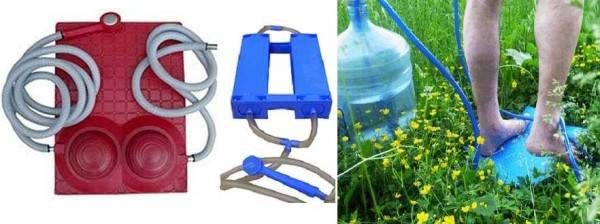
Foot summer shower - toptun
A hose with a watering can is connected to the outlet of this "pump". To get a stream of water, trample on the mat alternately pressing the pump pads.We trampled - the water went.


What is good about this option is that you can carry it with you. It's warm outside - wash on the lawn. It got colder - they went into the house, put a trough, washed themselves there. You can also take this shower on a hike - it fits in a standard package. Another plus is that you can regulate the temperature of the water yourself: if you pour it warmer, you wash yourself in warm water. If you want to freshen up, take a bucket of cooler water. A good option for a shower for summer use.
How to choose a tank for a summer shower
The main criteria for choosing a tank for an outdoor shower
- Capacity. It varies on average from 20 to 200 liters. It all depends on how many people will take a shower daily, how often you will use it. For two people, a tank capacity of 30–40 liters will be quite enough, water can be saved, not poured just like that. But for a family of four, a more capacious tank is needed, liters per 100. The water from the tank will not be additionally diluted with cold water, this is not a boiler for the house, so it should initially be enough.
- Color. The darker the tank, the faster the water will warm up in it. Remember physics? Dark shades are much better at attracting the sun's rays. So the tank should ideally be black. Or dark blue, dark green, brown.
- Manufacturing material.
- Tank shape.

Let's talk first about the material of the outdoor shower tank. There are two main options - metal and plastic.
metal tank
Advantages of metal tanks:
- Durable.
- Durable.
- You can weld with your own hands from sheets of metal, that is, save money and make a tank of the desired shape and volume.
- After painting in dark shades, they become quite attractive and perfectly attract the sun's rays, save heat longer (if the steel is thick enough).
There are nuances: carbon steel will begin to rust due to exposure to water. The zinc layer on galvanized steel can also leak over time, and sooner or later cracks, scratches, and chips will appear on enameled metal. It is best to choose stainless steel tanks.
Cons of metal tanks: heavy, reliable supports are needed, it is more difficult to care for, painting is necessary.
plastic tank
Plastic shower tanks on the site also have many advantages:
- Lungs.
- Relatively inexpensive - from 1000 to 6000 thousand rubles, depending on the shape and volume.
- Easy care.
- Doesn't need painting.
- They serve for a long time.
- They are made from food-grade polyethylene, therefore they are safe for humans.
There are only two disadvantages of a plastic tank in comparison with a metal one - it is not so durable and it will not work with your own hands. Otherwise, plastic containers today confidently bypass metal ones in popularity.
tank shape
As for the shape of the tank for a summer shower, there is a controversial point here. Flat tanks can replace the roof - a significant savings. Yes, they heat up faster. But washing them is much more difficult, you may simply not get to the corners, you will have to use brushes with handles or special disinfecting tablets.
Ideally, the tank should have a flat bottom, but still allow access to everywhere that regular cleaning is required. But in general, you can even put an ordinary plastic barrel on the roof of a summer shower.
Important! You will most likely have to purchase a shower head for the tank separately, inserting it into a special or do-it-yourself hole. You can buy this important detail for about 400-500 rubles.
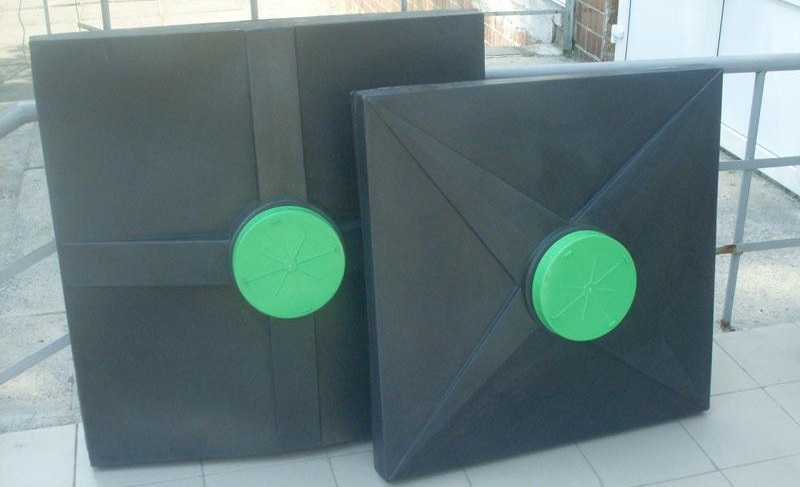
flexible tank
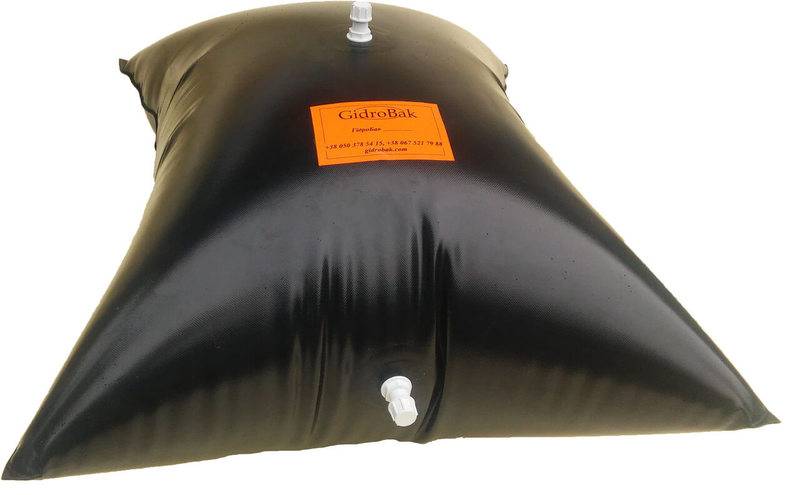
When choosing an idea for arranging a summer shower at a minimal cost, take a closer look at soft tanks made of polymer fabric. They are very light, up to 200 liters in volume, flat, black, heat up quickly, cost about 1,500 rubles (there are cheaper).
For the winter, you can simply twist and hide them, they won’t take up much space. However, such soft tanks are fragile and can be easily damaged and do not last long. Yes, and you can wash them from the inside only by rinsing under the pressure of water.
If you have any questions on this topic, ask them to specialists and readers of our project here.
Summer shower manufacturing costs
Speaking about the economic component, it should be noted that the independent arrangement of a summer shower is much cheaper than ready-made structures. Of course, manufacturers offer a wide range of products that differ in size and shape, style and materials used. The cost of finished structures fluctuates around 10-20 thousand rubles, not all summer residents are ready to spend that kind of money to take an illuminating shower.
As for the do-it-yourself design, its cost depends on the materials used. If you plan a stationary shower with a foundation, a high-quality frame and waterproof lining, then you will practically not be able to save money, and the final price of the structure will be the same 10-15 thousand rubles. True, it should be noted that in this case the owner of the cottage will receive not only a beautiful, but also a durable outdoor shower, the construction costs of which will justify themselves more than once.
If a simple shower (portable or mobile) is enough for the homeowner, and improvised materials are used to create it, then the implementation costs can be reduced to zero.When arranging light structures, there are no particular difficulties, but the construction of a stationary summer shower scares many. In fact, there is nothing wrong with this, and the help of specialists is not required, the main thing is to clearly follow the instructions, observing all the norms and requirements.


The time spent on the construction of the structure also depends on the type of summer shower and the materials used to implement it. A bucket shower or a simple mobile shower can be organized in a couple of hours, but a stationary shower made of brick or wood, erected on a pile foundation, will take at least 2 weeks. Approximately 7-10 days are needed to create the base, a couple more days will be needed to assemble the frame and its sheathing.
Finished blocks and prices
Factory-made outdoor shower cabins have a lot of variety. First of all, they can be made in different colors, since the colors of polycarbonate and corrugated board can be different. Also, the lining can be made of synthetic fabrics, for example, from a film or tarpaulin. You will also find two configurations: with and without a locker room.

On average, the prices for cabins packed in an awning are 15 thousand rubles. The package includes a tank with a volume of 200 liters. If you want to have a locker room, then the amount will be about 18 thousand or more.
The same options, but with polycarbonate walls and a heated tank, will cost 20 and 25 thousand rubles, respectively.
Of course, these prices are approximate and you can find the exact figures in local hardware stores.
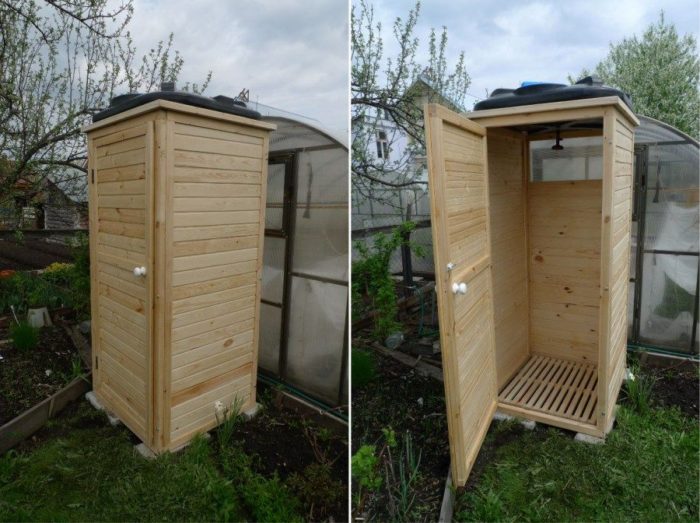
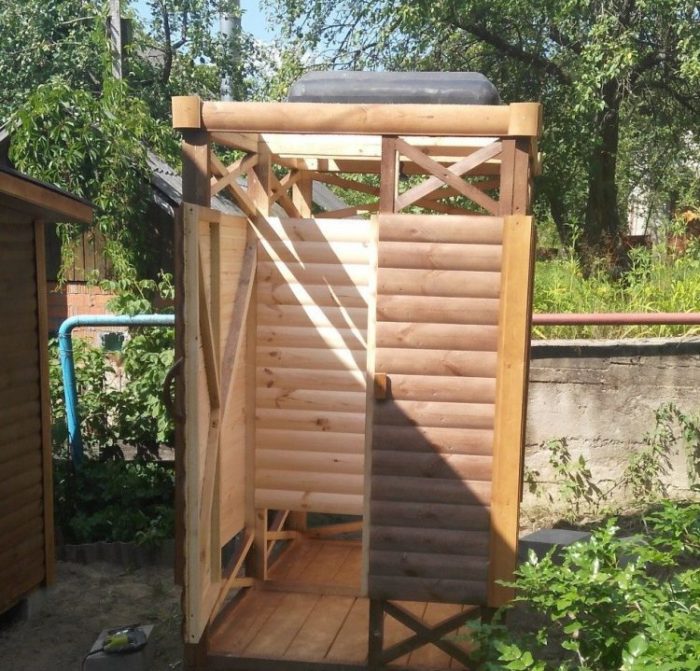
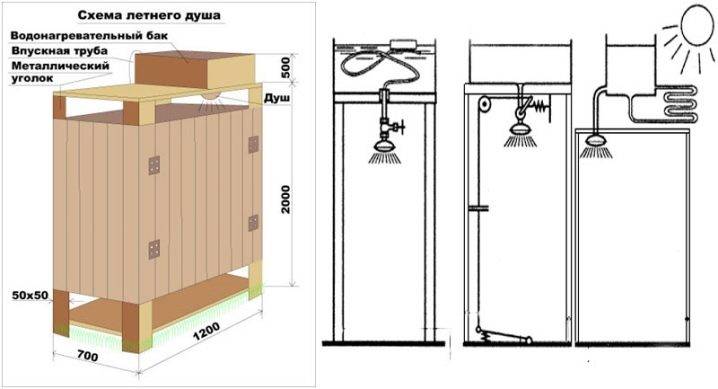
Summer shower in a country house made of wood
For the construction of the structure you will need:
- timber for the frame with a cross section of 30 mm;
- sheets or lumber for sheathing;
- self-tapping screws;
- hoses;
- shower equipment - watering can, bracket, adapter, etc.
Production of support and frame
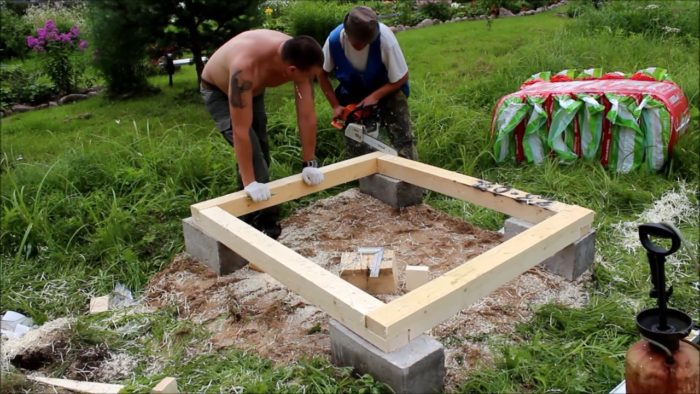
How to build a shower in the country with your own hands from wood:
- Boards 150 mm wide and 30 mm thick are fixed in the form of a base measuring 1x1 m. 4 beams with a section of 70x100 mm are attached to it.
- The lateral and transverse jumpers make the bandaging of the frame. The lintels will serve as roof reinforcements, where a water tank will be placed.
- To connect jumpers and racks, a spike-groove is cut out, but sometimes they are fixed directly, reinforcing the connections with metal corners.
- The upper trim is made from a bar 50x50 mm. There are several intermediate strappings, calculating the height of the building and the weight of the water tank. The higher the shower, the larger the tank, the stronger the structure.
Wood treatment from moisture
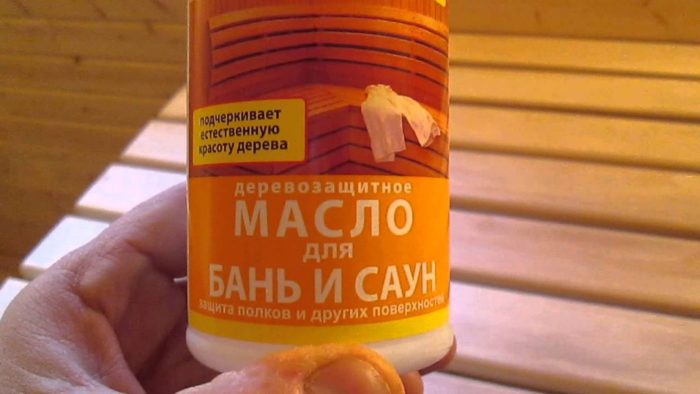
A temporary structure is made from the remnants of lumber. They take any boards, timber, but pre-dried. Residual moisture cannot exceed 22%. Otherwise, the frame will not last even one season. Additional processing is done with antifungal antiseptics for wood. The compositions are sold in finished form with instructions for use.
Protective properties have:
- stain;
- varnish;
- saturated aqueous solution of potassium permanganate;
- blue.
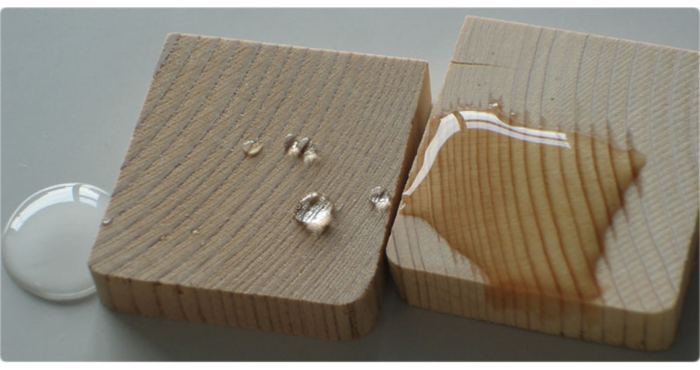
The finished structure is dried, then coated with an acrylic-based facade varnish. They take a water-based varnish, make several protective layers, the amount is arbitrary, but each new layer is applied only after the previous one has dried.
Water tank installation
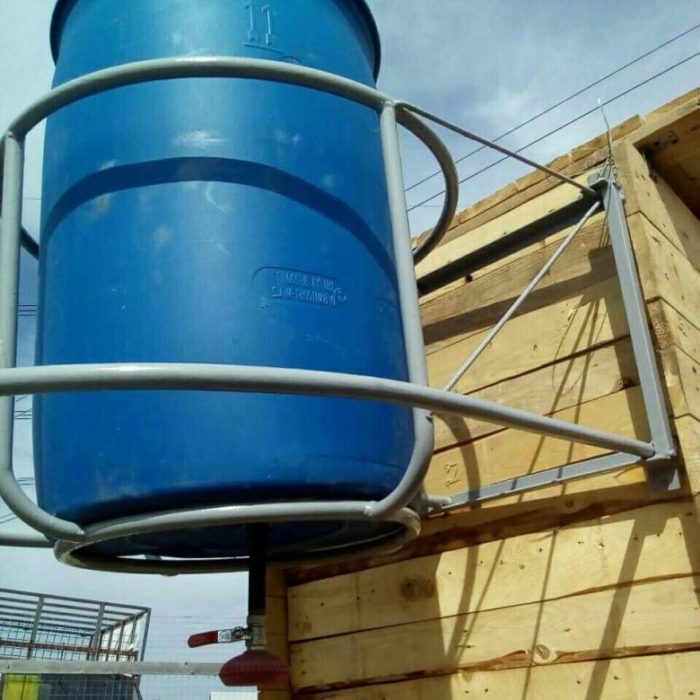
When installing containers, a number of nuances are taken into account:
- If the shower barrel for the dacha is a finished factory design, the roof is flat, then the container is laid on the floors, aligning the pipe from below with the hole in the roof. The side lugs are joined with anchor rings, fixed with steel wire.
- Also, steel strips are used for fixing, for example, when making a shower from a eurocube. The workpiece is bent along the profile of the prepared container, fixed to the roof with nails, self-tapping screws. The nozzles and outlets are pre-joined with hoses for water supply and liquid supply to the watering can.
- A separate frame is constructed subject to the fixation of a high Eurocube or a large barrel. Braces are made of nylon slings, ropes, cables. Attach them to the corner posts of the frame or anchors.
- With a horizontal arrangement of containers, lateral movement is limited. It is most convenient to put a couple of bricks or cinder blocks, the barrel will not move.
They pre-think how to fill the shower container, there are several options:
- pour in buckets, for which a ladder is attached to the tank, a neck is made in the container;
- pump through a hose, for which a piece of hose is lowered from the neck or topping pipe.

shower sheathing
Knowing how to build a frame, drainage for a shower, install a tank, choose a material for sheathing:
- Clapboard, blockhouse, lumber. They are fixed with a gap of 2-3 mm.
- Strong cellophane wrap. The option is short-lived, but enough for the season.
- impregnated material. Tarpaulin, awning, tent canopy.
- Polycarbonate.
- Slate sheets, corrugated board.
Depending on the type of sheathing, fasteners are selected, the fixing step.
3.Water tank selection tips
The easiest way to ensure water supply is to install a plastic tank or an old iron barrel on the roof of the shower, paint it black to increase the rate of heating of water by sunlight, and connect a hose to it, through which water will flow into the tank. The presence of a hose for water supply is mandatory, especially if the tank volume is 100 liters or more. The disadvantage of naturally heated tanks is that their use is problematic in the cool season. Therefore, many prefer heated tanks. There are three types of such systems:
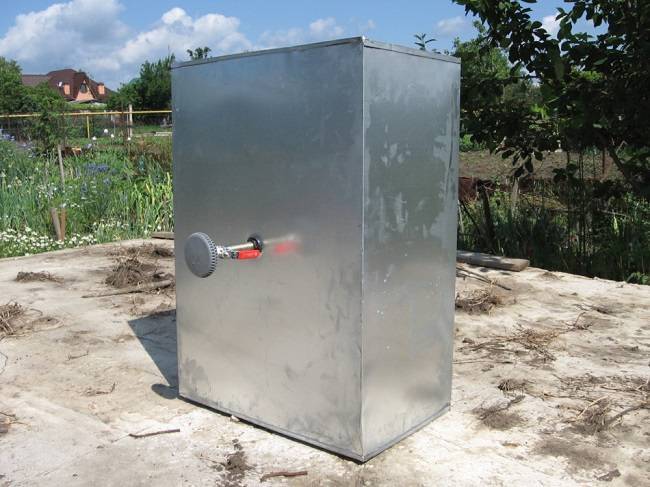
- A metal tank with a heating element inside. The advantage of this design is the presence of a pump that provides a constant supply of water. The heating element constantly maintains the set temperature and does not allow the water to cool. Thus, at any time you will have access to hot water. The disadvantage is obvious - in the absence of running water in the country, such a tank is useless.
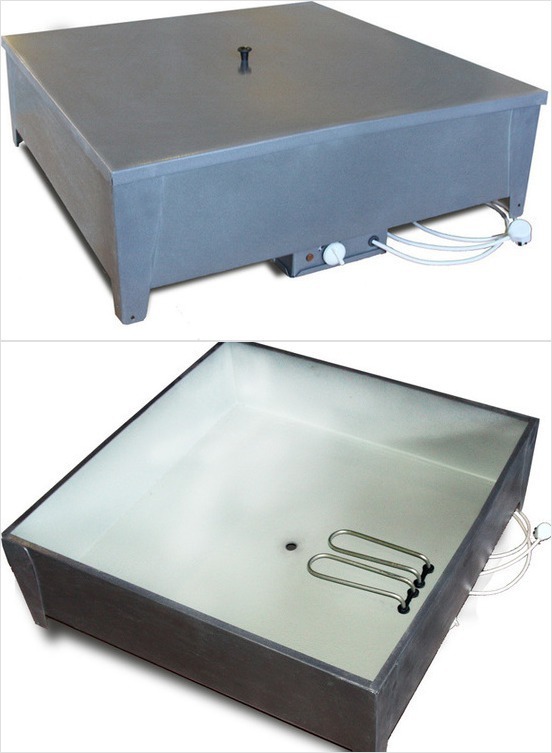
- Tank made of galvanized steel, which is designed for low showers. It has a flat shape and a short built-in shower head. Its volume is 100 and 200 liters. Such a tank works like a boiler and needs a constant water supply.
- A simpler variety is a heated plastic tank. It has a compact shape and low weight, which greatly facilitates its installation. The system does not need a constant supply of water, which is both a plus and a minus at the same time. Because it turns out that the heating element in this design must be turned off after heating.
The installation of the selected tank can be done in two ways - placing the tank directly on the cabin roof or on a special frame.The second case is rational to use if the volume of the tank is impressive, and the building may not support its weight. It is enough to make a frame from old iron pipes over the shower roof or from wooden beams. This method of placement will help to avoid significant heat loss and speed up the heating time of the water.


Projects and schemes
There is nothing difficult in making a summer shower with your own hands. And this work should be approached with all responsibility.
To get started, you need to carry out several sequential steps:
- choose the right project;
- draw up a drawing on paper indicating the dimensions of the building and the size of the site;
- choose a place for the future outdoor shower;
- make a marking of the territory;
- buy the necessary materials and tools;
- build a foundation;
- to carry out sewerage for water drainage;
- prepare the drain;
- install the construction of a summer shower;
- install a water tank or connect a water pipe;
- carry out interior decoration;
- install hooks for clothes, shelves and a curtain if necessary.
So in any case, all work must begin with a plan and drawing. This stage will greatly facilitate subsequent work and save you from many problems.
The height of the cabin should reach two meters, and the space inside should be enough to turn around, bend over and raise your arms up without constraint. As a rule, about two meters in length and one and a half meters in width are enough for this.
A summer shower project can be simple, but at the same time interesting. And for this you do not need to have special building skills. For example, on the site you can build a country two-room change house with a toilet and a shower under one roof.Such a building will be especially important during rain or in the cold season. The optimal length of the trailer is 6 meters. This area will be enough to place inside a toilet, shower and changing room.
Each owner chooses a place for a summer cabin independently.
We list the main recommendations.
- It is more reasonable to place the cabin on the sunny side. Try to avoid shade, and in order for the water in the tank to heat up faster, it is advisable to find a place where the sun's rays fall throughout the day. If there is no such area in your yard, then you need to consider at what time it will be more comfortable for you to take an outdoor shower. If during the day, then choose an area that is illuminated by the sun in the morning. And if you prefer to use the shower in the evening, it is recommended to choose a place that is illuminated by the sun in the afternoon.
- It is better to choose a flat area with a slight elevation, so the water will drain faster into the drain hole. If you place the shower in a low place, this will undoubtedly lead to stagnation of water, which will later lead to the appearance of an unpleasant odor.

- The place should be protected from drafts - even though the summer breeze is warm, blowing can cause trouble.
- The shower cabin should not be located in the central part of the site - it is better to hide even the most unusual and interesting design from prying eyes.
A suitable place to install a cabin in a suburban area will be several options.
- Area next to a private house. In this case, you can use one of the walls. This is a great option that allows you not to conduct additional communications.Such a shower can be connected to a domestic water supply, and a ready-made sewer can be used to drain the water. In addition, you can additionally carry out lighting so that you can take a shower in the dark.
- Not far from the bath. It is very useful to take a cool shower after the steam room.
- Location next to the pool. In this case, it is not bad to make the lining of the walls of the shower cabin with the same tiles, so as not to disturb the harmony and unity of style.
- Under the same roof with an outbuilding or a toilet. This option allows you to save not only space on the site, but also money.
- Another good two-in-one option is to allocate additional space for a dressing room. Agree, it is not very convenient to wipe yourself with a towel in a narrow, damp shower. And you should think over the project so that water does not penetrate into the locker room.
How to make a summer shower from a barrel with your own hands?
There are several ways to build an outdoor shower. The most durable are solid shower houses with walls made of polycarbonate or other suitable materials. To independently make a shower in the country, you must:
- select a project;
- make a drawing and indicate on it the size of the site itself and the parameters of the building;
- find a suitable place for future construction;
- make markup;
- prepare the necessary tools and materials;
- lay out the foundation.
Then it is desirable to carry out sewer pipes and make a drain. After that, the construction of the summer shower is installed. At the final stage, the barrel is installed and the water supply is connected.
How to install?
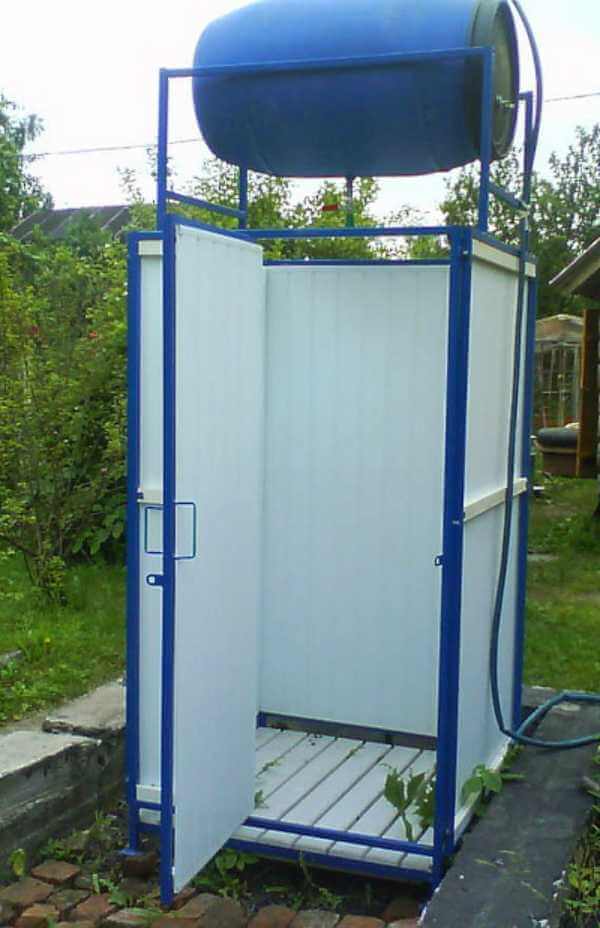
When installing the container on the shower, be sure to fix it, otherwise the barrel may simply fall from the surface. It is advisable to place the building itself in an open, unshaded place.Thanks to this, the water in the barrels on hot sunny days will heat up on its own without the use of heating devices.
If the container is mounted vertically, when installing the tank on the roof, supports for it should be provided in advance. For this, a small fence of boards is suitable, in which the container is installed and fixed
With horizontal fastening, it is important that the container simply does not roll away, so it is fixed with ordinary bricks. If the roof is flat, the tank is fixed on it with braces
In this case, strong cables, ropes are used, which are attached at the corners to racks or anchors.
How to fix?
Installing containers and fixing them is not a laborious task that requires special skills and knowledge.
When using a flat-shaped tank, it is enough to simply lay the container on the floor and align the nozzle with the roof hole. If there are side lugs, they are connected using a strong wire with rings on the roof or wall
It is important that the beams are strong enough to support the weight of a tank completely filled to the brim with water.
Canisters made of plastic or eurocubes are fixed with narrow metal strips. To do this, the blanks are bent in the shape of a container and fixed with nails to the roof.
When using a plastic tank, be sure to strengthen its adhesion to the support. In this case, it is more reasonable to tie it to the structure, otherwise an empty barrel may fly off with a strong gust of wind.


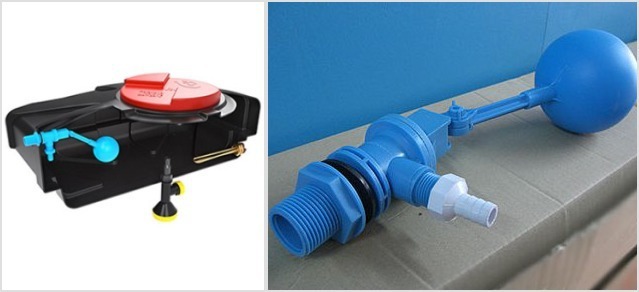
Crane installation
Installation of a crane for a metal tank and for a plastic container is carried out in a similar manner. The watering can is attached to a specially provided hole with a threaded connection located at the bottom of the container.A watering can is selected depending on the thread pitch and the diameter of the outlet. A faucet with a watering can can be metal or plastic, while the length of such a device varies. To embed a tap into a closed container, you need the following.
- Decide on the place where the watering can with a crane will be attached.
- Then you should drill a hole corresponding to the selected parameters and clean the edges.
- Degrease the surface.
- On the inside, screw on the nut with the gasket. For additional bonding under the gasket, coat with sealant.
- Perform similar actions from the outside.
For plastic shower barrels, see the video below.
Filling the tank and heating water
The barrel can be filled with water manually or with a pump.
There are four ways to make sure that the water in the shower is always warm.
- Solar rays are the easiest and most economical option for heating water. But in this option, a prerequisite when choosing a place for a cabin is that the site should always be under the sun's rays. To enhance the effect, you can paint the tank with black paint. Then the rays of the sun will warm the surface of the barrel more strongly, thereby the water will warm up faster.
- Use firewood - this option is possible if a gazebo with a fireplace or stove is installed next to the shower.
- Use an electric heater - for a summer shower there will be enough power from 2 kW. The heating element should be installed at the bottom of the water tank, and if you plan to use a boiler, then it must be placed on top. But in this case, the tank should be equipped with a thermometer that will indicate the temperature of the water.When the maximum temperature is reached, the electric heater must be turned off, otherwise the device may burn out.
- Install a modern thermosyphon system - cold water, passing through the pipes through the coolant, moves into a container with heated water. But this method can only be used in the hot summer period.

For a large family, two water tanks can be placed on the site. One large for cold and one smaller for hot. Thus, each member of the family will be able to independently regulate the temperature of the water. To do this, it will be necessary to connect a mixer to the system to supply water from different barrels.
7. Country shower from corrugated board
Another good material for covering a summer shower is corrugated board. This material is characterized by high strength and durability combined with lightness. It is windproof. And when its walls heat up throughout the day, it will be comfortable to take a shower in it. Both wooden beams and metal profiles can be used as a frame. Metal, of course, is more durable. Therefore, if you still need to purchase materials, give preference to it.
The manufacture of the frame is similar to the examples from points 5 and 6. The only difference is that more crossbeams must be added. This is necessary to securely fix the sheets and give the structure rigidity, since the corrugated board itself is considered a soft material. Fasten sheets with self-tapping screws. Be sure to use spacers to avoid damaging the sheet. You can cut the corrugated board with scissors for metal or using a grinder and a disk with teeth. Other circles are not recommended.During cutting, the polymer coating can burn through, which protects the coating from corrosion. The roof is also covered with corrugated board, and the tank is located under it. The gap between the walls and the tank will provide natural ventilation in the cabin and prevent the formation of mold and unpleasant odors. An unheated tank can be placed on top of the frame. Then the need to build a roof is eliminated.
How to choose a tank for a country shower
Before buying a shower tank, you need to decide on its volume and choose depending on the number of family members. It is best if the tank capacity is large, so that there is enough water in full. Depending on the model, solar energy may be used for heating, or there may be an element for heating water using electricity.
There are several important characteristics that you need to pay attention to when choosing a tank:
The design of the tank should not be heavy.
Since the tank is designed for a large volume of water, the material must have a large margin of safety.
In order for the water in the tank without a heating element to evenly warm up, dark colors should be preferred. They absorb a lot of solar energy, due to this, the heating process will take a long time. If the tank has a built-in heater, then the color of the tank is unimportant.
Shower tanks differ in shape - square, rectangular or round. The most stable and practical is the flat-shaped container
Its advantage is that it can be installed on any roof, even if it has a slight slope.
Another important criterion to pay attention to is the material. Tanks that are offered in stores can be: steel, plastic, stainless steel and galvanized steel.


