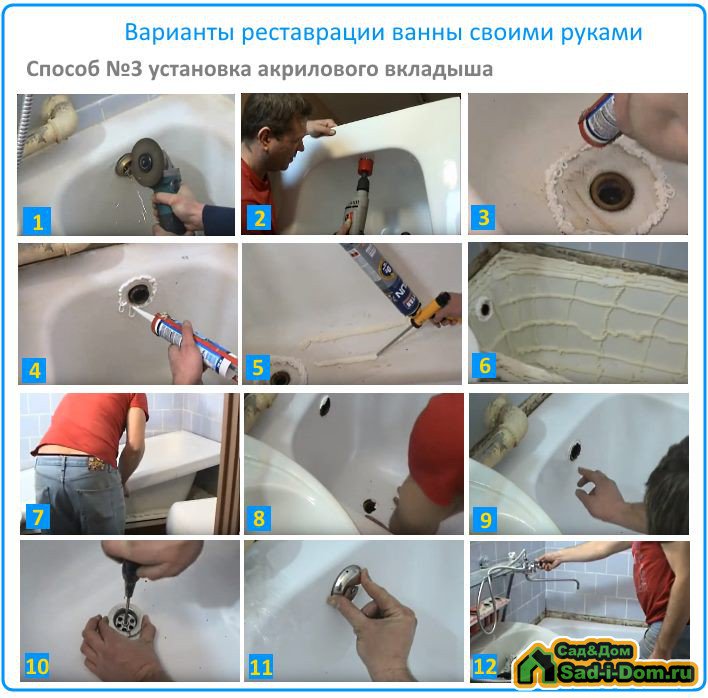
- Step-by-step instructions on how to install an acrylic liner
- How to install an insert
- Installation steps
- Measurement
- Bath preparation
- Product fit
- Installing the liner
- Acrylic bath liner price
- Installing acrylic liners in the bath
- We study the characteristics and advantages of the acrylic liner
- Installation technology of the acrylic liner in the bath
- Installing the liner
- Mounting the acrylic liner
- Varieties
- Types of inserts
- How to choose an acrylic liner, what to look for
- Helpful Tips
Step-by-step instructions on how to install an acrylic liner
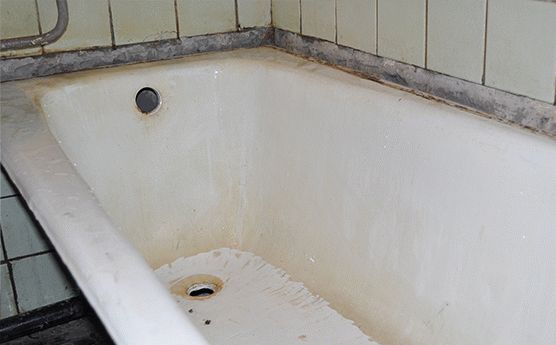
The installation process and technology is not so complicated if you understand the details and study the stages of work. As in the previous methods, here you also need to start with the preparation of the base, the only difference is that it is not necessary to remove the old enamel. Let's take a closer look at all the stages of work:

- The first step is to dismantle the lower drain and the upper overflow. Chip the tile backsplash from the sides of the bath, if any. Clear all coarse debris.
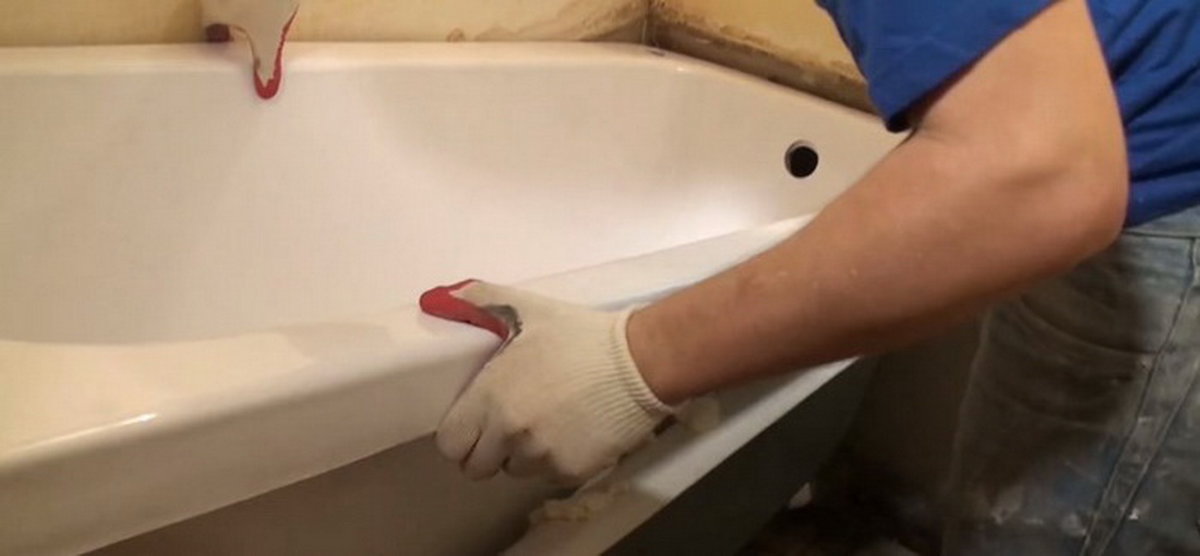
- Next, we make a freeze. To do this, we insert an acrylic liner into the old bathtub, measure it, cut openings for drains and overflows, preferably with a drill with a nozzle (54 mm in diameter.). After that, with a grinder or a jigsaw, the excess technological edge of the liner should be cut off.The cut points must be carefully sanded.
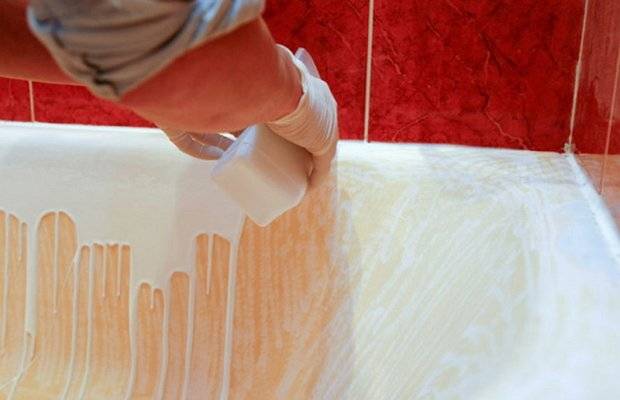
- The next step is to apply sealant and prepare a special foam. To do this, thoroughly wipe the bath. Apply silicone sealant around the drain holes. Sealant is also applied between the sides of the tub and the acrylic liner. We would like to clarify that during the installation process, the foam may swell and displace the liner itself, for this, before applying the foam to the bath, a special composition should be introduced into the foam can with a syringe, which will prevent the foam from swelling.
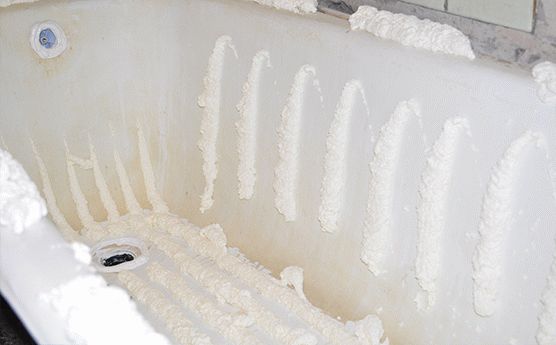
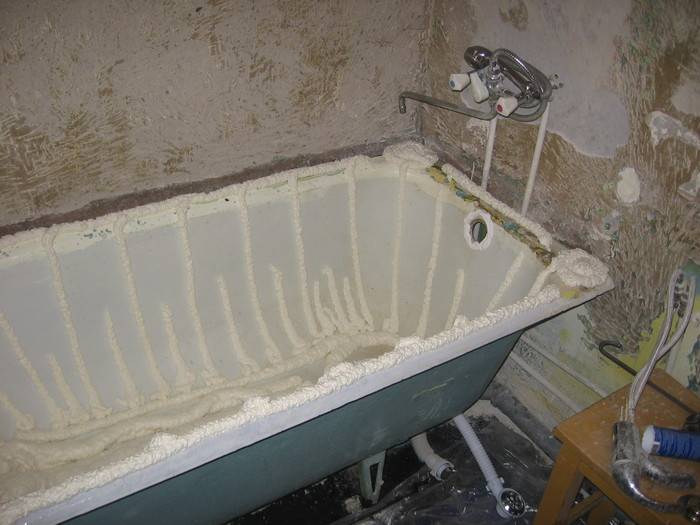
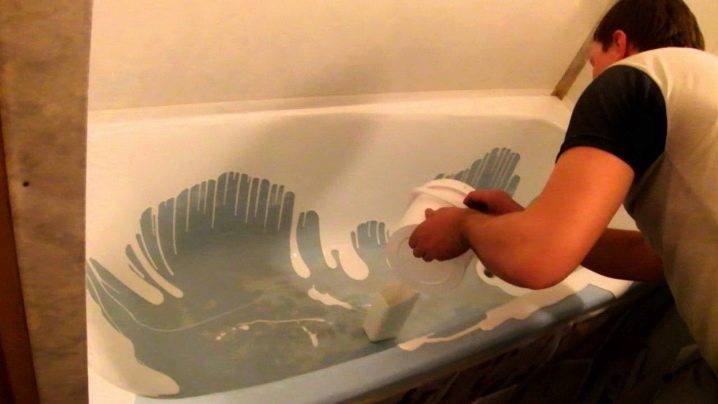
- Foaming step. After the preparatory work has been completed, we apply a two-component foam to the bath. To do this, on the surface of the bath, apply in strips from bottom to top, with an interval of 10 cm, a prepared special foam. At the very bottom of the strip with foam, you can apply more often.
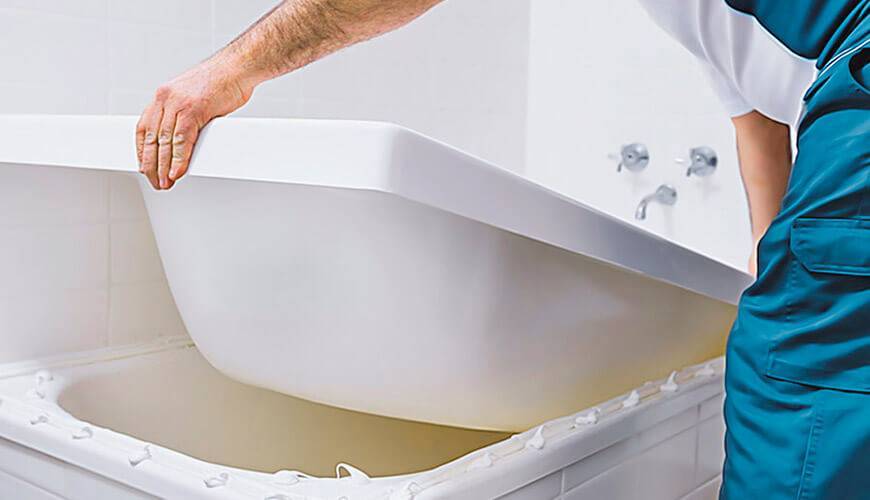
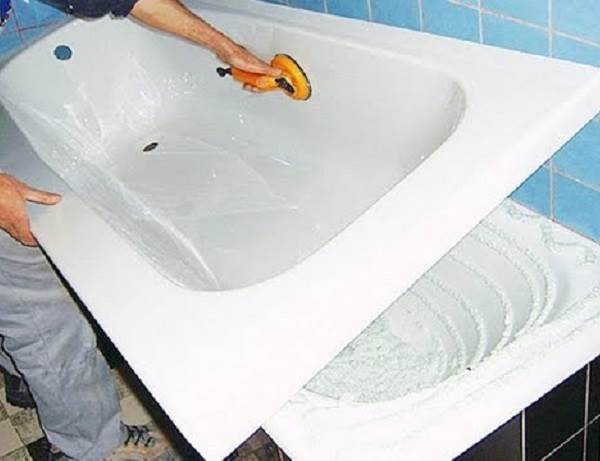
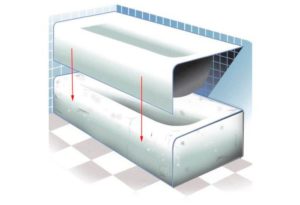
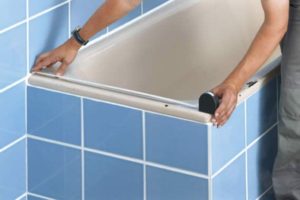
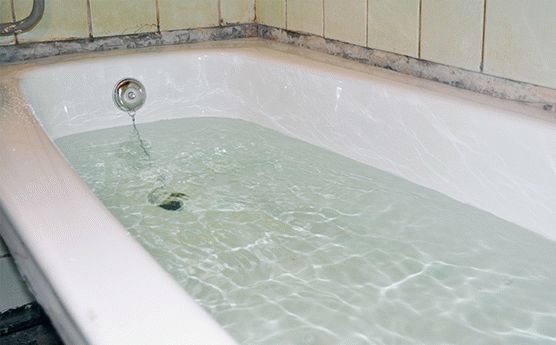
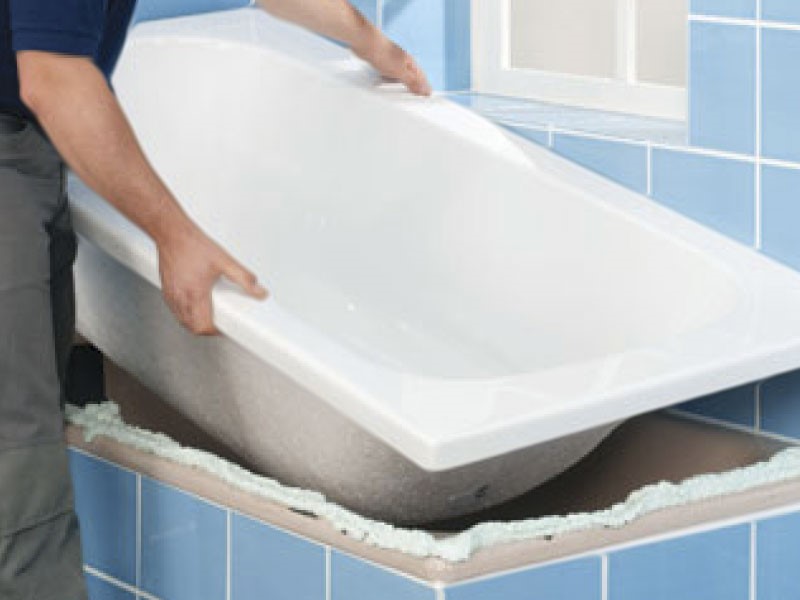
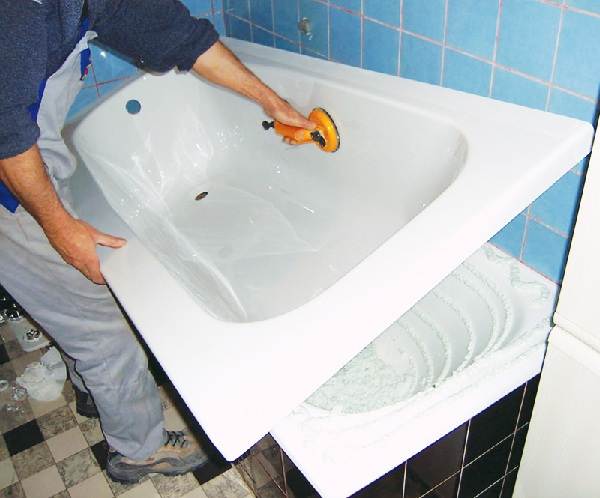
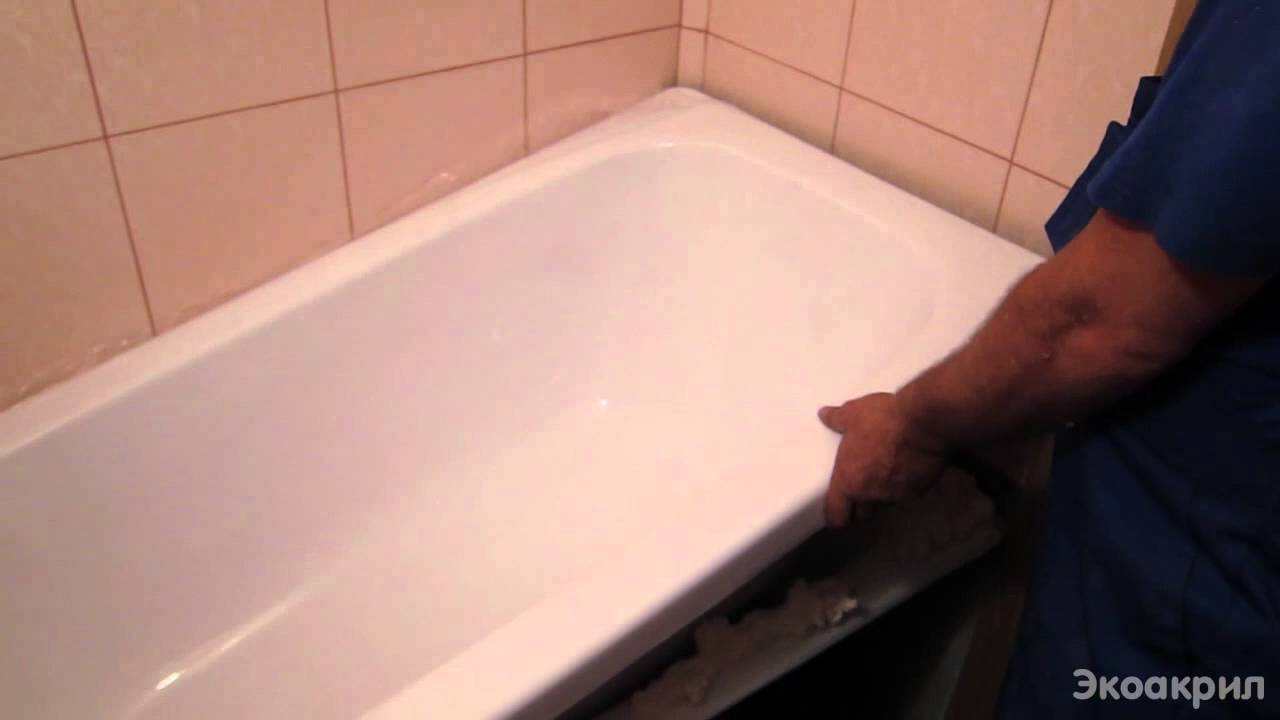
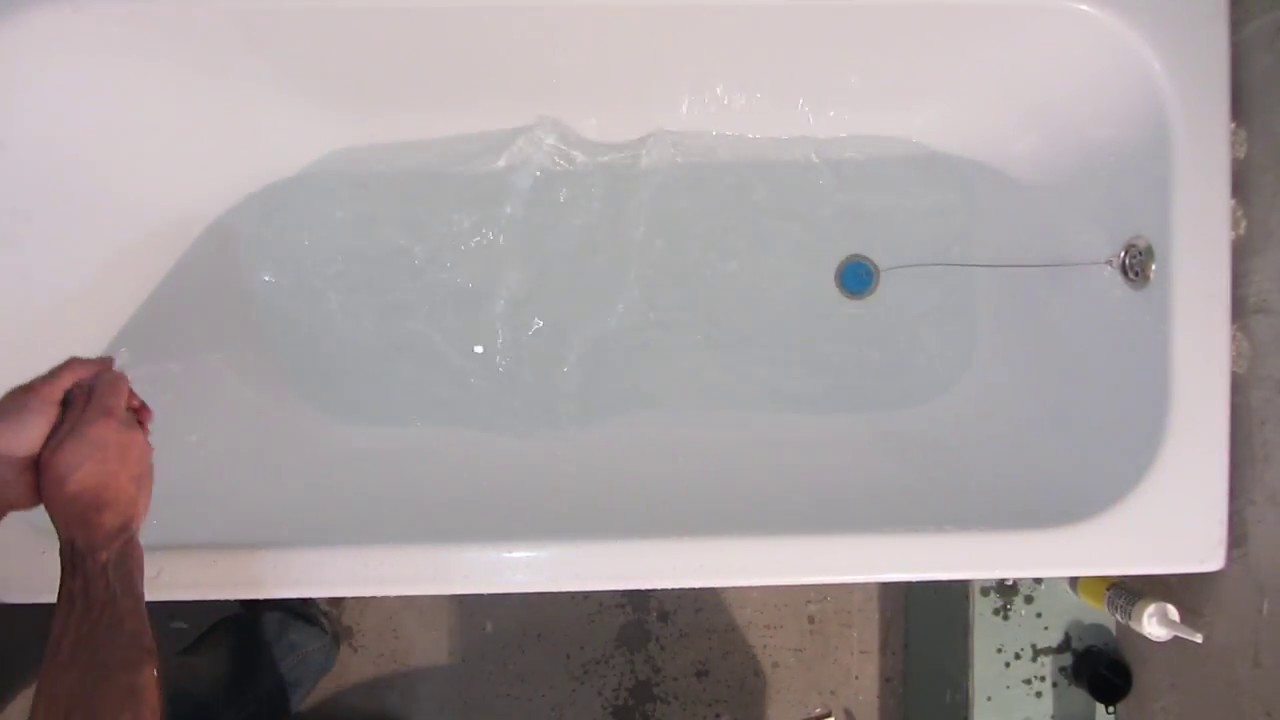
- And the final stage is the installation of the liner. After the foam application is completed, carefully place the acrylic liner in the bathtub, and pressing firmly, wipe it evenly over the entire surface, especially in the area of \u200b\u200bdrain and overflow. After the laying work has been done, the drain and overflow gaskets are installed, tightening the nuts tightly. Then, water is filled into the finished restored bathtub so that under the mass of water, allow the liner to adhere tightly and firmly to the bathtub surface.
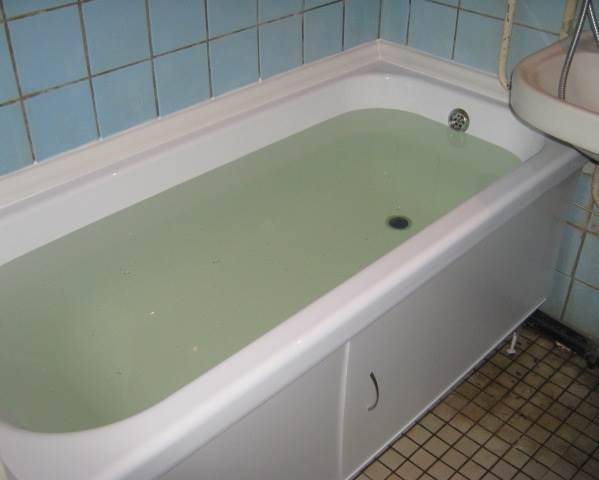
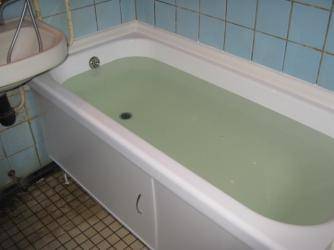
- After all the operations, the bath is left in this form with filled water for about a day. After the water is drained, the protective film layer is removed from the bath. After six hours, it will be fully usable. More clearly with the installation process, you can see the video.
Installing an acrylic liner in a bathtub video
As a result, by installing an insert in the bath, you will get a completely new bath, but the decision to buy a new bath or give a second life to the old one is up to you.
How to install an insert
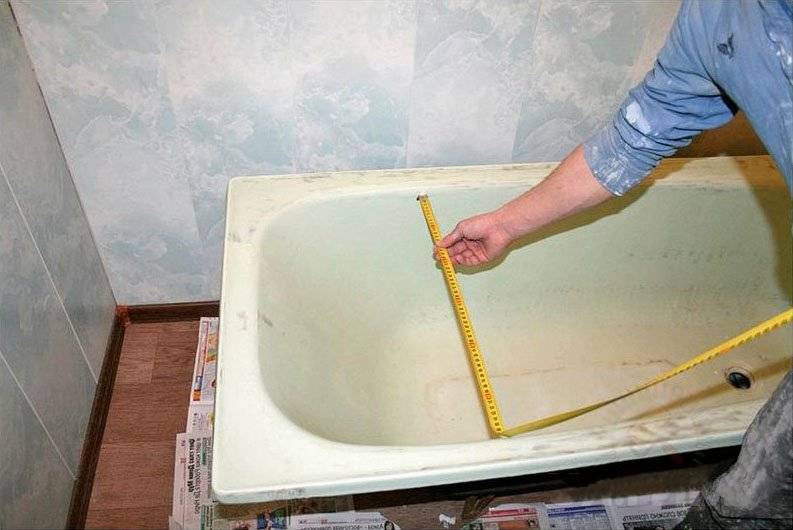
Installing an acrylic liner in the bath is carried out by hired installers, or independently. Refusing the services of workers, you will have to independently measure the washbasin that has lost its gloss. We need measurements in millimeters:
- the width of the upper inner part of the product at both ends
- tub interior length
- the total length of the bowl along its outer edges
- depth (measured in the drain area)
After measuring and ordering products, you need to prepare the bath for work:
- The sides of the bowl are cleaned. Only enamel should remain without cement, dirt, silicone, particles of mounting foam, sand.
- The trim is removed. To install the liner, you need at least a centimeter gap. If it is, the finish can be left. If there is no gap, you will have to shift the tiles or panels after installation, depending on how the sides are finished.
- The inner surface of the bath is degreased. Otherwise, there will be no reliable adhesion of the liner to the main bowl. It is desirable to clean it with baking soda, including the sides. After, you need to dry the bath.

The insert in the bath is installed on the mounting foam
The list of manipulations can be replaced by removing the enamel. Do this:
- sanding the surface by hand with sandpaper attached to a block of wood
- grinder with a nozzle in the form of a petal emery wheel
Removing the enamel ensures maximum adhesion of the liner to the tub. However, after removing the old coating, it will also have to be washed off. The final surface, again, is degreased and dried.
It remains to dismantle the plums. They also need to be thoroughly cleaned and dried.Now you can start installing the insert:
Insert the liner into the tub, marking the cutting lines of the sides. As mentioned, they should go at least a centimeter to the edges of the washbasin. When trying on a tab for it, it is advisable to hold it with handles for carrying glass or with a luggage tape. Cut off the edge of the liner along the marked lines with an electric jigsaw. In the absence of such, you can use a hacksaw. Remove the burrs remaining on the cut with sandpaper
When working, it is important not to wipe the adjacent surfaces. Coat the drain holes with sealant
Silicone based. You need to smear without regret. Otherwise, water can penetrate between the liner and the old tub. Take a two-component mounting foam, a gun for it and create a semblance of a grid on the entire inner surface of the bath and boards. Within 15 minutes, we need to sit down and crimp the liner. After the foam polymerizes, hardens. Pressing the insert to the bottom of the bath, you need to make maximum efforts. Install the drain, replacing the siphon. After placing the liner, its threads will not be enough. Install overflow. Fill the bath to the drain with water and leave for several hours. The liquid will press the acrylic inlay against the base, allowing the foam to adhere securely. The latter, as you know, is gradually expanding, gaining volume. This pushes out the liner. Water counteracts expansion of polyurethane foam. We make out the joint of the liner and the sides, covering it with silicone sealant. It needs an antibacterial component. Otherwise, over time, the sealant will become the basis for mold and mildew, it will darken. Restoring a bathroom vanity.
After installing the liner in the bath, you need to take a full bath of water
It is better to put an acrylic liner on cast iron bathtubs. They don't bend.Acrylic has such a weakness. If there is an equally flexible base under the coating, the structure will turn out to be short-lived. Therefore, inserts are not recommended to be placed on copper wash basins. In this case, the reviews about the acrylic liner in the bath will be negative.
Installation steps
How to glue the acrylic liner in the bath! Consider the procedure for the production of installation work:
Measurement
To select the liner, it is necessary to measure the dimensions of the restored bathtub.
Having measured the length, width and height of the old bathtub, based on the obtained dimensions, we select an acrylic product.
Bath preparation
- To prepare the bath, you need free access to the perimeter of the entire bath. If there is no such access, then a decision must be made: either gain access or cut the liner.
- Cleaning up old enamel. Cleaning is done mechanically using coarse-grained sandpaper, using a tool or manually. High-quality grinding of enamel guarantees good adhesion, since glossy enamel does not provide good adhesion when gluing. It is unacceptable to leave uncleaned areas in the bathroom.
- After cleaning, the bath must be washed.
- The next step is to dismantle the siphon.
Product fit
- Having laid the liner in the bathroom with a marker, we mark the drain and overflow holes, protruding parts beyond the dimensions.
- After pulling out the tab, the excess acrylic is cut off around the perimeter, if the configuration does not match, build up with the help of a dense reinforcing mesh and special glue, the place of the mismatch of the geometric configuration to the maximum approximate. Once dry, move on to the next step.
- Using a drill with a special crown, according to the marking, drain and overflow holes are cut out.
Installing the liner
The essence of the installation of the liner is the principle of fixing inside the old plumbing fixture. To perform this stage, it is necessary to use high-quality materials intended for these purposes.
The foam must have a good density after hardening, so ordinary polyurethane foam is not suitable for this purpose.
The sealant must have the following qualities: it must be resistant to mold, waterproof and have good adhesion.
Ideally, it is better to replace the mounting foam with silicone. But this will lead to an increase in the cost of restoration.


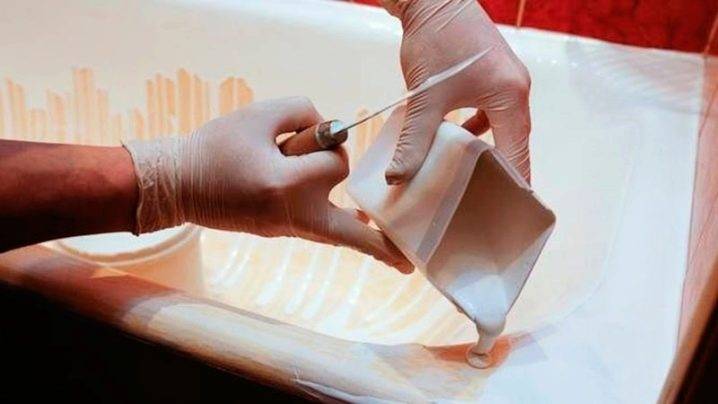
- A sealant is applied around the perimeter of the bath. Careful application of the sealant ensures a tighter contact between the bath and the acrylic.
- For tightness and to eliminate leaks through the drain holes, we apply sealant around the perimeter of the holes, first determining the layer thickness.
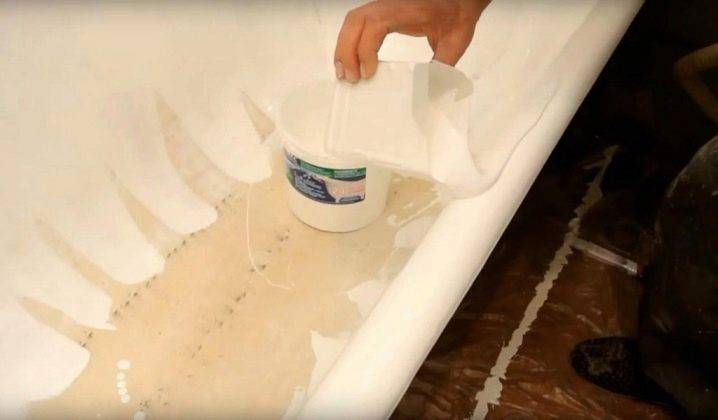
- The next step is to cover the entire surface with adhesive foam. The foam should be applied without gaps and gaps, respecting the layer thickness, trying to accurately repeat the configuration of the structure.
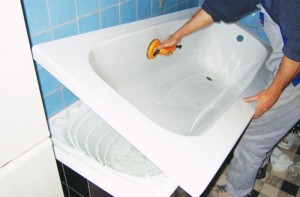
- After application, the insert itself is installed. When installing, it is necessary to press it as tightly as possible to the walls of the bath. For this purpose, use clamps and boards.
- Immediately after installing the liner, the siphon is mounted. This allows the most reliable sealing of overflow points.
- Having completed these stages, the final step is to close the drain hole with a plug and draw water into the bath. The water level should be 2-3 cm below the edge of the overflow hole. Cold water performs 2 functions:
- It is a load, provides reliable pressure on the insertion plane.
- Catalyst for foam polymerization and liner fixation.
The bath with water should stand for at least 24 hours, and only after that it can be used in the usual way.
|
|
|
|
|
|
|
| Two-component foam or special mastic to replace the acrylic liner |
|
|
|
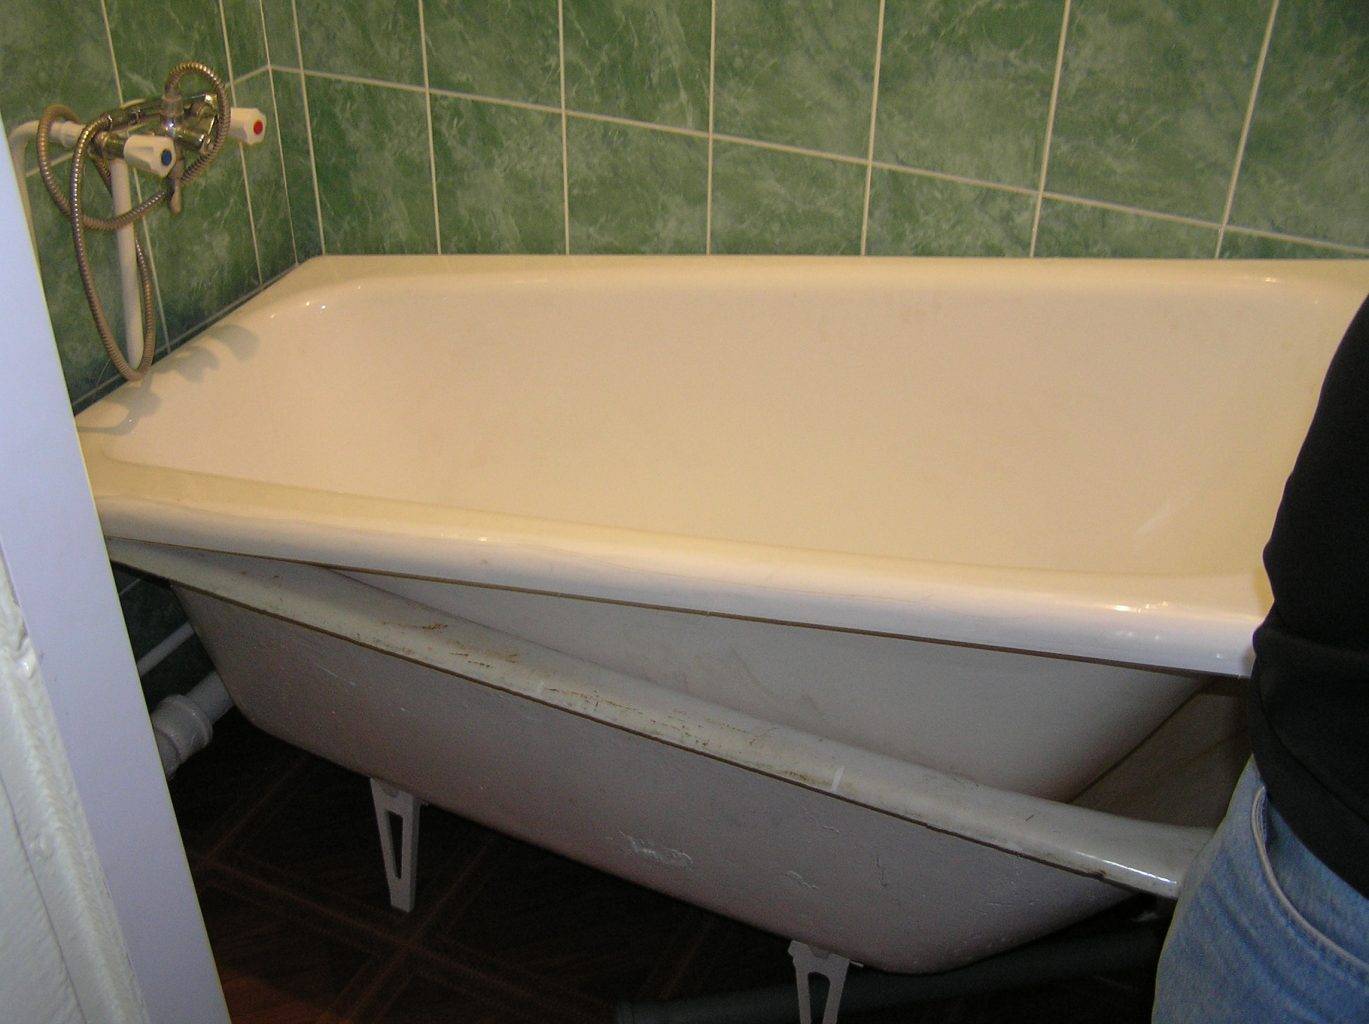
 Measure the length, width and depth of your old tub to find the right acrylic liner.
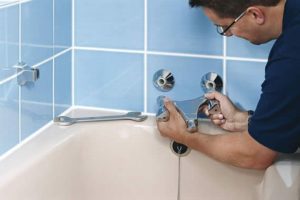 Provide maximum access to the bath, if necessary, remove the old faucet and other accessories
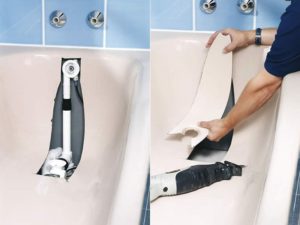 To replace the old siphon, you may have to cut out part of the old bath
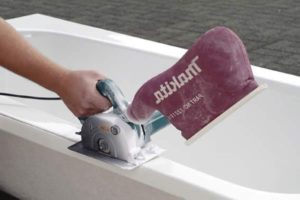 Cut off the excess pieces of the acrylic liner
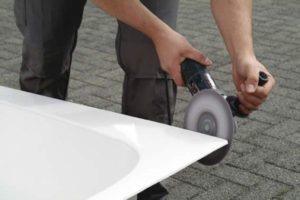 Sand the edges of the acrylic liner
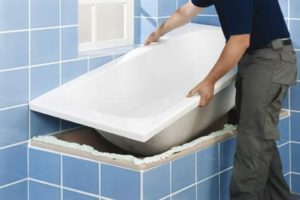 Insert the liner and fill the tub with water
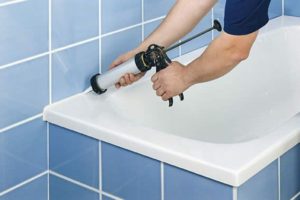 Applying sealant to stop leaks around the perimeter of the bathtub and near the drain holes
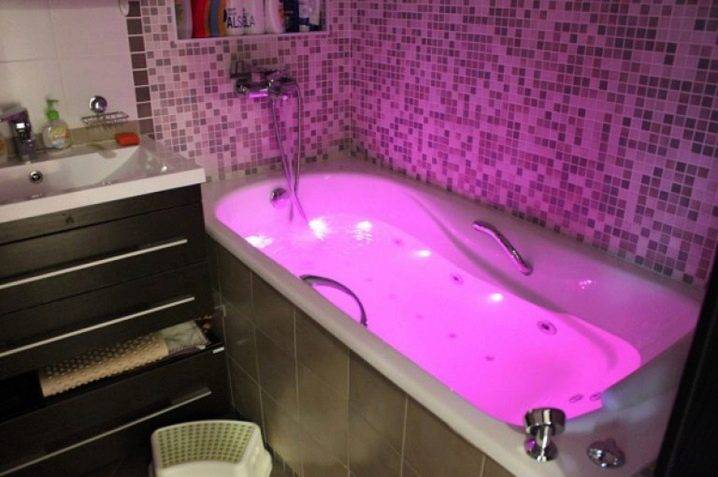
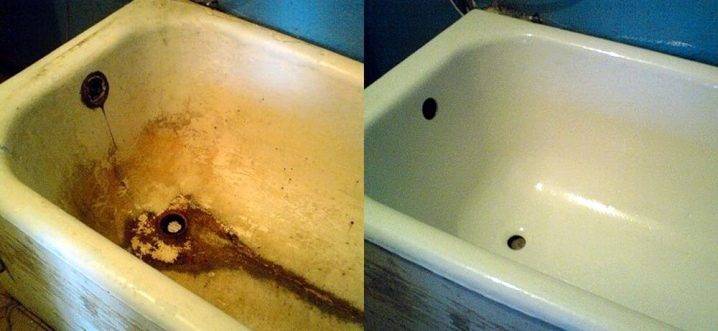
 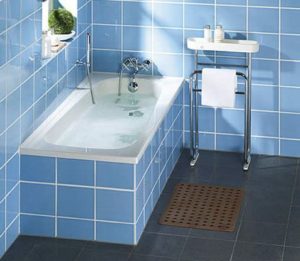 After installing the acrylic liner, about 3 hours later, a finished new bath
Acrylic bath liner price

Acrylic bath liner price
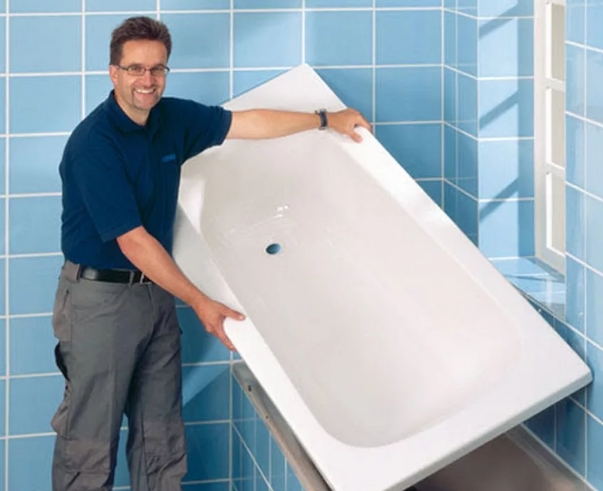
And the krill liner is a bathtub without legs, which must be inserted into an old, damaged steel or cast iron one. There are nine standard sizes of Soviet bathtubs restored in this way. Five types are seventy meters long, and four fifty meters long.
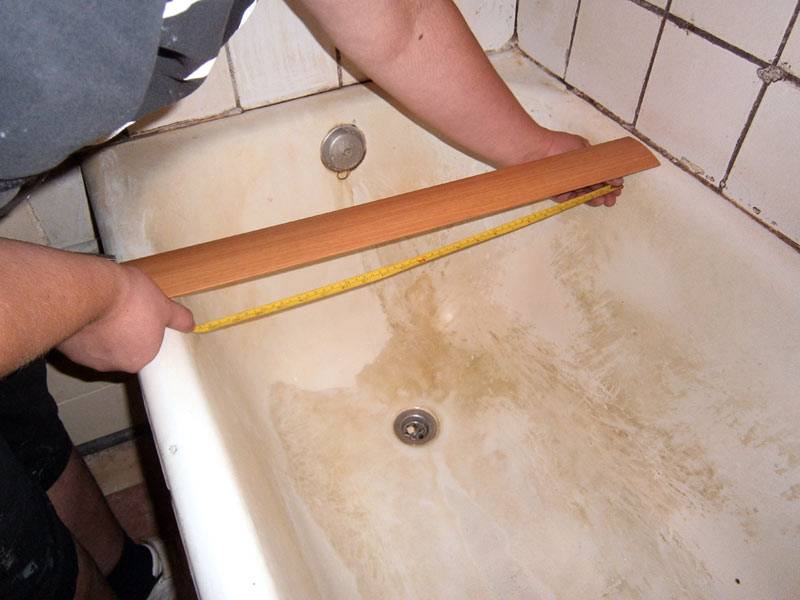
To determine the size of the acrylic liner in the bath, several measurements should be taken. 1. Depth is five centimeters from the drain. To find out the depth, you need to put a flat, long and even object on the bath. Lowering the tape measure to the bottom, we notice the readings. 2. The length of the bathtub is measured from edge to edge and the length of the inner bowl. There are narrowed and even bathtubs, which also need to be measured.
Production of acrylic liners PLASTALL
Installing acrylic liners in the bath
From the beginning, the enamel of the old bath should be washed and dried, as if it were a restoration. liquid acrylic baths. Do not rush anywhere, do it qualitatively
You will use this bathroom for the next 10-15 years, pay special attention to the transitions from the wall to the bottom
Do not use grinding wheels and thinner, they will not be useful, only noise and stink. If you have a question, call right away, we will tell you how to do it.
Removing the old siphon
We remove the old drain and overflow. It can be cast iron or plastic. It is possible to remove such a drain either with the help of a grinder, or with a hammer and a chisel.
The second way is faster, easier and safer. Chamomile-like cuts are made on the inside of the bath, the bronze nut is bent and the drain is removed.
Acrylic liner is installed on the foam
For gluing the liner to the bath, a two-component mounting foam and silicone sealant are required. If there is no such foam, then you can make it. To do this, about ten cubes of ethylene glycol are blown into the balloon using a syringe without a needle.
Such foam does not expand and does not deform the liner. Lubrication with silicone around the drain and overflow holes will prevent water from leaking between the old and new acrylic tub.
How to make two component foam
The stake is fixed on the screws of the new drain. In order for the bath to finally take hold, it is poured with water for several hours. Water with its weight presses on the walls and bottom until the foam hardens.
Advantages of acrylic insert
- Excellent thermal insulation will keep the water warm several times longer
- sufficient strength against cracks
- can be washed with normal soap
- does not fade, dirt does not attract
- quick installation
The disadvantage is the problematic repair in the event of a strong impact with a through hole.
We study the characteristics and advantages of the acrylic liner
Installing an acrylic liner is not the only way to restore an old bathtub.We will analyze all the restoration options in order to know exactly which method is right for you. The first option is enameling the bath. The advantages of this method include the affordable cost of enamel, the possibility of restoration without removing the borders, as well as the long service life of the new coating - about 12 years. But there are also many shortcomings. For example, if enameling is carried out in violation of technology, the service life can be reduced to 5 years.


The second option is to use a bulk bath. The warranty is about 20 years, the surface after processing will be smooth and without smudges, in addition, for restoration it is not necessary to remove the sides, which eliminates the risk of damage to the tile. True, you need to remember about the cons of the bulk bath. For example, this material is very capricious, and its correct application requires dexterity and experience.
Bulk bath
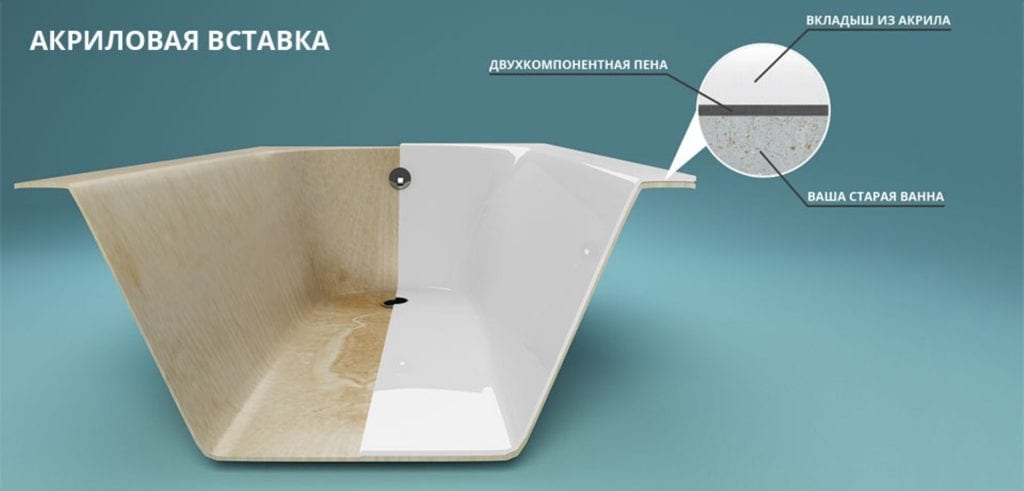
The last option is to install an acrylic insert. by the most the main advantages of this method restorations can be called accessibility and ease of installation - you will quickly carry out the work with your own hands, even without being a specialist. It is not necessary to dismantle the drain to install the insert, as it is enough to simply remove the cover. But even here it was not without drawbacks. For example, you will have to remove the border, as a result of which you can damage the tile. The second disadvantage is that acrylic inserts cannot always fit exactly in size, which means you will have to use foam correction.
The acrylic liner has other important features. For example, the product is not afraid of rust. The maintenance of the updated product is also simple - wipe the coating with a damp cloth and try not to soak clothes made of heavily dyed fabrics in the bath for a long time.If you're looking to install an acrylic liner to upgrade a metal bathtub, there are a number of other benefits. For example, water procedures will become much more comfortable, since acrylic is a material with a low level of thermal conductivity. The water in such a bath will cool much more slowly.
Installation technology of the acrylic liner in the bath
For better installation work, it is desirable to perform all operations in strict sequence:
- Acrylic fitting is done in order to obtain an insert that is most suitable in shape to the restored bathtub. This procedure is done as follows. First, the liner is sunk into the bath cavity (with pressure) and the outline is marked with a pencil. Then the liner is removed and the excess material is removed according to the outlines obtained. Of course, it is necessary to cut the acrylic quite carefully so as not to damage it, therefore it is recommended in this case to use an electric jigsaw with a metal saw (or fine teeth), or a grinder with a cutting wheel.
- The marking of the locations of the drain and overflow holes is carried out in order to be able to exactly match the indicated points. This procedure is usually done by applying any coloring matter to the drain sites. After installing the insert in a predetermined position, a kind of imprint is obtained on its reverse side, just indicating the location of the holes.
- Drainage holes are drilled using a special crown with a diameter of 54 mm.
- The liner is removed and preparations are made for its installation.Why the sealant with a special gun is applied with a ring (roller with a diameter of 2 - 3 cm) around the drain holes on the bath itself, as well as around the entire perimeter of its upper edge. Whereas a special foam is applied on the reverse side of the liner in such a way that its thickness allows compensating for the voids that form between the acrylic liner and the base of the bath itself. That is why experts recommend using a special foam with a low coefficient of expansion and applying it in a continuous layer.
- The design is assembled by laying the liner in the bathroom, followed by pressing.
- For high-quality fixation around the perimeter, it is recommended to press the liner with clamps (do not forget to put gaskets) and immediately install the siphon, thereby ensuring the best fixation of the liner in the locations of the drain and overflow holes. Next, the drain is clogged with a cork and the bathtub is filled with water by 50 - 60%, which ensures a reliable pressing of the liner to the base base of the bathtub.
After 24 hours, the water from the bath can be removed and, by connecting the device to the sewer networks, begin its operation.
From all of the above, we can conclude that the method of how to install an acrylic liner in a bath is not so complicated, which is why it can be implemented independently. This can be confirmed by a video about the restoration of the bath.
Read more:
If you liked the material, I will be grateful if you recommend it to friends or leave a useful comment.
Installing the liner
Let's assume that you have chosen a product of the right size, according to the model of your bath.Now you've brought it home and you need to install it.
It is important to consider that the work must be done with high accuracy. If there are liner installers in your city, then it is better to give this work to them, because if you have no experience, you can get a negative result.
That is, after a few months, the bathroom will begin to smell bad, the top layer will peel off, mold, greenery and other imperfections will appear. Having decided for yourself that the installation of the bath liner will be carried out independently, then follow the steps listed:
1. Clean up. It all depends on the condition of the plumbing. This will usually take many hours. First of all, you need to inspect the room and understand how the plumbing is attached to the walls. Usually in the bathroom, the tile comes on top of the bath itself, which is done on purpose, in order to drain water from the walls.
Therefore, if your case is similar, you should remove the tile that is adjacent to the plumbing. It is worth considering that if you can’t carefully remove the tile, then in the future you will have to either buy it again by quadrature, or change the entire finish, because if you have an old tile, you won’t find the same collection.
Installing an acrylic liner in a bathtub
2. Remove the siphon. If during the operation the siphon dried up, stuck or stuck to the bath in some other way, then a grinder is used to dismantle it. You can always pick up a new siphon and overflow to the acrylic insert, so it’s better to replace all plumbing components along with the repair.
As for the surface itself, it should be frequented with sandpaper.After the work is completed, you should wash off the surface with water, dry everything thoroughly, degrease and only then move on.
3. Preparation. As soon as we have prepared the bath, we will have to bring the liner to the installation state. Each of them has a technical side. It is laid down by the manufacturer in order to further repel water from getting under the insert.


But, as a rule, there is not enough space for mounting an insert with a rim. Therefore, the presence of a technical side is a minus, since it will have to be cut off. Take the grinder and remove everything unnecessary by taking the appropriate measurements.
4. Marking for holes. Restoration of a bathroom with an insert includes the process of forming holes for a drain / overflow. You will need a cutter, as well as a pencil. Attach the liner itself to the bath, from the convenient side and mark it. Then make holes for the drain / overflow. For cutting, you need a crown (cutter) of the desired diameter.
5. Installation. To perform in a previously prepared bath, you will need to buy a special adhesive. It can be either an acrylic adhesive itself, or a waterproof type silicone, or a two-component foam. Many installers offer mounting on mounting foam, which should never be done.
It's cheap, but eventually the foam can lay unevenly. Somewhere it will inflate, which will lead to the formation of defects. Therefore, if you were recommended mounting on foam, discard this idea.
When using professional glue, it is important to apply it to the entire back of the acrylic.
Do not leave any dry places, because condensation will begin to form here, soon the surface will swell and become unusable
It is important, near the drain hole, also next to the overflow, apply a layer of sealant to prevent water from entering under the insert
Once you have applied the adhesive, the liner can be lowered onto the cast iron base. Smooth all sides generously, making sure there are no dry spots.
It is important to install special clamps along the sides of the bath, which will help to press the new body to the old base. When the installation is done, the surface is stuck, they begin to connect the drain and overflow into place
6. The final stage. Once you've made sure the job is done, you can start shaping the aesthetics of the room. It is necessary to re-lay the tiles, glue the ceramic border, process the joints with sealant.
To allow the adhesive to dry, fill the bathtub with clean water overnight, up to the beginning of the overflow hole. Water must be left overnight. Everything will be dry by morning. There are times when an unpleasant odor accompanies the acrylic surface. It usually clears up after a week.
Mounting the acrylic liner
The installation process of this product is very simple. It is possible to produce it yourself, even without experience in this field. To perform the installation, you will need a special foam consisting of two components. It can be purchased at the same place where you buy an acrylic insert. You also need a sealant that can last a long time.
Installing the acrylic liner
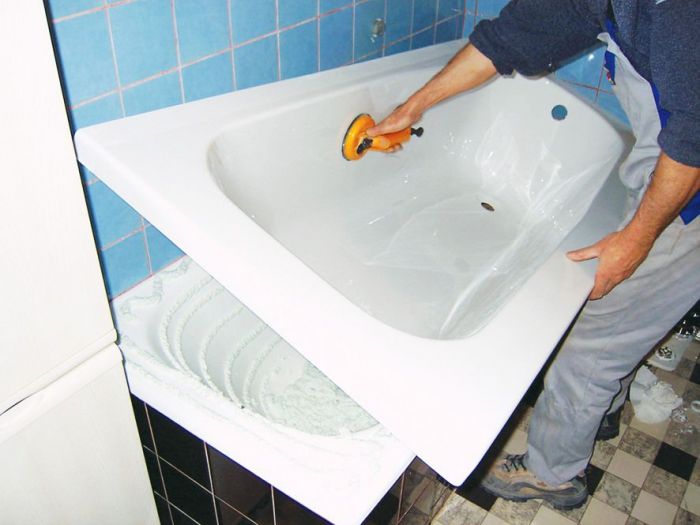
Installation of the acrylic insert begins with the preparation of the cast iron surface. To do this, the edges of the old bath are cleaned. They do not need to have coatings or any finishing materials because they will be hosting the new acrylic surface.Sometimes there are troubles with tiles that go up to the sides of the bathroom. In this case, the interfering finish is dismantled. Without this, it will not be possible to install the insert normally.
The technology for installing an acrylic liner in a bathtub requires a high-quality and even surface. To do this, you need to clean the old enamel. This can be done manually with coarse sandpaper or mechanically using a drill with an abrasive attachment. At the end of the stripping, you need to rinse the bath, removing the resulting dust. The result of the operation is a rough surface. It will have good adhesion, and gluing the liner to it will be quite simple. When the cleaning is completed and the bathtub has a clean surface, the siphon is dismantled from it - it will interfere with subsequent operations.
When updating an old bathtub with an acrylic insert, great attention should be paid to the fit. It runs from the edges to the center.
The insert is placed in the bathroom and outlined with a pencil. Extra parts of the insert are marked. Cutting the insert is recommended to be done with an electric jigsaw, they can perform a high-quality cut along a complex contour. Similarly, the location of the drain holes is marked and they are drilled.
To protect against moisture ingress, a sealing compound is applied around the entire contour of the bath and around the drain. The rest of the bath area is covered with foam, which is applied in a continuous layer. If gaps are allowed in it, then in these places the acrylic insert will sag, which will inevitably lead to cracks. After applying the foam and sealant, the liner is installed in its place and pressed tightly. Immediately after installation, it is necessary to mount the siphon - it will help to press the insert.
Dismantling the liner is not a problem. It is cut by a grinder into 4 parts and removed.


The restored bath has all the advantages of cast iron and acrylic products. A similar result can be obtained with a restoration using a liquid acrylic solution. However, this method is more complicated, and without preparation, it is better not to try to do it yourself.
Published: 29.10.2014
Varieties
Acrylic liners are of two types:
Cast. Such products are made from sheet sanitary acrylic by pressing. In the production process, the sheet is placed on an aluminum or synthetic matrix, heated to the desired temperature and pressed under vacuum. At the stage of heating and molding, the acrylic is stretched, which leads to a decrease in the thickness of the original workpiece. If the manufacturer uses thinner sheets to save money, then the walls of the resulting liner may turn out to be so thin that they cannot guarantee the integrity of the product.
Sometimes buyers are interested in the availability of restoration products made of vinyl. Professionals warn that bathroom vinyl liners don't exist. Since polyvinyl chloride is not a plumbing material, only windows, fabric, building decorations and other things that are not related to plumbing are made from it.
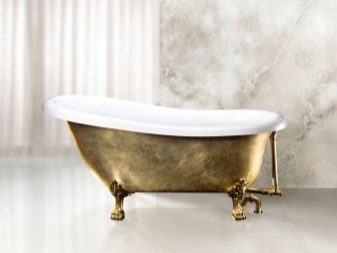
As a rule, the restoration surface is invested in old cast iron bath. This sanitary ware is a classic that has no analogues, but requires some effort to maintain and install.To date, manufacturers cannot offer liners for any bowl model, only for the most common ones. Standard sizes in centimeters are usually 150X70 and 160X70. However, there are models with a length of 170, 180 and a width of up to 80 cm. The most common acrylic version in a sitting font has dimensions of 120X70.
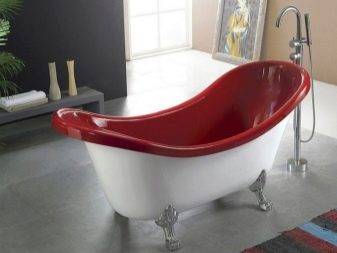
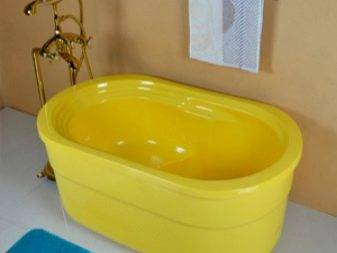
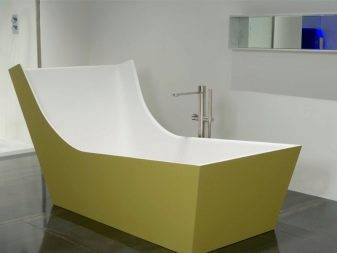
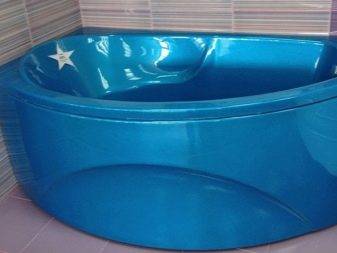
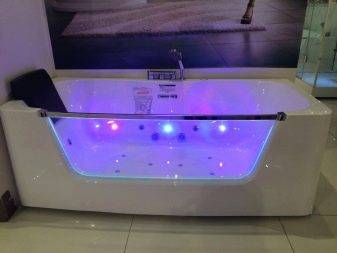
Acrylic material allows you to experiment with the shade of the bowl. The color insert will become a design element of the bathroom, on which you can make the main focus, dream up with lighting and color schemes of the surrounding space. The most common shade according to customer reviews is white and blue, but other tones look no less impressive.
Types of inserts
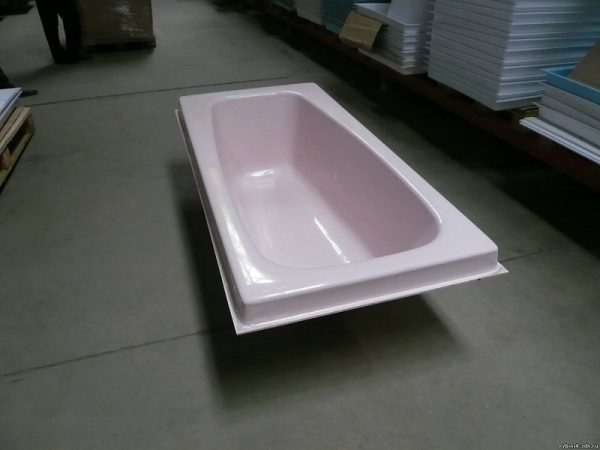
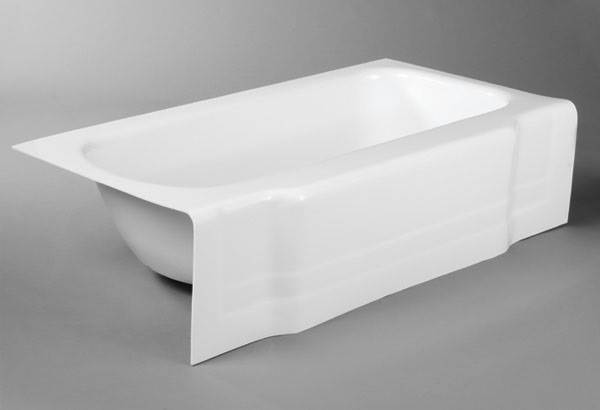
Acrylic bath liner is a finished product. It is cast in bowls of standard, typical bowls. Measurements are taken mainly from cast-iron Soviet models. It was they who managed to lose their external gloss.
The quality of cast iron of the past era is on top. The owners of rare baths do not always want to part with them, wanting only to ennoble. They also stop at the liner because of the economy. Updating the inner bowl costs about 5-6 thousand rubles.
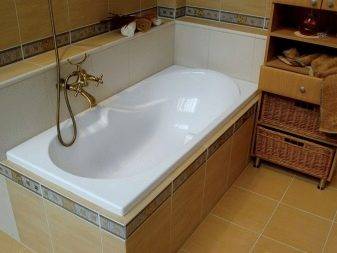
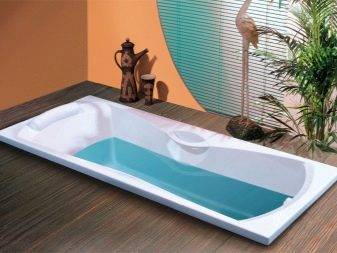
Since the liners are already made, and in accordance with typical bathrooms, it is difficult to find an insert for a custom-shaped bowl. Usually, only rectangular models with the same inner surface or rounded ones are implemented.
Bath insert with screen
In addition to the shape, the acrylic bath liner conforms to certain dimensions. They are also typical. The company selects the most suitable of the available inserts. If it does not lie down perfectly, problems are possible, such as cracking, bruising, and the acrylic layer moving away from the main bowl.
"Acrylic layer" is a concept as relative as "acrylic" itself. Inserts can:
- Consist entirely of acrylic, or contain only 5% polymer. The latest standard is relevant for ABS + PMMA boards. The first abbreviation is the designation of simple plastic. PMMA is actually an acrylic layer. It is extruded, that is, squeezed out, simultaneously with the base.
- Acrylic only. Such liners are called cast, they are rare, because they are expensive. On the other hand, a full-fledged acrylic insert does not exfoliate, it is more reliable than ABS + PMMA. Reinforced models are especially high quality. Inside they are lined with mesh. Its threads serve as structural stiffeners. A similar technique is used in first-class acrylic baths.
Molded liners, unlike extruded ABS + PMMA, are formed from a heated, softened polymer sheet in a mold. Not only the structure of the liner is important, but also its thickness. The larger it is, the more difficult it is to damage the product.
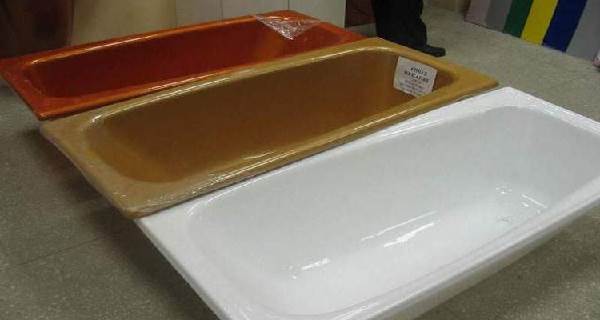
Colored bath liners
Inserts with a width of 5-7 millimeters are considered reliable. Often, the proposed acrylic liner for the bathroom is only 23 millimeters thick. So manufacturers reduce their costs, increasing profits. Buyers are not always versed in the nuances of the quality of the inserts, they "rely" on advertising and an attractive product.
How to choose an acrylic liner, what to look for
The cost of acrylic liners, although much lower than new plumbing, is not enough to buy them several times, in case the chosen model does not fit
Therefore, first of all, it is important to correctly take measurements from an already installed bath. And even if it is a standard size, reinsurance will not be superfluous
To select an insert, you need 5 basic measurements.
To accurately select the insert, you need to take 5 measurements
- full bath length. The measurement is taken along the outer edge of the bathtub.
- Internal length. Determine the maximum length of the bath bowl, excluding the width of the sides.
- Inner width at the drain. Determine the width of the bowl directly above the drain by measuring the distance between the side walls, without taking into account their width.
- Inner width at the back. Find the place of maximum expansion of the bowl from the back of the bathroom and measure its width, excluding the sides.
- Bath depth. The metering is determined in the area of the drain. For a more accurate result, it is recommended to put a flat straight board or rail across the bathtub on its sides and measure from it strictly perpendicular to the drain.
The bath can be straight (the width at the drain corresponds to the maximum width of the bath) or ellipsoidal (the width above the drain is less than at the back). According to the available measurements, the seller consultant will be able to offer a suitable option. In cases where such a model is not currently available, as a rule, it is brought to order. It happens that the plumbing does not meet standard dimensions, then the acrylic liner cannot be installed in the bathroom, as is the case if the plumbing is bricked or a finishing material that is not planned to be removed.


When choosing a manufacturer, you should pay attention to the quality of finished products. Inexpensive liners, for example, made in China, often have a thickness of no more than 2 mm and after installation, swelling and cracks are guaranteed
While more expensive certified products are not only durable, but also hygienic. The optimal thickness for acrylic liners should be in the range of 5-6 mm.Only then can we talk about the strength, reliability of the design and long service life.
Some manufacturers offer inserts in several color options, usually there are four of them: blue, green, pink and traditional white.
Helpful Tips
Experts assure that a lot depends on a competent and correct choice. The durability of an acrylic liner is 70 percent dependent on its quality and only 30 percent on installation and maintenance. However, an illiterate installation can lead to additional costs for repairing the coating. If a crack forms somewhere during installation, water will accumulate under the liner. This will lead to mold growth and a foul odor. In this case, the restoration of acrylic is necessary. If everything is done on time, then its service life can be extended.

Acrylic material is afraid of fire, it melts. If you put candles on the sides, then hot wax can burn a hole, so it's better not to experiment. For the same reason, in no case should you pour boiling water into an acrylic bath. If the bathroom is to be renovated, it is better to cover the surface with a soft cloth first so that the tile fragments do not damage the coating. To restore the original shine of the acrylic surface, it should be rubbed with toothpaste.
If the acrylic insert is completely damaged or needs repair, then you can remove it, but this will require some effort.
It is done like this:
- First, remove the siphon.
- Then cut the insert with a grinder will and across very carefully. Making an incision, gradually drain the water if it has accumulated between the surfaces.
- Next, remove the cut pieces of the acrylic layer.
- If there was water between the tub and the tab, then the mounting foam was saturated with rotten liquid. It needs to be cleaned up. In order to remove it from the surface of the bath, use a spatula. After cleaning with sandpaper.

- This is followed by garbage collection, wet cleaning and drying.
- Before the next stage of restoration, the surface is degreased.
- Next, you can insert a new tab or apply liquid acrylic in an even layer.
If there are doubts about the choice, experts advise to pay attention to the following arguments before choosing between purchase new bathtub and liner. Modern cast-iron bathtubs differ from products of the Soviet period in lower enamel quality. In order for the coating to be durable, it is necessary to choose expensive models, the price of which starts from 15 thousand rubles.
In order for the coating to be durable, it is necessary to choose expensive models, the price of which starts from 15 thousand rubles.
Modern cast-iron bathtubs differ from products of the Soviet period in lower enamel quality. In order for the coating to be durable, it is necessary to choose expensive models, the price of which starts from 15 thousand rubles.
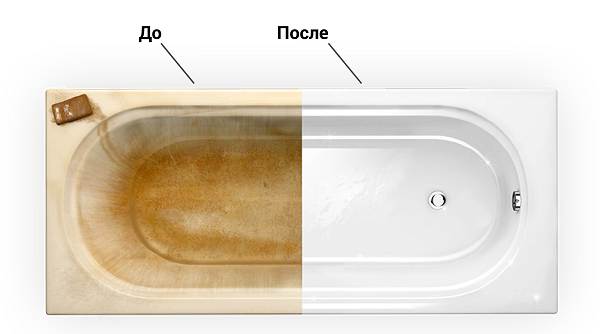
- Even expensive models with an enamel coating are difficult to wash off yellowness and rust.
- An acrylic insert is on average three times cheaper than a bathtub.
- Even if after a certain time something happened and the liner was damaged, it is easy to dismantle it and install a new one or restore it using liquid acrylic.
How to install acrylic liners in the bath, see the following video.


