- Features and characteristics of the acrylic liner
- Benefits of bath-in-bath technology
- Preparing for installation
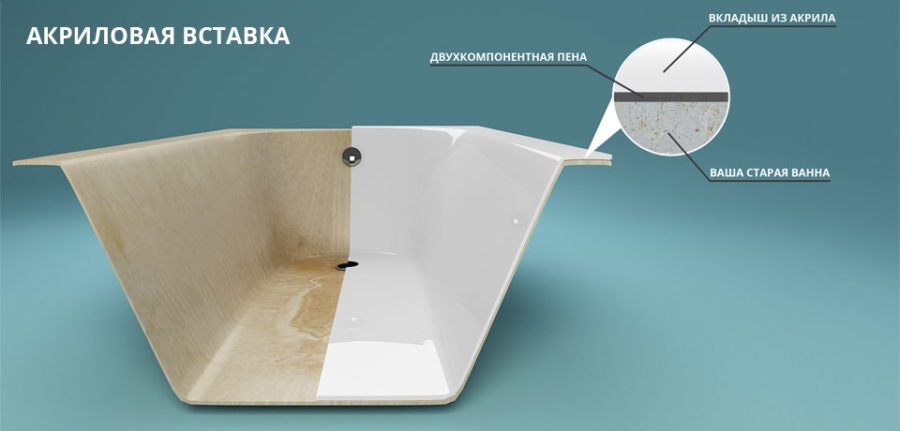
- Acrylic tub insert
- pros
- Mounting the acrylic liner
- Installation technology of the acrylic liner in the bath
- Installation steps
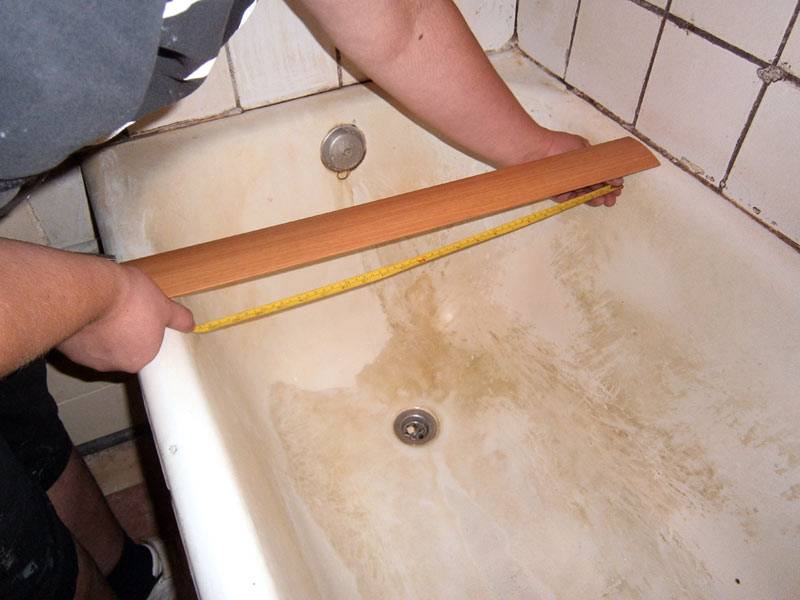
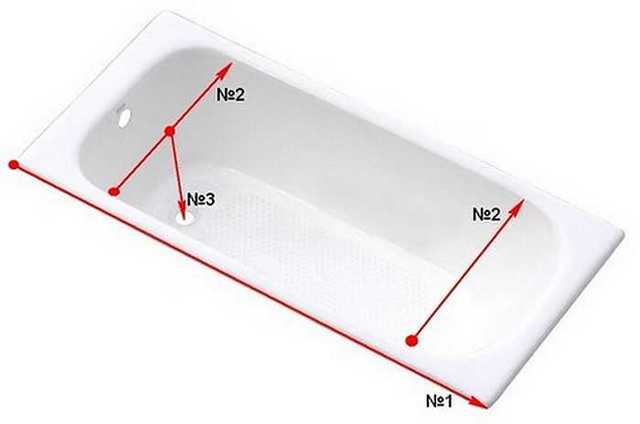
- Measurement
- Bath preparation
- Product fit
- Installing the liner
- Acrylic liner
- Advantages of acrylic construction
- Disadvantages of acrylic coating
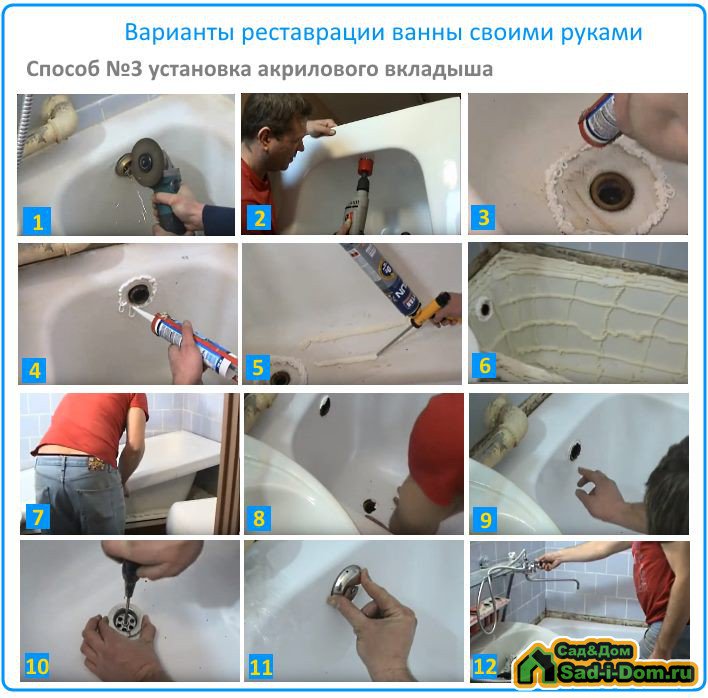
- How to install acrylic liner yourself
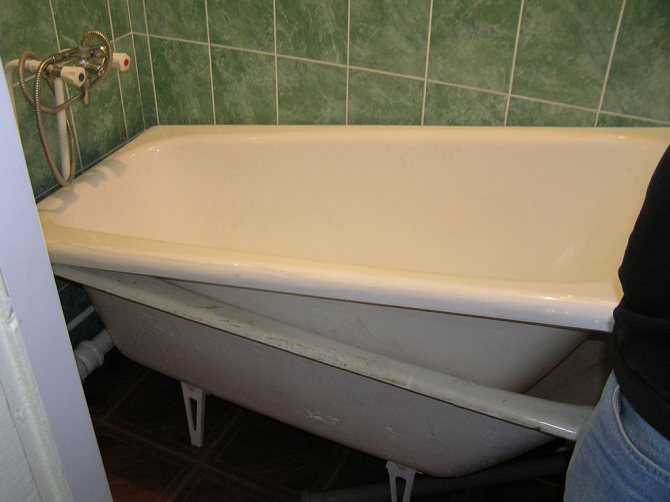
- An old bathtub in need of restoration should be prepared according to the following scheme:
- Insert Installation Diagram
- Step-by-step instructions on how to install an acrylic liner
- Installing the liner
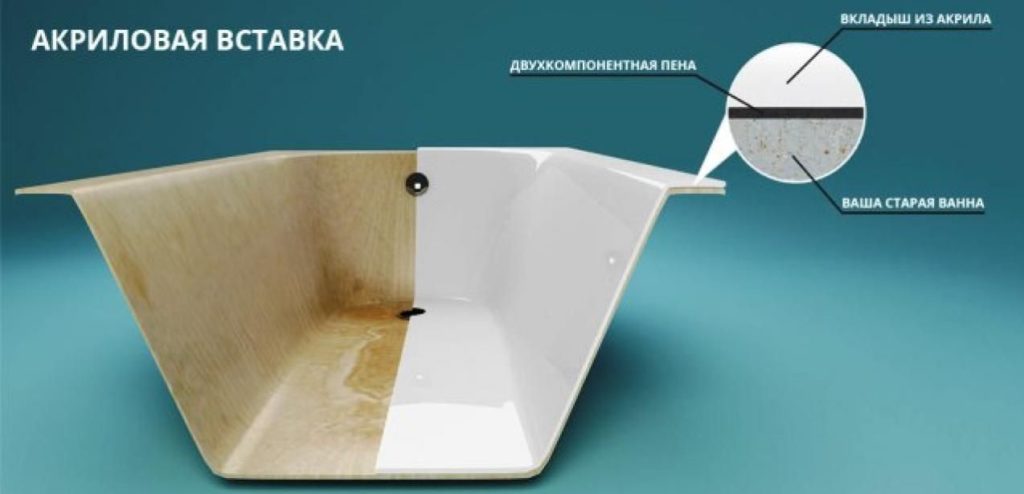
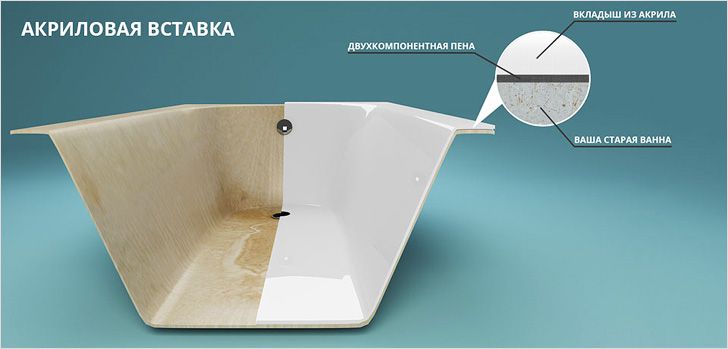
Features and characteristics of the acrylic liner
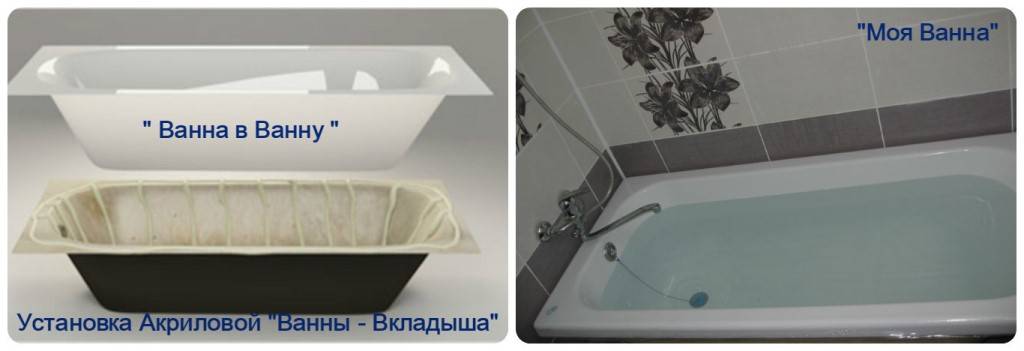
The technology for restoring plumbing using an acrylic liner has been known for a very long time. A primitive method in which a bath is inserted into the bath, and they are fastened together with a special adhesive type composition. Such an insert in the bath completely repeats the shape of the original being repaired due to the properties of the material used for manufacturing. After the plumbing is repaired and installed, it will be possible to say about its new positive properties:
- Due to the fact that the glossy surface of the insert in the bath has no pores, the surface remains clean and does not require thorough cleaning using additional products with an aggressive chemical composition;
- The ability to perceive small deformations and therefore it becomes possible to install in steel baths that sag under pressure;
- The possibility of using various detergents with any composition without damaging the bathroom.
Acrylic liners, like any other product, can have their pros and cons. And if everything is clear with the advantages, then there are no shortcomings yet. Consider the most obvious shortcomings of the material:
- The layer of the lining on the bathtub is quite thin, so sooner or later in the process of abrasion, the lower layer of the product will become noticeable, which, despite the same white color, is noticeable;
- A poor-quality acrylic overlay may soon lose its glossy sheen, so when purchasing, you should give preference only to trusted manufacturers, since it is impossible to visually determine the quality of the material.
Benefits of bath-in-bath technology
Relatively recently, we became aware of the technology for the restoration of bathtubs by this method. Surprisingly, she became very popular. And here are the reasons:
- Installation of an acrylic insert is carried out very quickly. Literally three hours after the start of work, you will be able to see the updated bath. And in a day you will be able to use it for its intended purpose.
- All work is carried out without the involvement of qualified specialists. If you decide to update the bath by enamelling, then it is more difficult to achieve a positive result.
Let's figure out how to choose an acrylic liner.
Preparing for installation
Of course, before installing the acrylic liner yourself, you will have to carry out a number of relevant preparatory work. It will take you no more than an hour, but if you do everything right, you will be amazed at the end result.
So, in what order will you need to work:
- First of all, you will have to remove the ceramic tiles adjacent to the old bath, as well as plastic or ceramic borders. This is necessary because you will need free access to the edges of the bathtub around the perimeter.
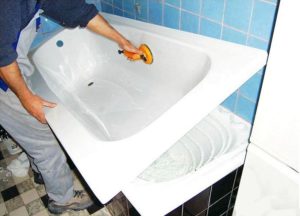
- After that, proceed to the elimination (cleaning) of the old enamel. To do this, you will need coarse sandpaper, which you can attach to a plastic or wooden holder for your convenience. This is necessary in order to get better adhesion (cohesion) to the surface of the bath, and if you leave a shiny enamel, you may not get the same result.
- After carefully working the entire inner surface of the cast-iron bath so that you do not have any unfinished areas, clean the bath well from dust, dirt and splinters that will result from this operation. And only after putting the bath in order, you can proceed to dismantle the siphon.
Now you can start installing the acrylic liner in the cast iron bath.
The most expensive way to repair a bath - liner
Acrylic tub insert
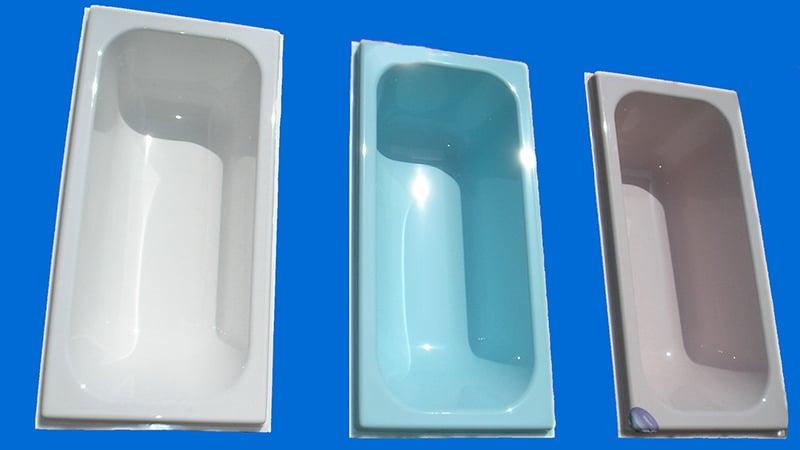
Of the several effective ways to restore an old cast iron or steel tub, one of the most reliable is an acrylic liner. This is a factory-made copy of the bathtub. Slightly smaller than the original, the size of such a copy allows you to accurately install it inside the bath.The result is an almost new bath in the old building.
Here is what this technology is:
- measurements specify the actual size of a standard problem bath;
- from the arsenal of ready-made liners, the desired copy is selected, not only in size, but also in color;
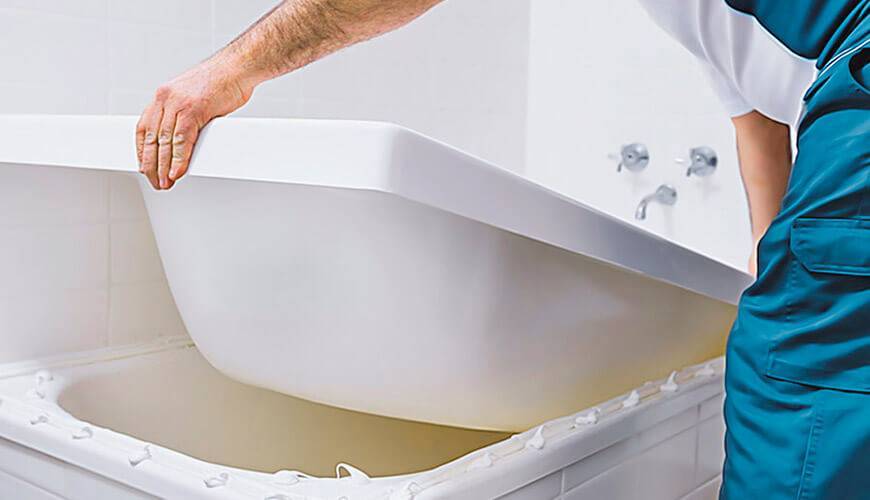
- the liner delivered to the place (it is much lighter than any bathtub) is cut, if necessary, in place, and the internal surfaces of the old bathtub are cleaned mechanically.
- the liner is mounted on an adhesive heat-insulating mounting foam;
- the previously disconnected sewer siphon is restored.
After 12 hours of hardening of the mounting foam, the bathroom can be used to its full potential.
pros
So what do we have? Installing an acrylic liner gives us a combined bath! Cast iron plus acrylic. This means the positive properties of both materials, which will complement and reinforce each other.
- Thermal insulation. You will reduce the heat loss of water when taking a bath. This means that the water will hold its temperature much longer. You will not need to constantly add hot water. And that's cost savings.
- Hygiene. Acrylic cannot grow fungus. Due to the porous structure of the cast-iron bath, traces of fungus, rust and dirt appear on it over time. But by inserting an acrylic liner, you will get a smooth surface that will prevent this.
- Ease of maintenance. Acrylic liners are easy to clean. Acrylic is said to repel dirt on its own. Using mild, non-aggressive chemicals and a regular sponge will clean the acrylic liner much faster than the cast iron tub you had before.
- Increased sound insulation. The cast iron bath makes noise when filling with water or when taking a shower.Acrylic inlay noticeably reduces such noises.
- Strength. Acrylic is able to withstand slight plastic deformation. If you need to install an acrylic liner in a steel bathtub, which can sag a little, then this property of acrylic is indispensable. As a result, such an insert will increase the anti-shock properties of the bath.
- Long service life. With proper installation and careful care, the acrylic insert will last 10-20 years (this is a guarantee from the manufacturer).
- Ability to change color. Acrylic liners for the bathroom can be not only white. You can choose a different color.
- Inexpensive. By installing the liner, you will renew the bowl 2-3 times cheaper than when buying a new bath. Here it is necessary to take into account, in addition to the cost of the bath itself, also the cost of plumbing and installation and dismantling. But we'll talk about this a little later.
The first two points can be solved simply - to find well-established manufacturers. Their list will be at the end of the article. We can accomplish the third point by entrusting the matter to a professional, and not trying to do everything ourselves and save a little more. Of course, you should know the installation technology, but we advise you to entrust the installation itself to someone who has extensive experience.


Mounting the acrylic liner
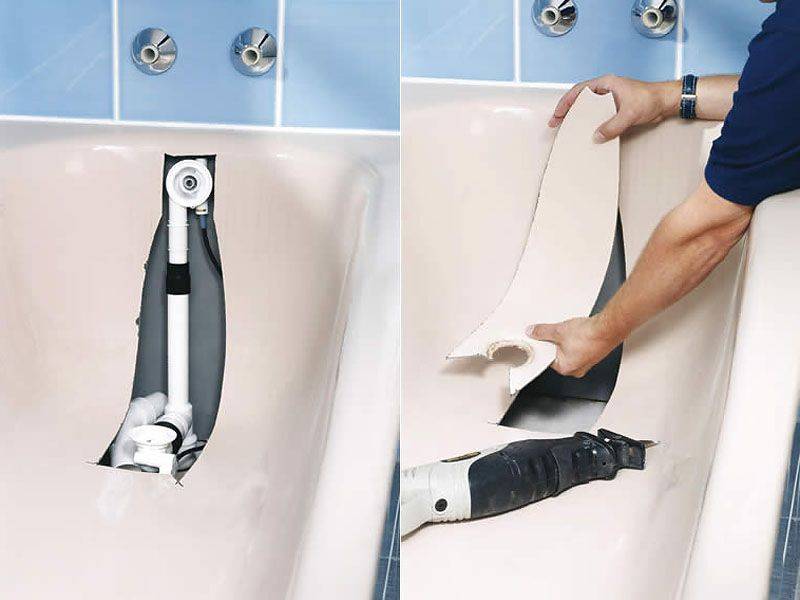
After preparing the surface, proceed to the installation work. The first step is marking and trimming the insert. To do this, the acrylic liner is placed in the bathroom, the line of the edges of the sides is marked with a marker, the place drain and overflow installations. The insert is cut along the perimeter with an electric jigsaw, and technological holes are cut out with a special “crown” nozzle.
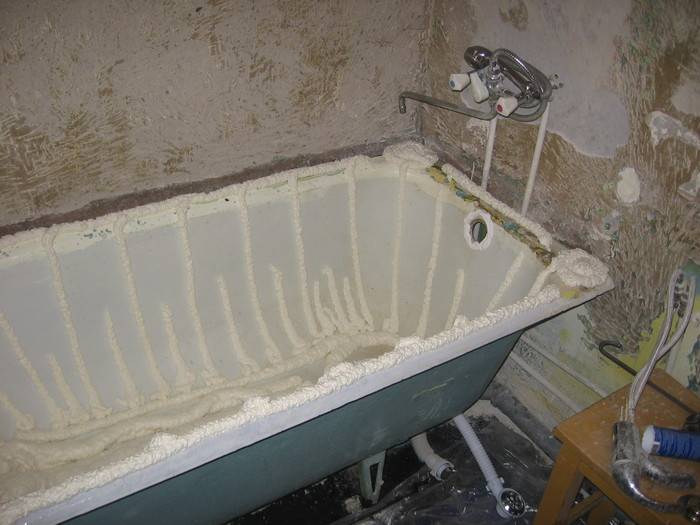
After the liner is ready for installation, silicone or sealant is applied to the surface of the old bath around the technical holes. The entire inner surface of the bathtub is covered with non-expanding polyurethane foam. The thickness of its layer depends on how the acrylic liner matches the size of the old bowl. The foam is applied in strips at a distance of 5-10 cm.
We apply foam every 10 cm. Install a siphon
First along the bottom of the bath, then on the sides, slightly wrapping the line towards the back of the bath along the side. The foam is also applied to the side of the tub around the perimeter. All parallel lines on the sides and bottom of the bowl are complemented by perpendicular ones, drawing a kind of grid with foam
When it is ready, the liner is carefully installed and pressed down to ensure a tighter fit to the surface along the entire length, special attention is paid to the bottom. Excess silicone that came out of the drain-overflow hole is removed
Install decorative grilles on technological openings. After the installation is completed, the bath is filled with water and left for several hours.
Important! Do not underestimate the complexity of installing a drain and overflow. So, for example, if you overtighten the tightening bolt, the acrylic liner may crack if it is not tightened well enough - water will accumulate in the layer between the old and new coating .. Perform installation of plastic curbscovering the seam between the new insert and the adjoining wall, making the connection absolutely airtight
The border or plinth is installed on a special adhesive or silicone. All seams are treated with moisture resistant sealant. Within 5-6 hours after installation, the bathroom can be used
Perform the installation of plastic borders that close the seam between the new insert and the adjacent wall, which makes the connection absolutely tight. The border or plinth is installed on a special adhesive or silicone. All seams are treated with moisture resistant sealant. Within 5-6 hours after installation, the bathroom can be used.
Installation technology of the acrylic liner in the bath
For better installation work, it is desirable to perform all operations in strict sequence:
- Acrylic fitting is done in order to obtain an insert that is most suitable in shape to the restored bathtub. This procedure is done as follows. First, the liner is sunk into the bath cavity (with pressure) and the outline is marked with a pencil. Then the liner is removed and the excess material is removed according to the outlines obtained. Of course, it is necessary to cut the acrylic quite carefully so as not to damage it, therefore it is recommended in this case to use an electric jigsaw with a metal saw (or fine teeth), or a grinder with a cutting wheel.
- The marking of the locations of the drain and overflow holes is carried out in order to be able to exactly match the indicated points. This procedure is usually done by applying any coloring matter to the drain sites. After installing the insert in a predetermined position, a kind of imprint is obtained on its reverse side, just indicating the location of the holes.
- Drainage holes are drilled using a special crown with a diameter of 54 mm.
- The liner is removed and preparations are made for its installation.Why the sealant with a special gun is applied with a ring (roller with a diameter of 2 - 3 cm) around the drain holes on the bath itself, as well as around the entire perimeter of its upper edge. Whereas a special foam is applied on the reverse side of the liner in such a way that its thickness allows compensating for the voids that form between the acrylic liner and the base of the bath itself. That is why experts recommend using a special foam with a low coefficient of expansion and applying it in a continuous layer.
- The design is assembled by laying the liner in the bathroom, followed by pressing.
- For high-quality fixation around the perimeter, it is recommended to press the liner with clamps (do not forget to put gaskets) and immediately install the siphon, thereby ensuring the best fixation of the liner in the locations of the drain and overflow holes. Next, the drain is clogged with a cork and the bathtub is filled with water by 50 - 60%, which ensures a reliable pressing of the liner to the base base of the bathtub.
After 24 hours, the water from the bath can be removed and, by connecting the device to the sewer networks, begin its operation.
From all of the above, we can conclude that the method of how to install an acrylic liner in a bath is not so complicated, which is why it can be implemented independently. This can be confirmed by a video about the restoration of the bath.
Read more:
If you liked the material, I will be grateful if you recommend it to friends or leave a useful comment.
Installation steps
How to glue the acrylic liner in the bath! Consider the procedure for the production of installation work:
Measurement
To select the liner, it is necessary to measure the dimensions of the restored bathtub.
Having measured the length, width and height of the old bathtub, based on the obtained dimensions, we select an acrylic product.
Bath preparation
- To prepare the bath, you need free access to the perimeter of the entire bath. If there is no such access, then a decision must be made: either gain access or cut the liner.
- Cleaning up old enamel. Cleaning is done mechanically using coarse-grained sandpaper, using a tool or manually. High-quality grinding of enamel guarantees good adhesion, since glossy enamel does not provide good adhesion when gluing. It is unacceptable to leave uncleaned areas in the bathroom.
- After cleaning, the bath must be washed.
- The next step is to dismantle the siphon.
Product fit
- Having laid the liner in the bathroom with a marker, we mark the drain and overflow holes, protruding parts beyond the dimensions.
- After pulling out the tab, the excess acrylic is cut off around the perimeter, if the configuration does not match, build up with the help of a dense reinforcing mesh and special glue, the place of the mismatch of the geometric configuration to the maximum approximate. Once dry, move on to the next step.
- Using a drill with a special crown, according to the marking, drain and overflow holes are cut out.
Installing the liner
The essence of the installation of the liner is the principle of fixing inside the old plumbing fixture. To perform this stage, it is necessary to use high-quality materials intended for these purposes.


The foam must have a good density after hardening, so ordinary polyurethane foam is not suitable for this purpose.
The sealant must have the following qualities: it must be resistant to mold, waterproof and have good adhesion.
Ideally, it is better to replace the mounting foam with silicone. But this will lead to an increase in the cost of restoration.
- A sealant is applied around the perimeter of the bath. Careful application of the sealant ensures a tighter contact between the bath and the acrylic.
- For tightness and to eliminate leaks through the drain holes, we apply sealant around the perimeter of the holes, first determining the layer thickness.
- The next step is to cover the entire surface with adhesive foam. The foam should be applied without gaps and gaps, respecting the layer thickness, trying to accurately repeat the configuration of the structure.
- After application, the insert itself is installed. When installing, it is necessary to press it as tightly as possible to the walls of the bath. For this purpose, use clamps and boards.
- Immediately after installing the liner, the siphon is mounted. This allows the most reliable sealing of overflow points.
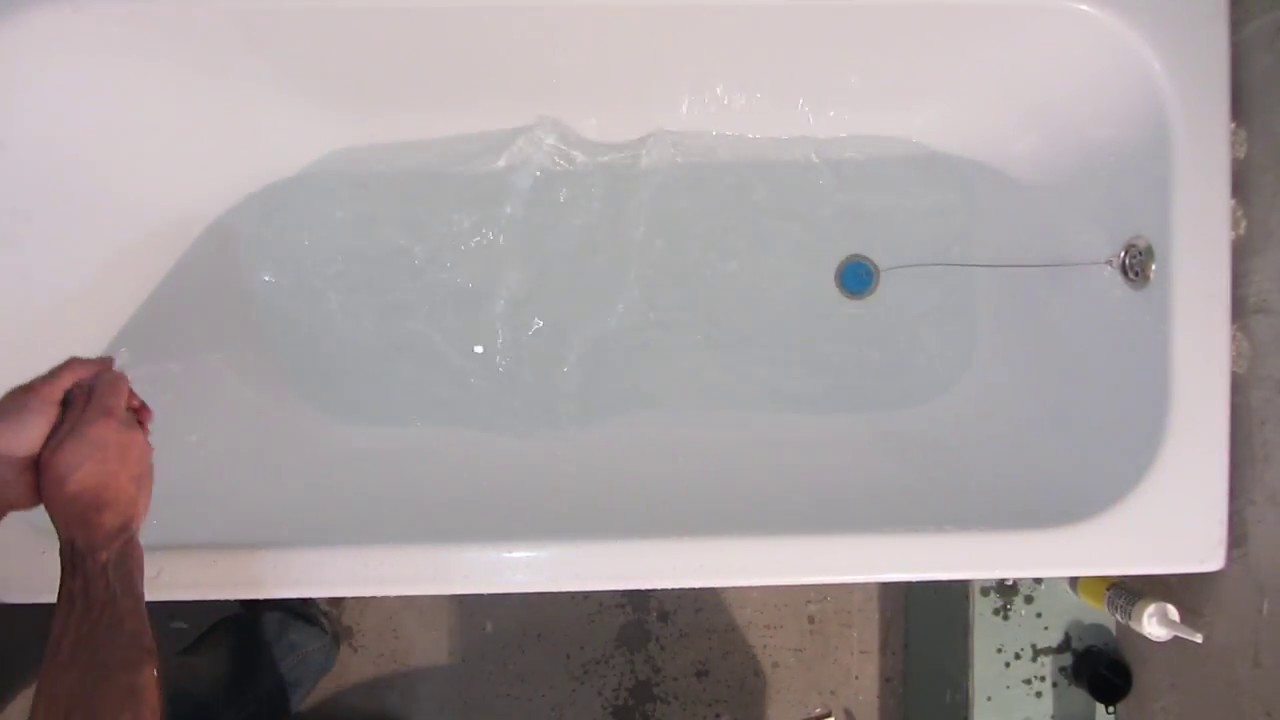
- Having completed these stages, the final step is to close the drain hole with a plug and draw water into the bath. The water level should be 2-3 cm below the edge of the overflow hole. Cold water performs 2 functions:
- It is a load, provides reliable pressure on the insertion plane.
- Catalyst for foam polymerization and liner fixation.
The bath with water should stand for at least 24 hours, and only after that it can be used in the usual way.
| Measure the length, width and depth of your old tub to find the right acrylic liner. | Provide maximum access to the bath, if necessary, remove the old faucet and other accessories |
| To replace the old siphon, you may have to cut out part of the old bath | Cut off the excess pieces of the acrylic liner |
| Sand the edges of the acrylic liner | Two-component foam or special mastic to replace the acrylic liner |
| Insert the liner and fill the tub with water | Applying sealant to stop leaks around the perimeter of the bathtub and near the drain holes |
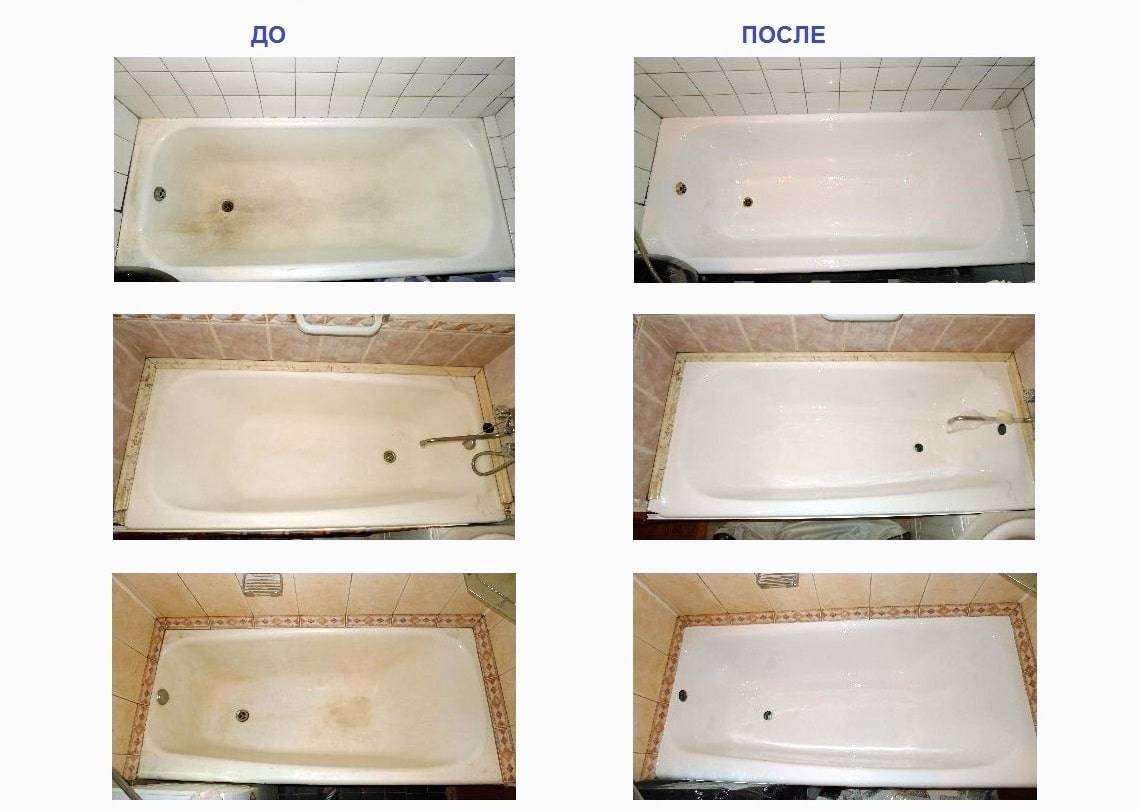
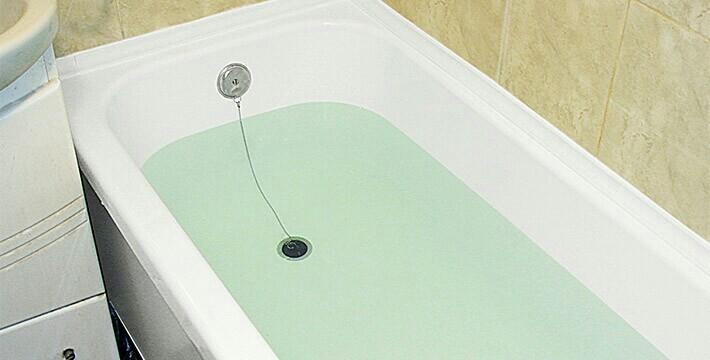
After installing the acrylic liner, about 3 hours later, a finished new bath
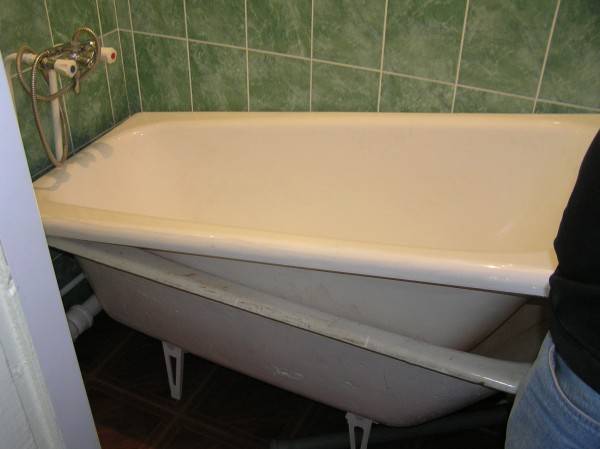
Acrylic liner
An acrylic bathtub without legs is an insert in the bathtub, which helps to carry out restoration work on a steel or cast-iron bathtub, the surface and appearance of which, due to long-term use, has lost its appearance.
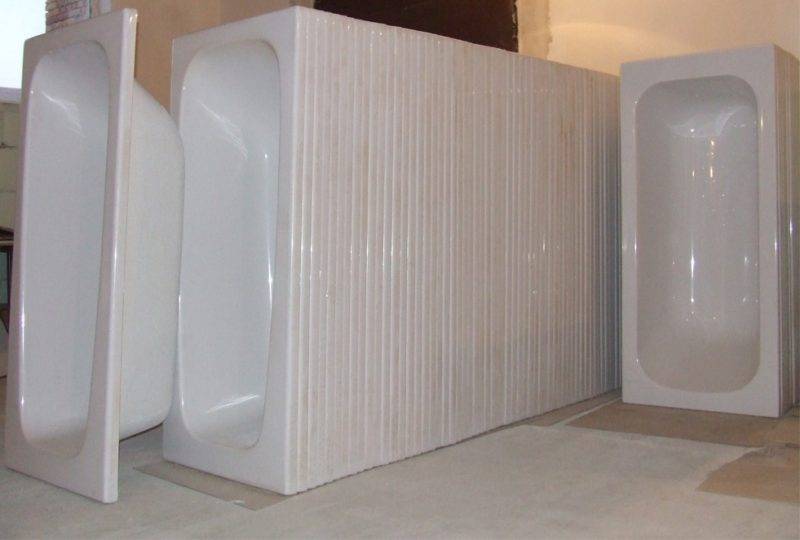
Acrylic liners are a ready-made design and are made from certified material that meets all the requirements and standards for the production of sanitary ware.
The leader in the manufacture of such acrylic materials is the Senoplast company from Austria.
The acrylic surface has antibacterial properties.
To give rigidity and strength, the manufacturer covers the outer part of the acrylic structure with special fiberglass in three layers.
This acrylic product is available in various sizes, which allows you to make a high-quality, as close as possible selection of the liner to the dimensions of the restored bathtub.
Advantages of acrylic construction
- Strength.
- Durability.
- Low thermal conductivity.
- Environmentally friendly material.
- Rust resistant.
- Lack of yellowness from a temporary factor.
- Ease of maintenance.
- Possibility of easy replacement.
- Good soundproofing.
- Ease of installation.
- Acceptable cost.
Disadvantages of acrylic coating
- The thickness of the liner is less than the acrylic bath.
- The need for a solid foundation.
- Lack of individual production of liners.
How to install acrylic liner yourself
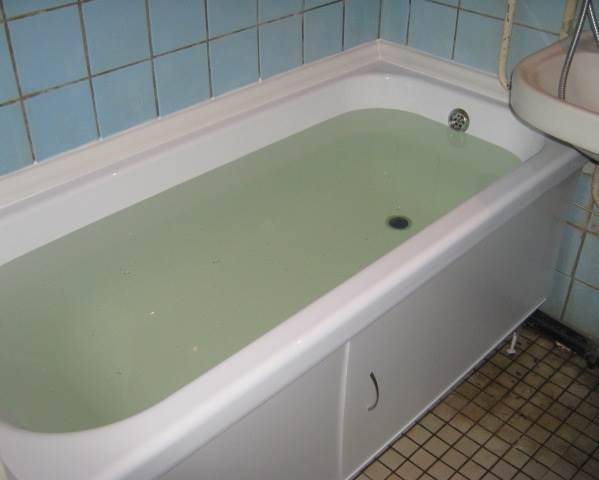
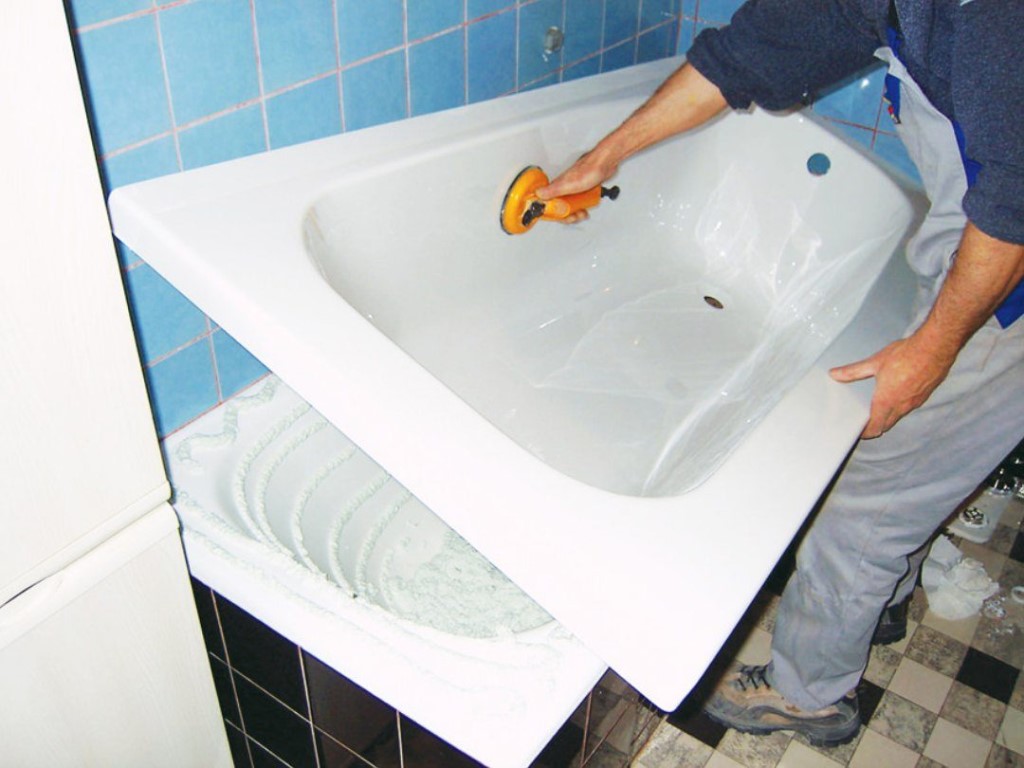
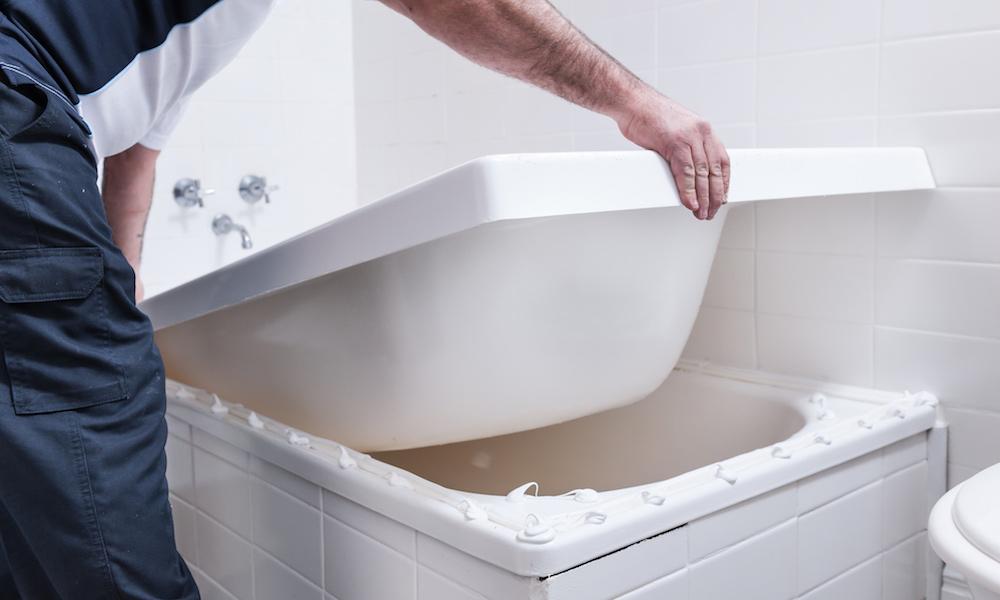
 Photo 4. Installing an acrylic bath liner.
Installing an acrylic liner in a bathtub is quite simple, but the procedure requires preliminary preparation of plumbing equipment. As a rule, it does not take more than an hour, but the final result depends on the quality of its implementation.
An old bathtub in need of restoration should be prepared according to the following scheme:
- we dismantle the plastic panels or tiles adjacent to the equipment. This operation is needed to gain access to the edges of the bowl around the entire perimeter;
- we clean the old enamel with a coarse-grained emery cloth, it can be fixed on a special holder made of plastic or wood. This is necessary to create a rough surface in order to increase its adhesive properties;
- after careful processing with sandpaper, we proceed to washing the bowl. We try to remove everything, even the smallest fragments, dust and dirt resulting from the previous operation;
- we dismantle the siphon and overflow, if a mixer was installed on the bathroom, we also remove it (by the way, a great reason to replace the old faulty mixer with new equipment).
Insert Installation Diagram
Professional bath renovators pay special attention to fitting the new bowl to the old bathtub. To do this, the insert is inserted into the equipment bowl, outlined around the perimeter with a pencil, then removed
After that, the excess plastic is cut off with a jigsaw.
Inserts for the purpose of unification are produced without drain holes, so they will have to be made independently.To do this, in old equipment, the overflow and drain holes are well rubbed with a simple pencil. The insert is then applied and strongly pressed against the drain points to take impressions. The liner is removed, holes of the corresponding diameters are drilled along the marks.


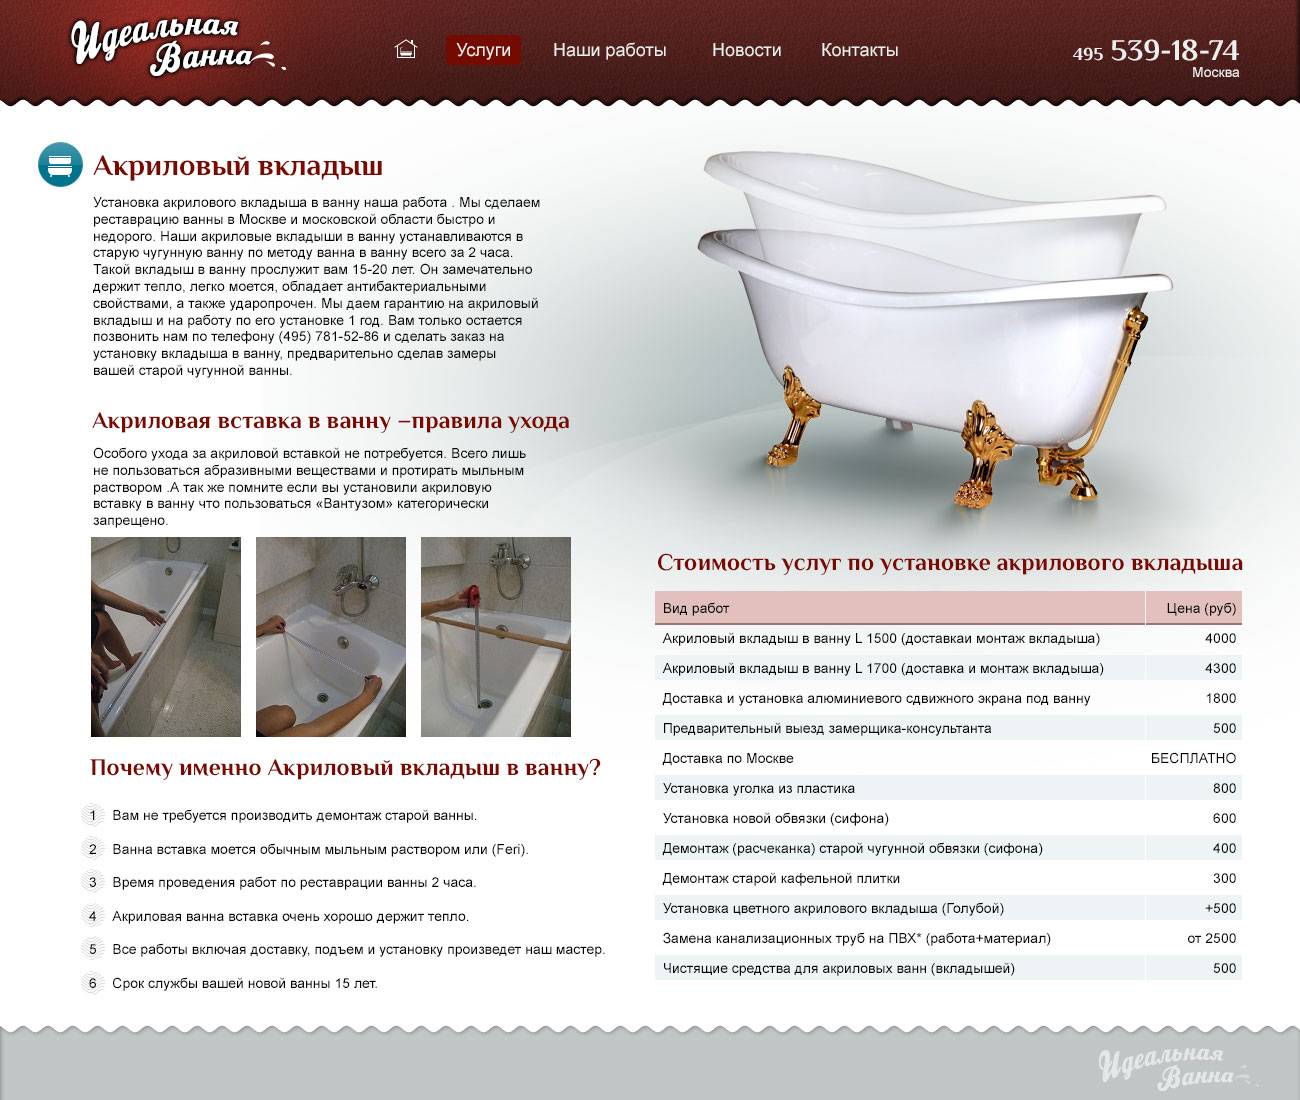

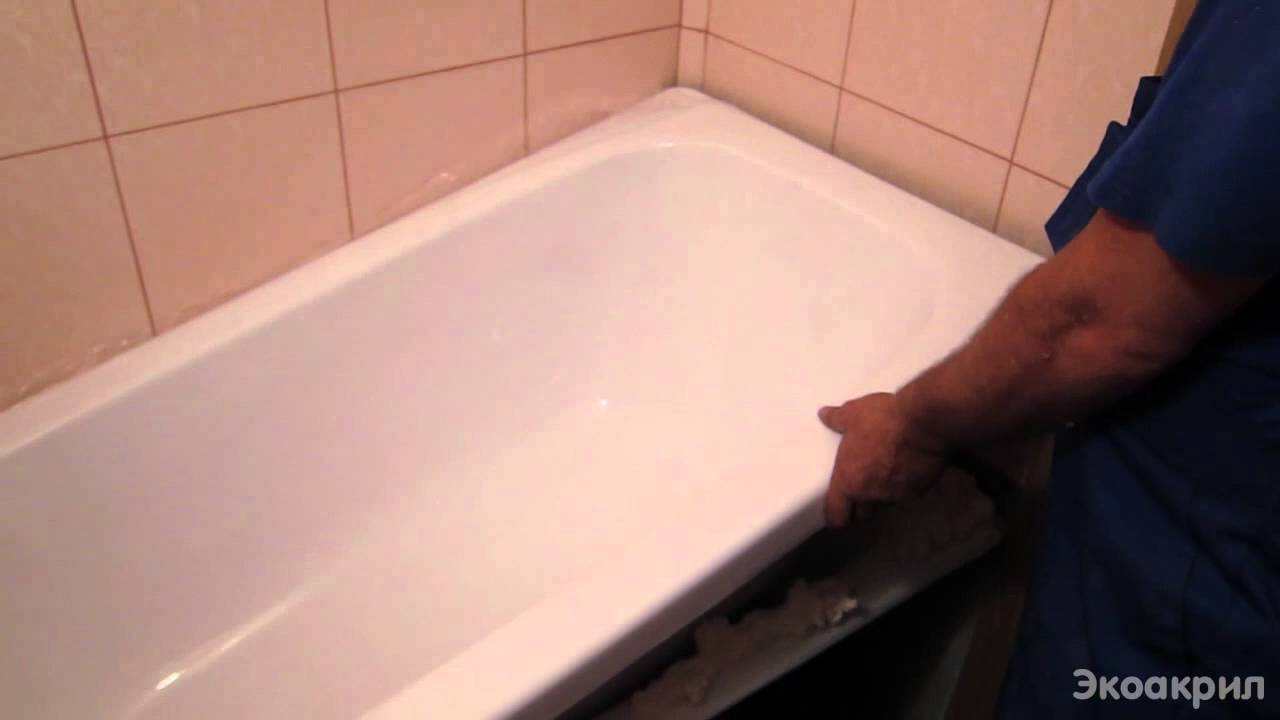

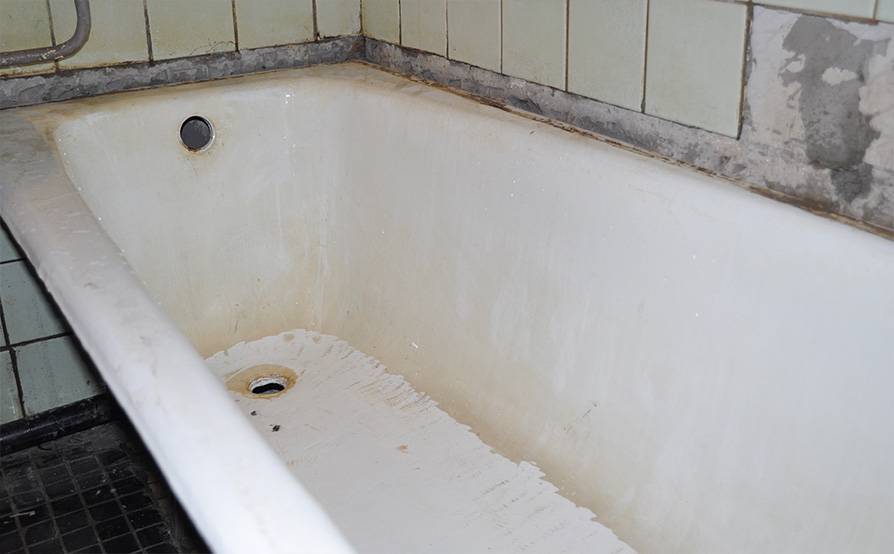
 Photo 5. Bath after restoration using an acrylic insert.
Now the fitted liner can be installed and fixed. For this:
we apply sealant or two-component foam (it does not expand) around the perimeter of the overflow and drain holes to eliminate the possibility of leaks;
then we cover the inner surface of the bowl of the old equipment with two-component foam
Important! Apply the foam without breaks, in continuous lines and without voids. Otherwise, under the weight of water and your body in such places, the liner will begin to sag, which may lead to premature wear of the product.
The volume of foam (layer thickness) directly depends on the accuracy of the configuration of the acrylic insert;
after the foam has been applied, you can proceed to the direct insertion of the liner into place. We press it as tightly as possible to the bath;
we fix the installed product around the perimeter with clamps, having previously placed wooden slats or boards under the pressure levers;
we mount the mixer in place;
without waiting for the foam to dry, we install a drain for the bath, after which we close the drain hole with a cork, open the tap and draw water to the overflow drain. Water in this case acts as a uniform load, which will ensure a strong fixation of the insert to the base.
In this state, the bath should be kept for about 24 hours, only after that it can be used in the usual way.
Step-by-step instructions on how to install an acrylic liner
The installation process and technology is not so complicated if you understand the details and study the stages of work. As in the previous methods, here you also need to start with the preparation of the base, the only difference is that it is not necessary to remove the old enamel. Let's take a closer look at all the stages of work:
- The first step is to dismantle the lower drain and the upper overflow. Chip the tile backsplash from the sides of the bath, if any. Clear all coarse debris.
- Next, we make a freeze. To do this, we insert an acrylic liner into the old bathtub, measure it, cut openings for drains and overflows, preferably with a drill with a nozzle (54 mm in diameter.). After that, with a grinder or a jigsaw, the excess technological edge of the liner should be cut off. The cut points must be carefully sanded.
- The next step is to apply sealant and prepare a special foam. To do this, thoroughly wipe the bath. Apply silicone sealant around the drain holes. Sealant is also applied between the sides of the tub and the acrylic liner. We would like to clarify that during the installation process, the foam may swell and displace the liner itself, for this, before applying the foam to the bath, a special composition should be introduced into the foam can with a syringe, which will prevent the foam from swelling.
- Foaming step. After the preparatory work has been completed, we apply a two-component foam to the bath. To do this, on the surface of the bath, apply in strips from bottom to top, with an interval of 10 cm, a prepared special foam. At the very bottom of the strip with foam, you can apply more often.
- And the final stage is the installation of the liner.After the foam application is completed, carefully place the acrylic liner in the bathtub, and pressing firmly, wipe it evenly over the entire surface, especially in the area of \u200b\u200bdrain and overflow. After the laying work has been done, the drain and overflow gaskets are installed, tightening the nuts tightly. Then, water is filled into the finished restored bathtub so that under the mass of water, allow the liner to adhere tightly and firmly to the bathtub surface.
- After all the operations, the bath is left in this form with filled water for about a day. After the water is drained, the protective film layer is removed from the bath. After six hours, it will be fully usable. More clearly with the installation process, you can see the video.
Installing an acrylic liner in a bathtub video
As a result, by installing an insert in the bath, you will get a completely new bath, but the decision to buy a new bath or give a second life to the old one is up to you.
Installing the liner
Let's assume that you have chosen a product of the right size, according to the model of your bath. Now you've brought it home and you need to install it.
It is important to consider that the work must be done with high accuracy. If there are liner installers in your city, then it is better to give this work to them, because if you have no experience, you can get a negative result.
That is, after a few months, the bathroom will begin to smell bad, the top layer will peel off, mold, greenery and other imperfections will appear. Having decided for yourself that the installation of the bath liner will be carried out independently, then follow the steps listed:
1. Clean up.It all depends on the condition of the plumbing. This will usually take many hours. First of all, you need to inspect the room and understand how the plumbing is attached to the walls. Usually in the bathroom, the tile comes on top of the bath itself, which is done on purpose, in order to drain water from the walls.
Therefore, if your case is similar, you should remove the tile that is adjacent to the plumbing. It is worth considering that if you can’t carefully remove the tile, then in the future you will have to either buy it again by quadrature, or change the entire finish, because if you have an old tile, you won’t find the same collection.
Installing an acrylic liner in a bathtub
2. Remove the siphon. If during the operation the siphon dried up, stuck or stuck to the bath in some other way, then a grinder is used to dismantle it. You can always pick up a new siphon and overflow to the acrylic insert, so it’s better to replace all plumbing components along with the repair.


As for the surface itself, it should be frequented with sandpaper. After the work is completed, you should wash off the surface with water, dry everything thoroughly, degrease and only then move on.
3. Preparation. As soon as we have prepared the bath, we will have to bring the liner to the installation state. Each of them has a technical side. It is laid down by the manufacturer in order to further repel water from getting under the insert.
But, as a rule, there is not enough space for mounting an insert with a rim. Therefore, the presence of a technical side is a minus, since it will have to be cut off. Take the grinder and remove everything unnecessary by taking the appropriate measurements.
4. Marking for holes.Restoration of a bathroom with an insert includes the process of forming holes for a drain / overflow. You will need a cutter, as well as a pencil. Attach the liner itself to the bath, from the convenient side and mark it. Then make holes for the drain / overflow. For cutting, you need a crown (cutter) of the desired diameter.
5. Installation. To perform in a previously prepared bath, you will need to buy a special adhesive. It can be either an acrylic adhesive itself, or a waterproof type silicone, or a two-component foam. Many installers offer mounting on mounting foam, which should never be done.
It's cheap, but eventually the foam can lay unevenly. Somewhere it will inflate, which will lead to the formation of defects. Therefore, if you were recommended mounting on foam, discard this idea.
When using professional glue, it is important to apply it to the entire back of the acrylic.
Do not leave any dry places, because condensation will begin to form here, soon the surface will swell and become unusable
It is important, near the drain hole, also next to the overflow, apply a layer of sealant to prevent water from entering under the insert
Once you have applied the adhesive, the liner can be lowered onto the cast iron base. Smooth all sides generously, making sure there are no dry spots.
It is important to install special clamps along the sides of the bath, which will help to press the new body to the old base. When the installation is done, the surface is stuck, they begin to connect the drain and overflow into place
6. The final stage. Once you've made sure the job is done, you can start shaping the aesthetics of the room.It is necessary to re-lay the tiles, glue the ceramic border, process the joints with sealant.


To allow the adhesive to dry, fill the bathtub with clean water overnight, up to the beginning of the overflow hole. Water must be left overnight. Everything will be dry by morning. There are times when an unpleasant odor accompanies the acrylic surface. It usually clears up after a week.


